
Facebook Messenger
Cisco Webex Contact Center users who want to use Facebook Messenger as a channel of customer support with Webex Contact Center can easily connect their Facebook pages with Webex Connect by following the below steps:
Configuring your Messenger App on Webex Connect
Messenger Usage
Messenger as a channel is supported in the Canada region as well.
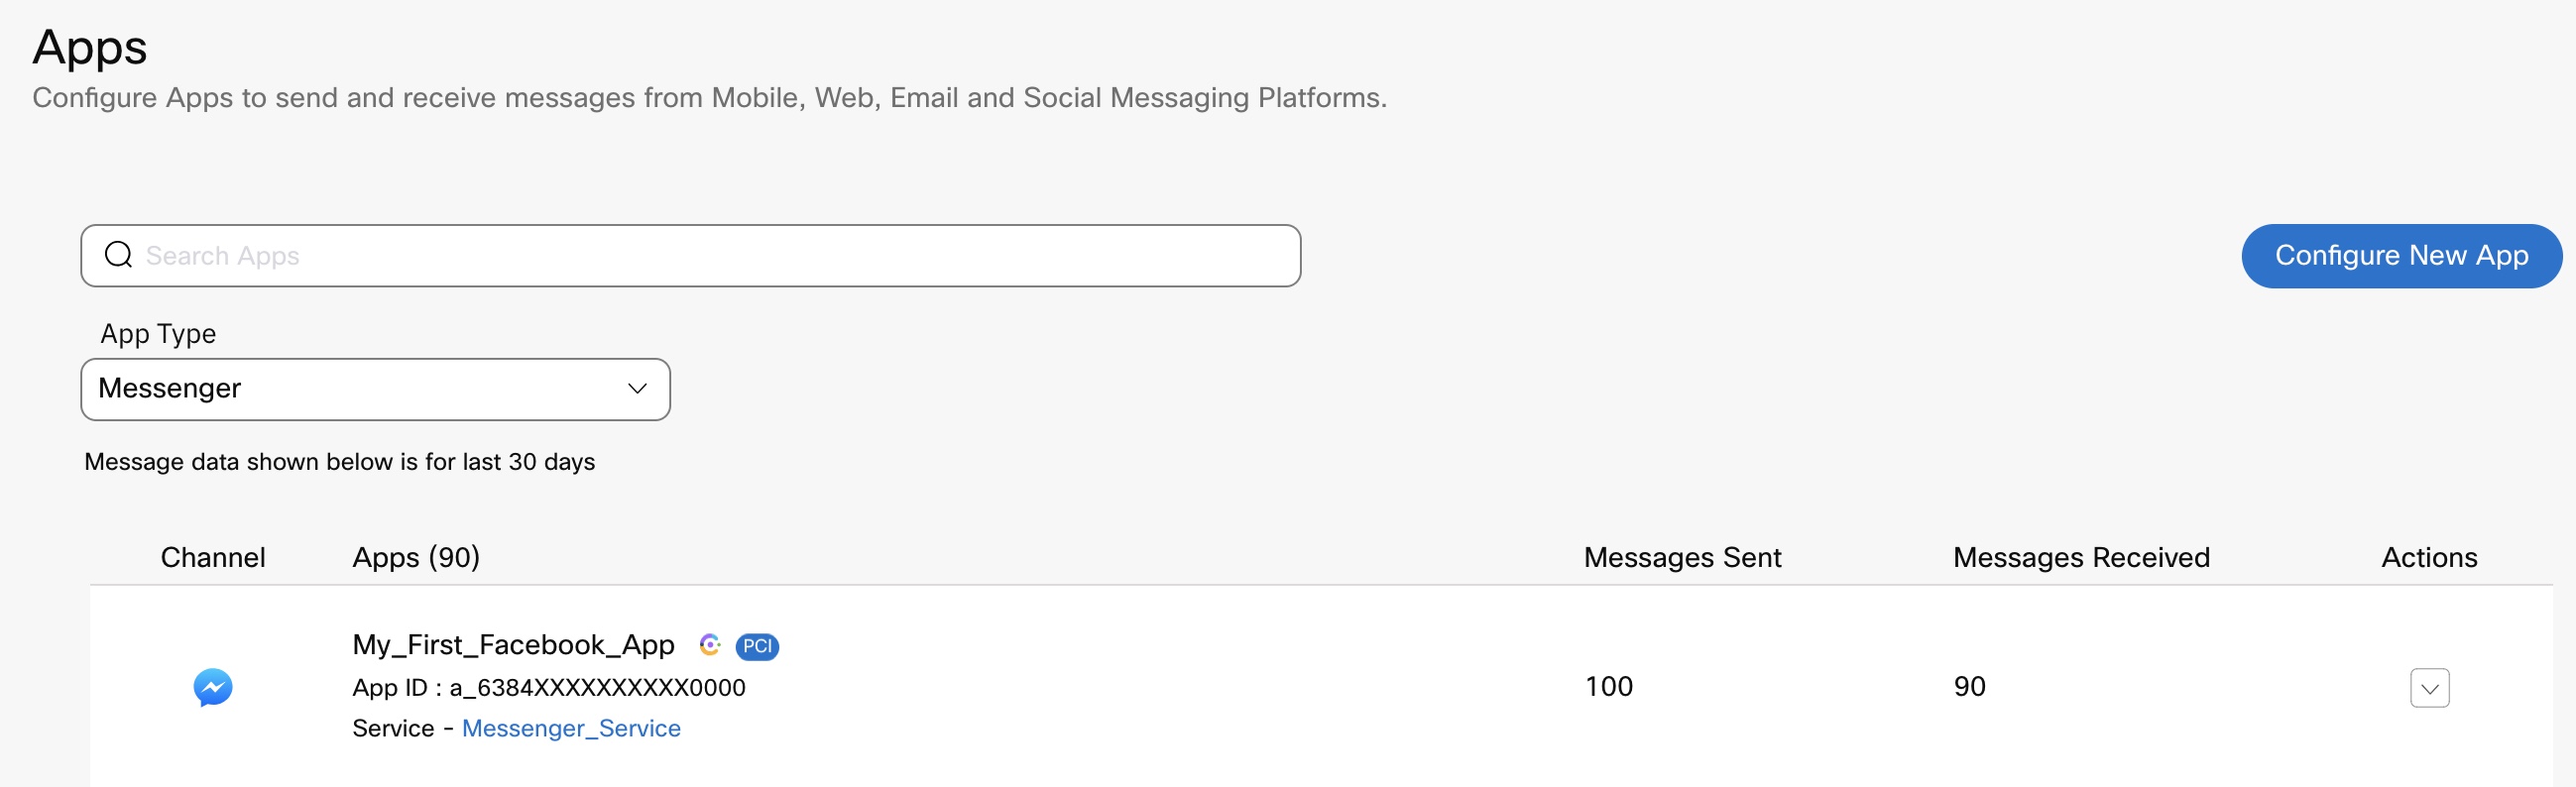
You can register your Facebook Messenger page with Webex Connect from 'Assets -> Apps' section. Here are the steps for registering:
- Select Messenger from Configure New App dropdown.
- Provide a name for your Messenger app asset and click Add Messenger Page. You must be the admin of the Facebook page to integrate Facebook Messenger with Webex Connect . You will be redirected to your Facebook login page.

- Provide the login credentials. You may not see this step if you're already logged in.
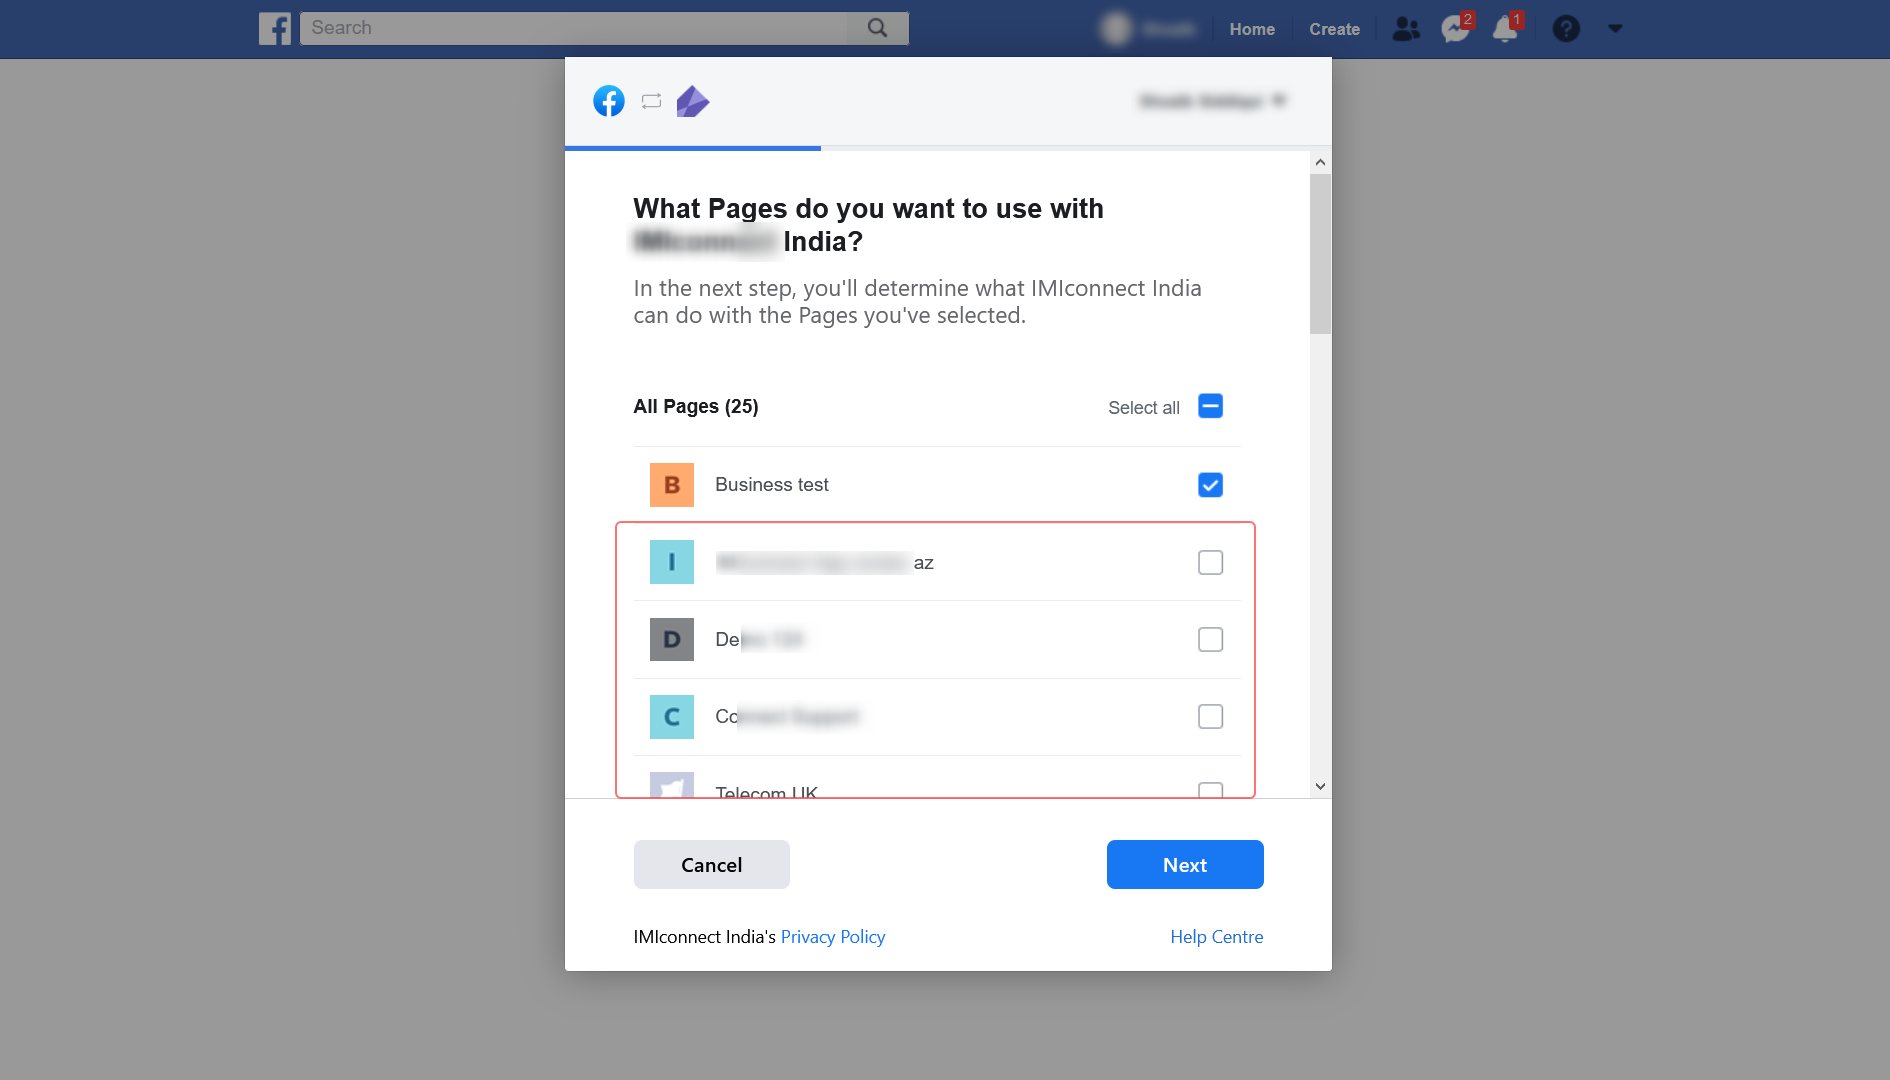
- Select the page that you want to register on the What pages do you want to use with Webex Connect pop-up.
- Provide the requested access permissions, and click Done.
At this stage, you will be redirected to Webex Connect . If you selected multiple pages in the previous step, you will be asked to choose the page that you want to use for the asset you are configuring. Select the required page. Once done, you'll see the following screen.
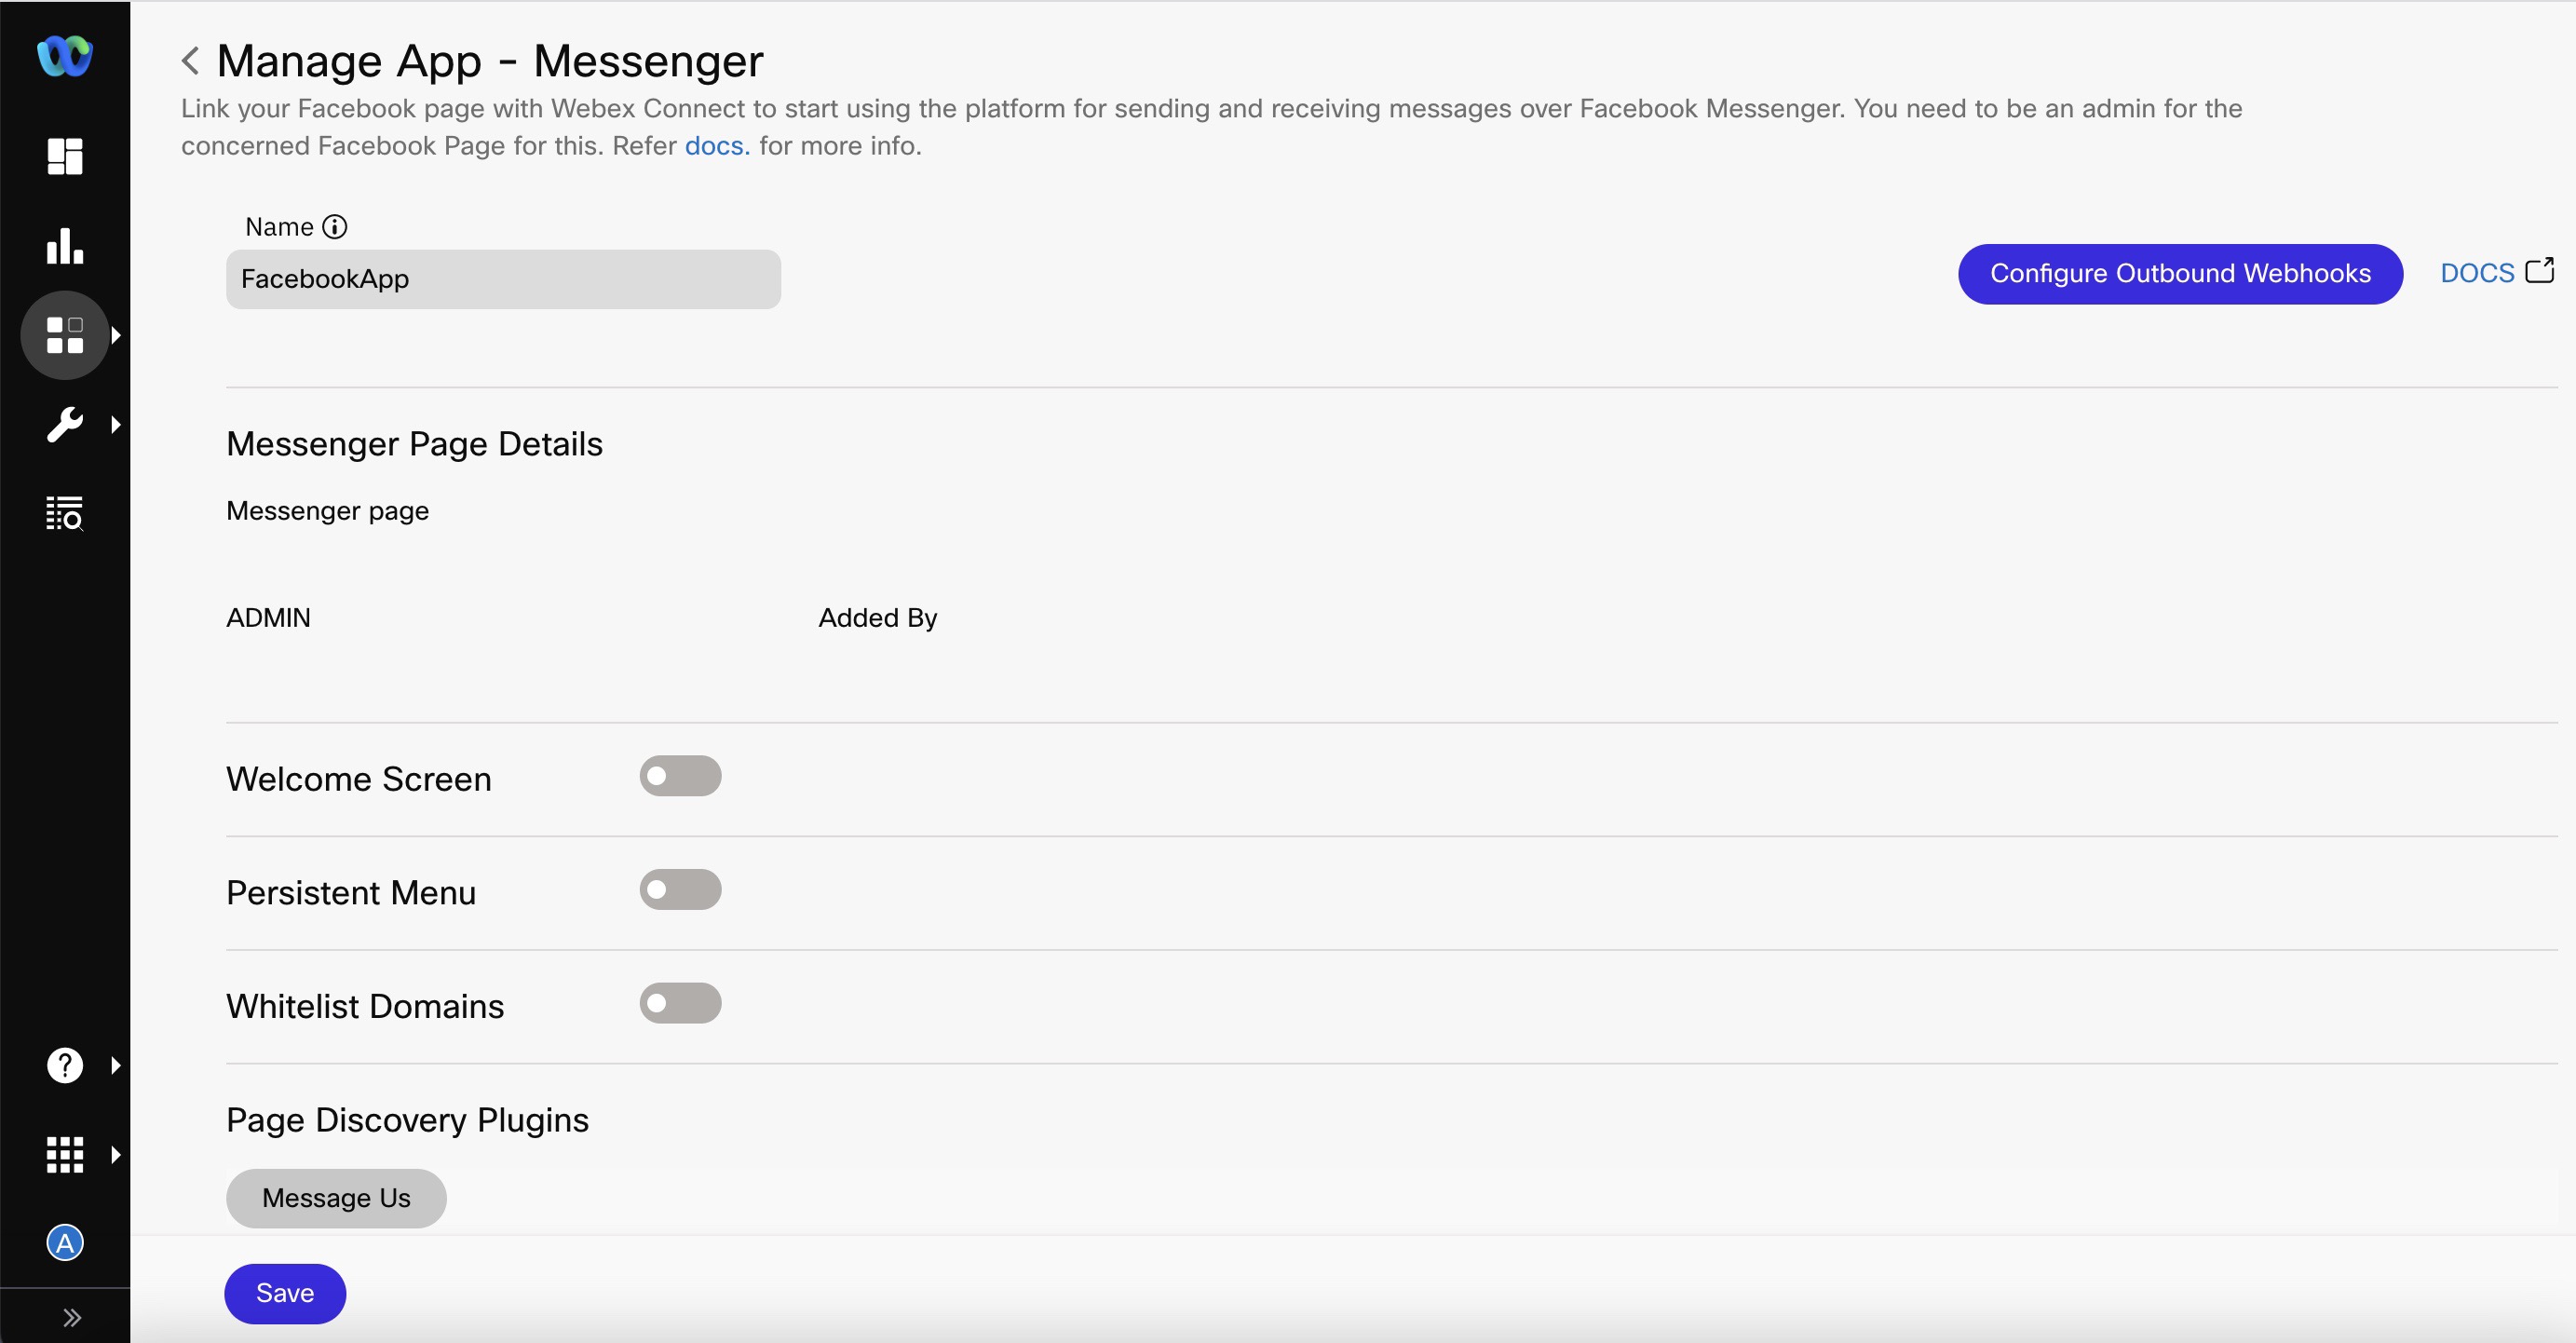
- Click 'Save'. This completes the association of your Facebook Messenger page with Webex Connect. We do support advanced settings such as Welcome Screen, Persistent Menu, etc. but those are optional. Refer to the last section for info on the advanced settings.
Registering your Facebook Messenger App Asset with Webex Engage
Once the asset has been saved, you will see a 'Register to Webex Engage' action button on top (ref: below screen).
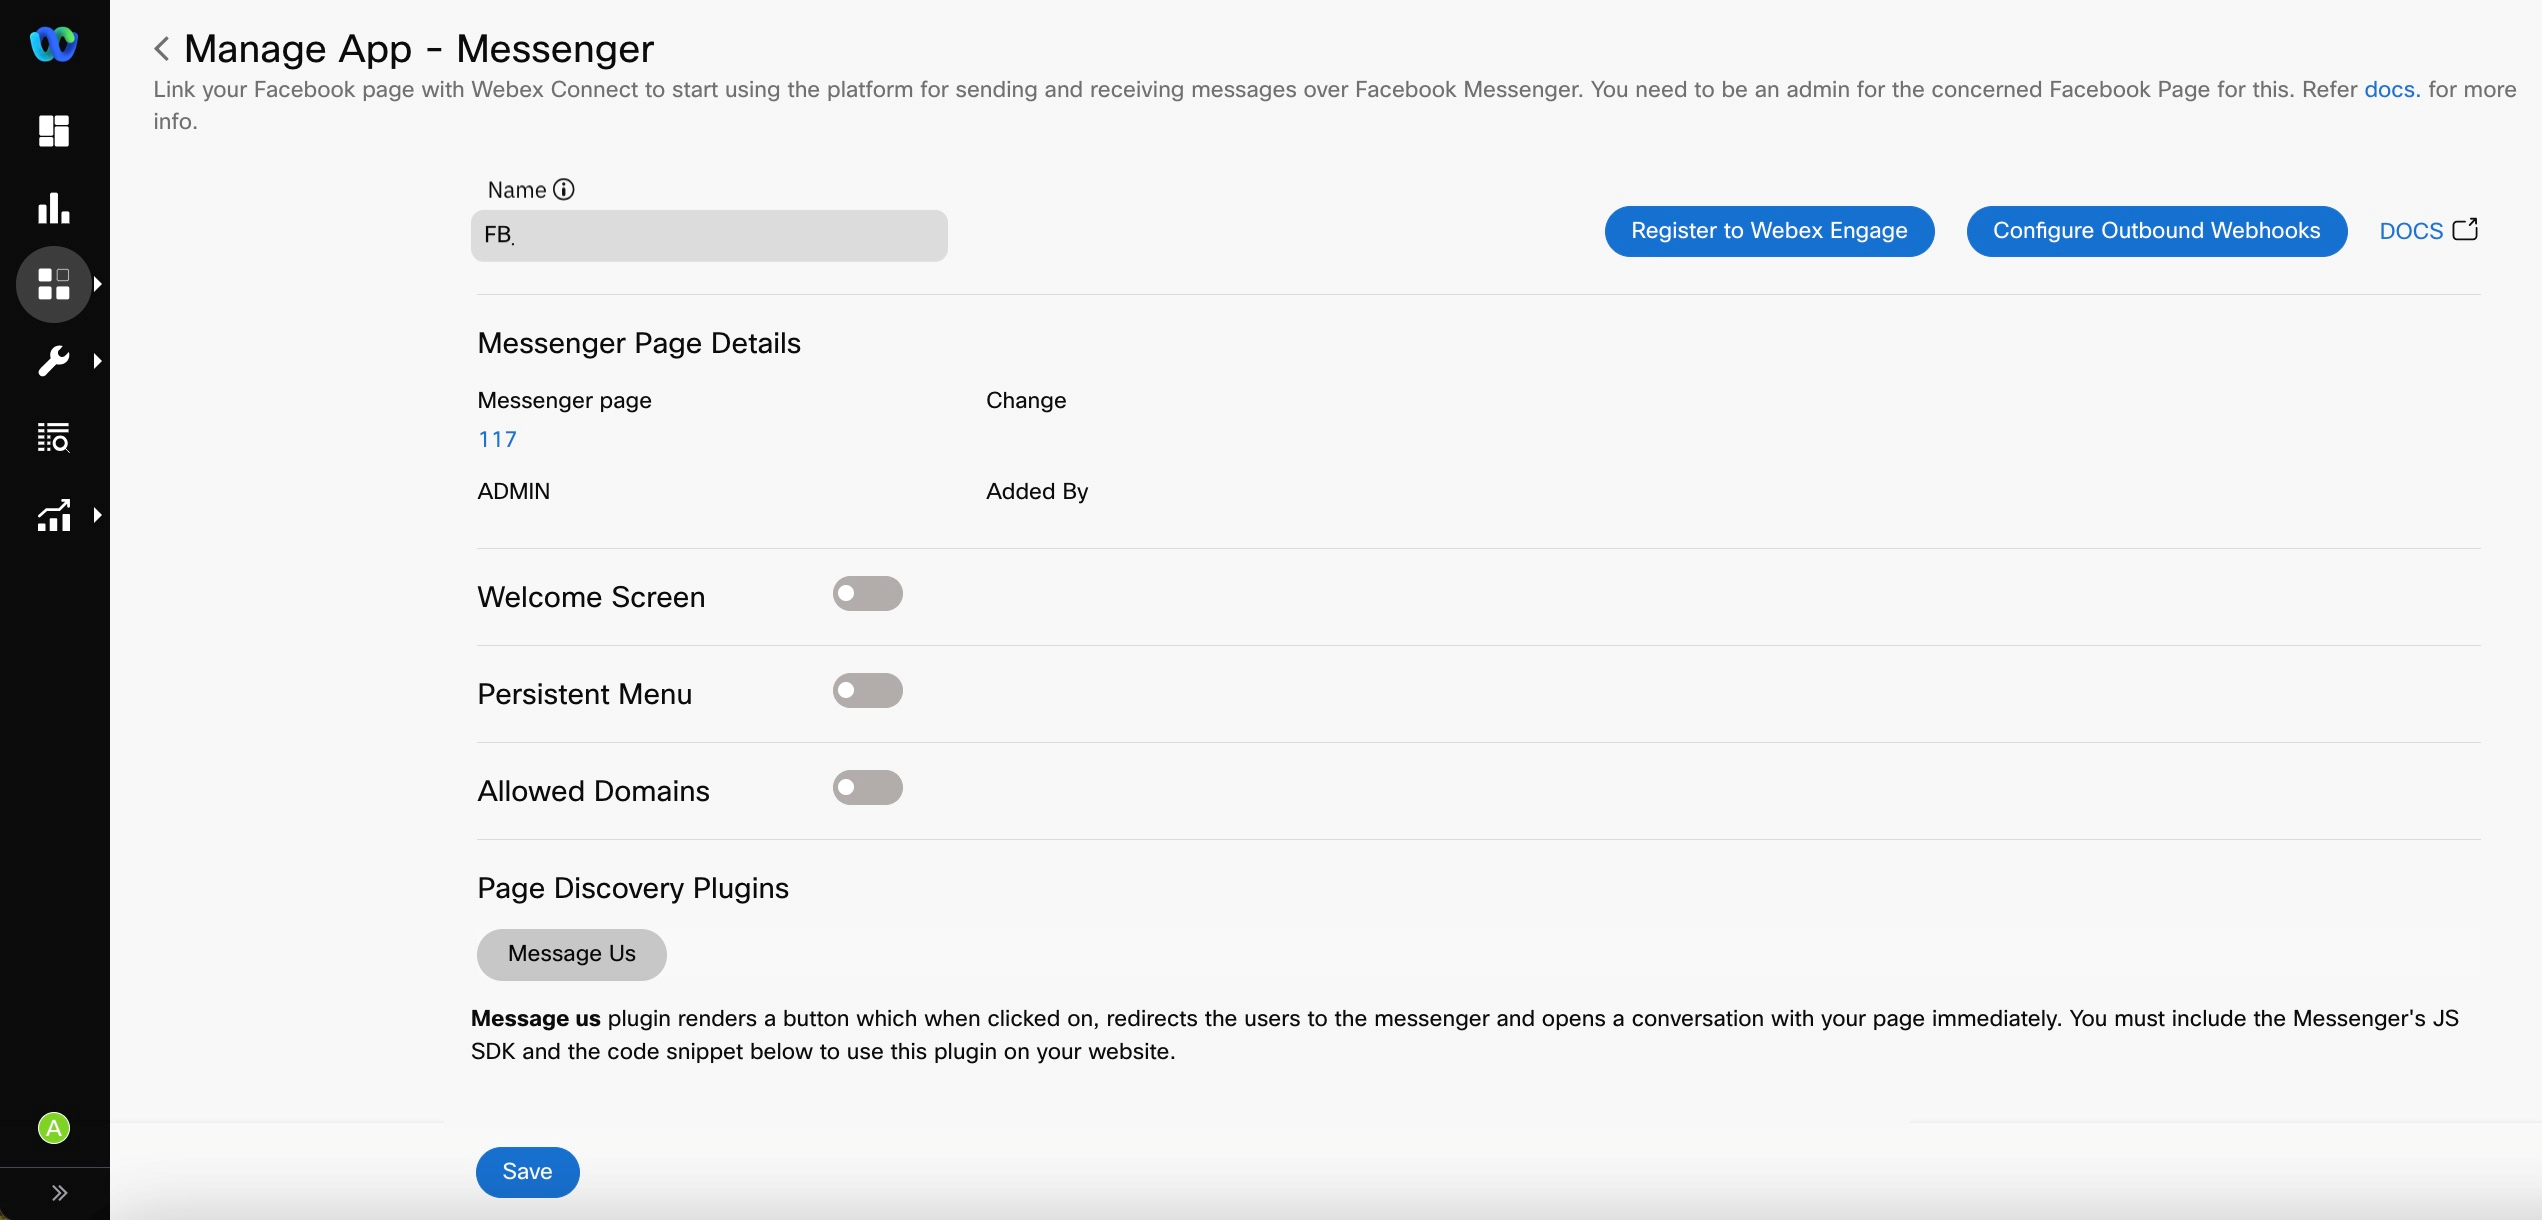
- Click Register to Webex Engageoption. Once clicked, you will see the following pop-up.

- Select the required service (this should be the Webex Connect service that would be used for configuring Facebook Messenger flows for Webex Contact Center).
- Click Register.
Note
- Please note, the service mapping cannot be changed once done. Hence, the asset registration on Webex Contact Center should be done after the service to be used has been decided.
- Do not delete the Facebook Messenger asset once it's been registered with Webex Contact Center. Once deleted it cannot be restored. Doing so would lead to asset deletion within Webex Connect alone while the entry continues to be in Webex Contact Center and Webex Engage.
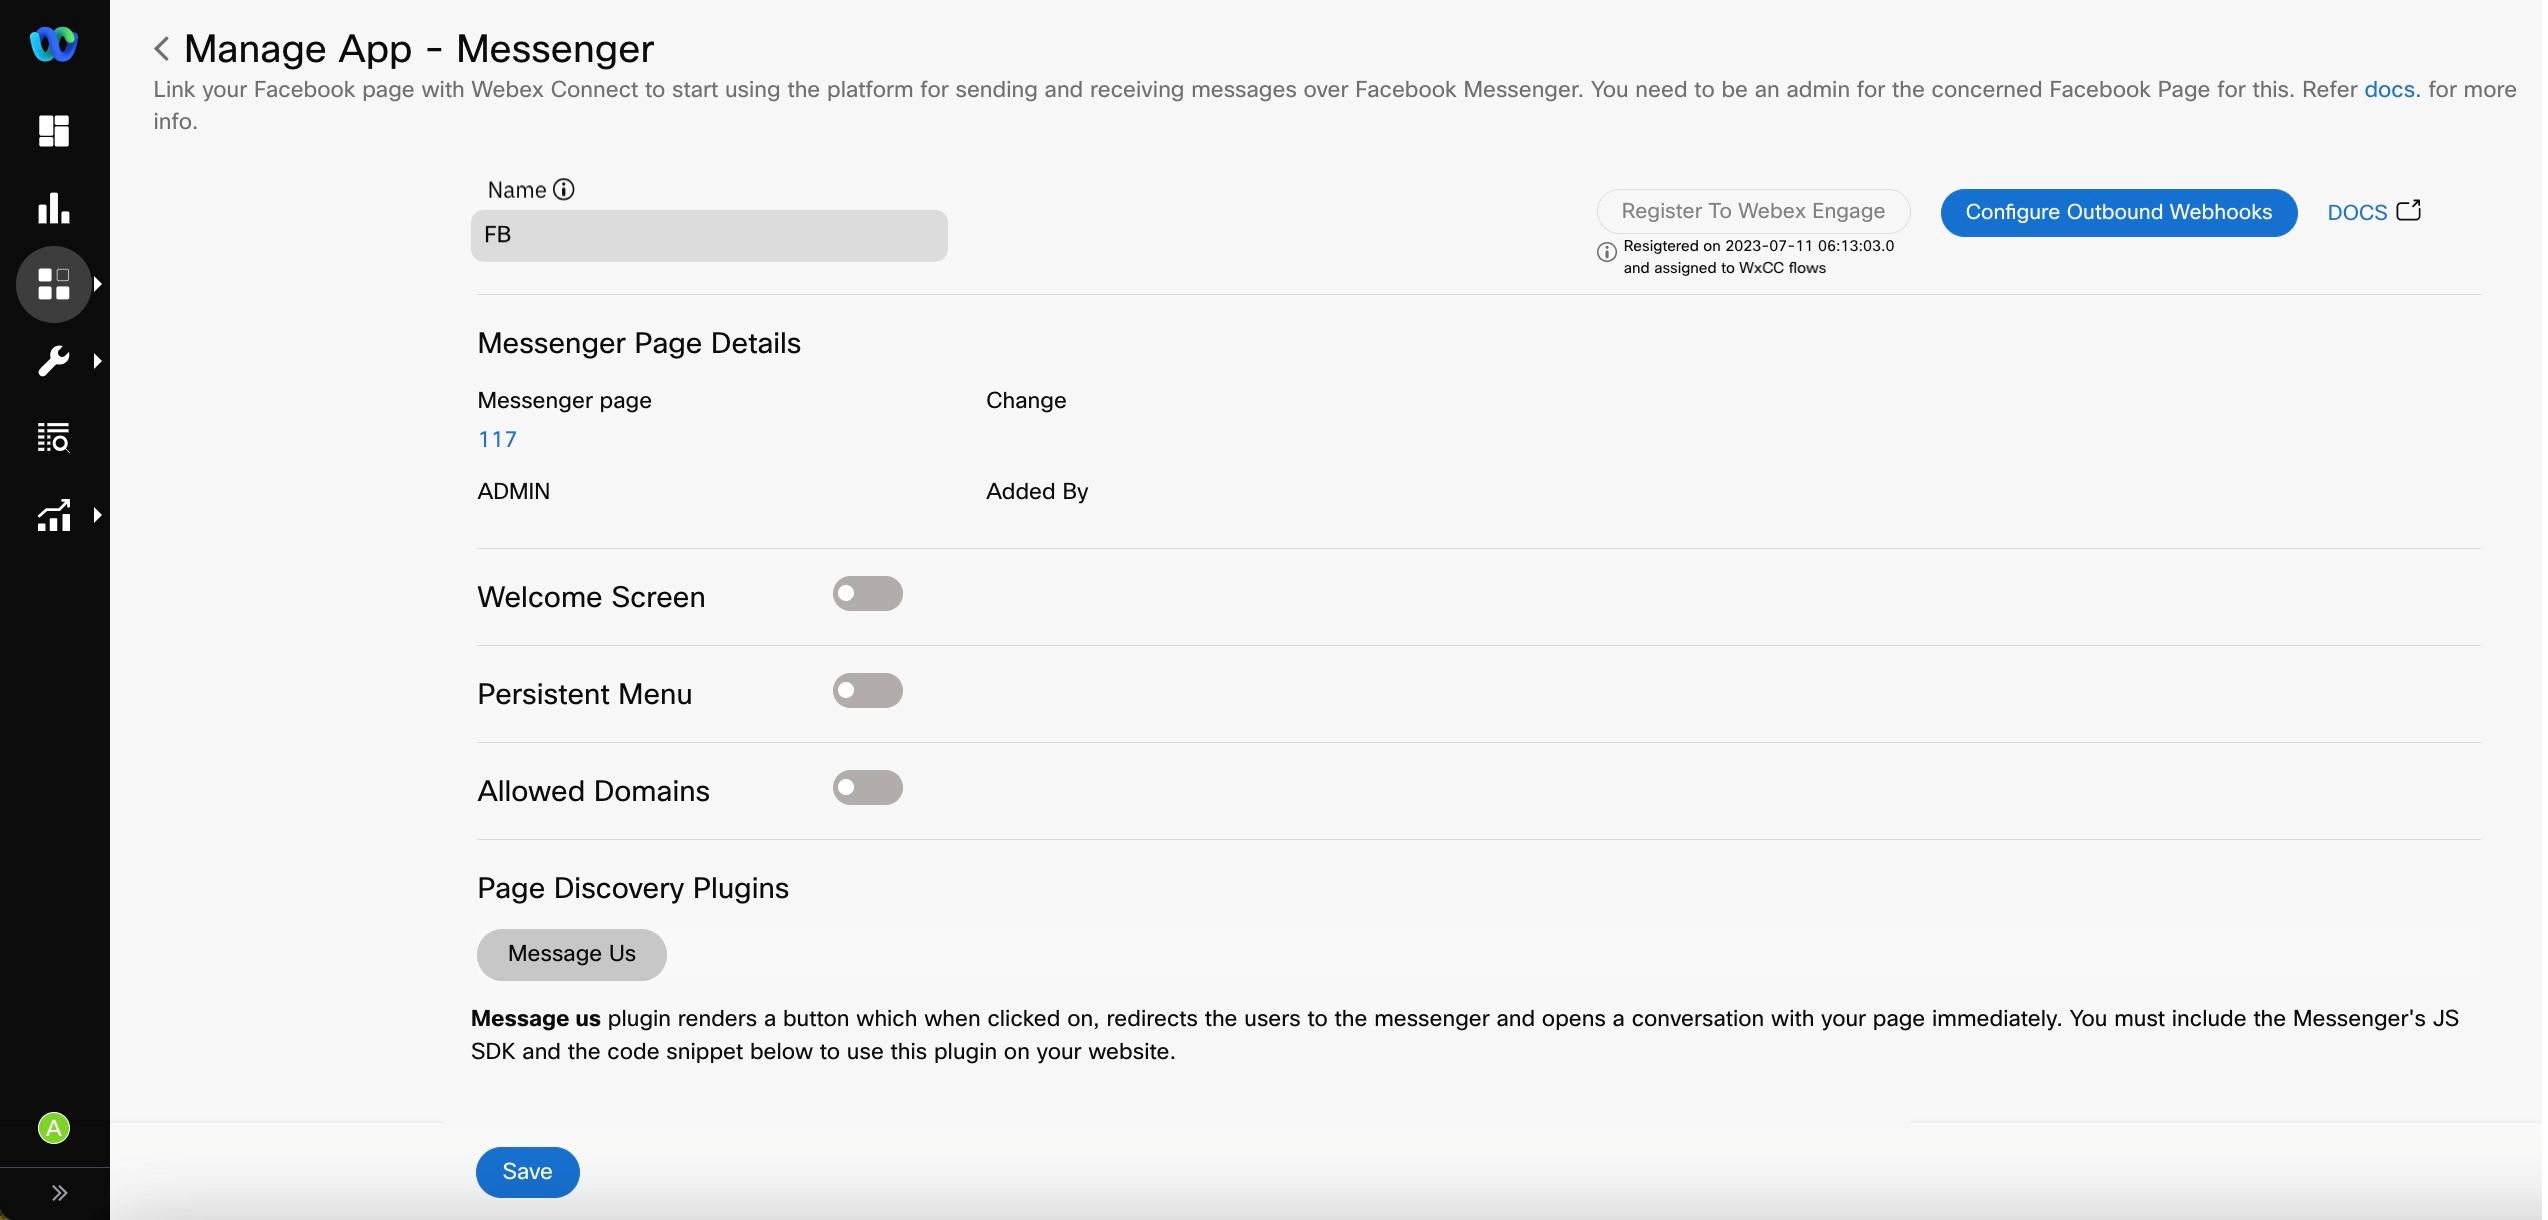
A message displays “Asset registered successfully”. This completes the asset registration for Webex Contact Center.
As shown above, you will see a Cisco Webex Contact Center icon and a PCI check enabled flag next to the Facebook Messenger asset once it's been successfully mapped with Webex Contact Center.
Once the asset is registered, this asset will be available for entry point mapping in Webex Contact Center portal.
Facebook Messenger Authorization Expiry
The following is a list of scenarios in which the authorization of your Messenger app will expire:
- When you change your Facebook/Messenger login password.
- If the user who requested the token no longer has a role on the page
- If you deselect any of the integrated pages when adding a new page in the Webex Connect platform. Make sure to include all the integrated pages.
Authorization Expiry
While adding a new page, please make sure to select all the pages that have been integrated with Webex Connect platform previously in the Facebook login flow.
Configuring Welcome Screen, Persistent Menu, etc.
Welcome Screen
You can optionally choose to configure the welcome screen for your Facebook Messenger customers. Switch the Welcome Screen toggle to Enabled, and provide a greeting message for the Welcome Screen (minimum three characters long).

Welcome Screen
We recommend you to not enable the Get Started button on the Messenger app configuration screen under Assets --> Apps section when using Webex Connect for supporting Messenger for Webex Contact Center.
Persistent Menu
The persistent menu allows you to have an always-on user interface element inside conversations. This is an easy way to help people discover and access the core functionality at any point in the conversation. You have to enable the "get started" button in the welcome screen to configure Persistent Menu.

Persistent Menu
You can refer Messenger documentation on Persistent Menus to know more about this feature such as best practices, limitations, etc.
Allowed List Domains
Add the web domains that need to be accessible from Facebook Messenger.
Subscription Messaging
Enable this feature to allow Facebook page to send non-promotional content through Messenger channel. This feature is available only for clients who have Facebook's permission to use it.
Page Discovery Plugins
The Page Discovery plugins allow you to integrate Facebook Messenger chat experience directly onto a website/webpage for a personalized experience. This allows your customers to interact with your business anytime with a click of a button.
To use the below plugins, you should include the code snippet provided on your webpage along with Facebook's JavaScript SDK. The website domain must also be in the allowed list on which you wish to use this plugin.

Send to Messenger
| Name | Description |
|---|---|
| Message Us | Renders a button when clicked on, redirects the users to Facebook Messenger and opens a conversation within your page. |

Checkbox Plugin
Updated 18 days ago