
Phone Number
A phone number is a 10-digit number that is used to send/receive SMS and/or incoming/outgoing calls.
To make or receive calls, send or receive SMS, or use certain apps available within Webex Connect, you must associate the services with the right type of phone number. Phone numbers can be either purchased or rented from Webex Connect for a monthly rental.
Phone numbers are of three types:
- Landline
- Toll free
- Mobile
Each type of phone number has the following features associated to it:
- SMS
- MMS
- Voice
Note
Due to limitations in auto-provisioning MMS for 10DLC numbers in the U.S., the MMS option is hidden for United States landline numbers.
Number Availability
Below are the existing number types migrated to new number types:
- All the countries with the “Phone Numbers" which have “SMS” feature have migrated to number type “Mobile” .
- For the US all “Phone Numbers” which have “SMS” feature have migrated to number type “Landline”.
- “Tollfree and Landline” numbers have remained the same.
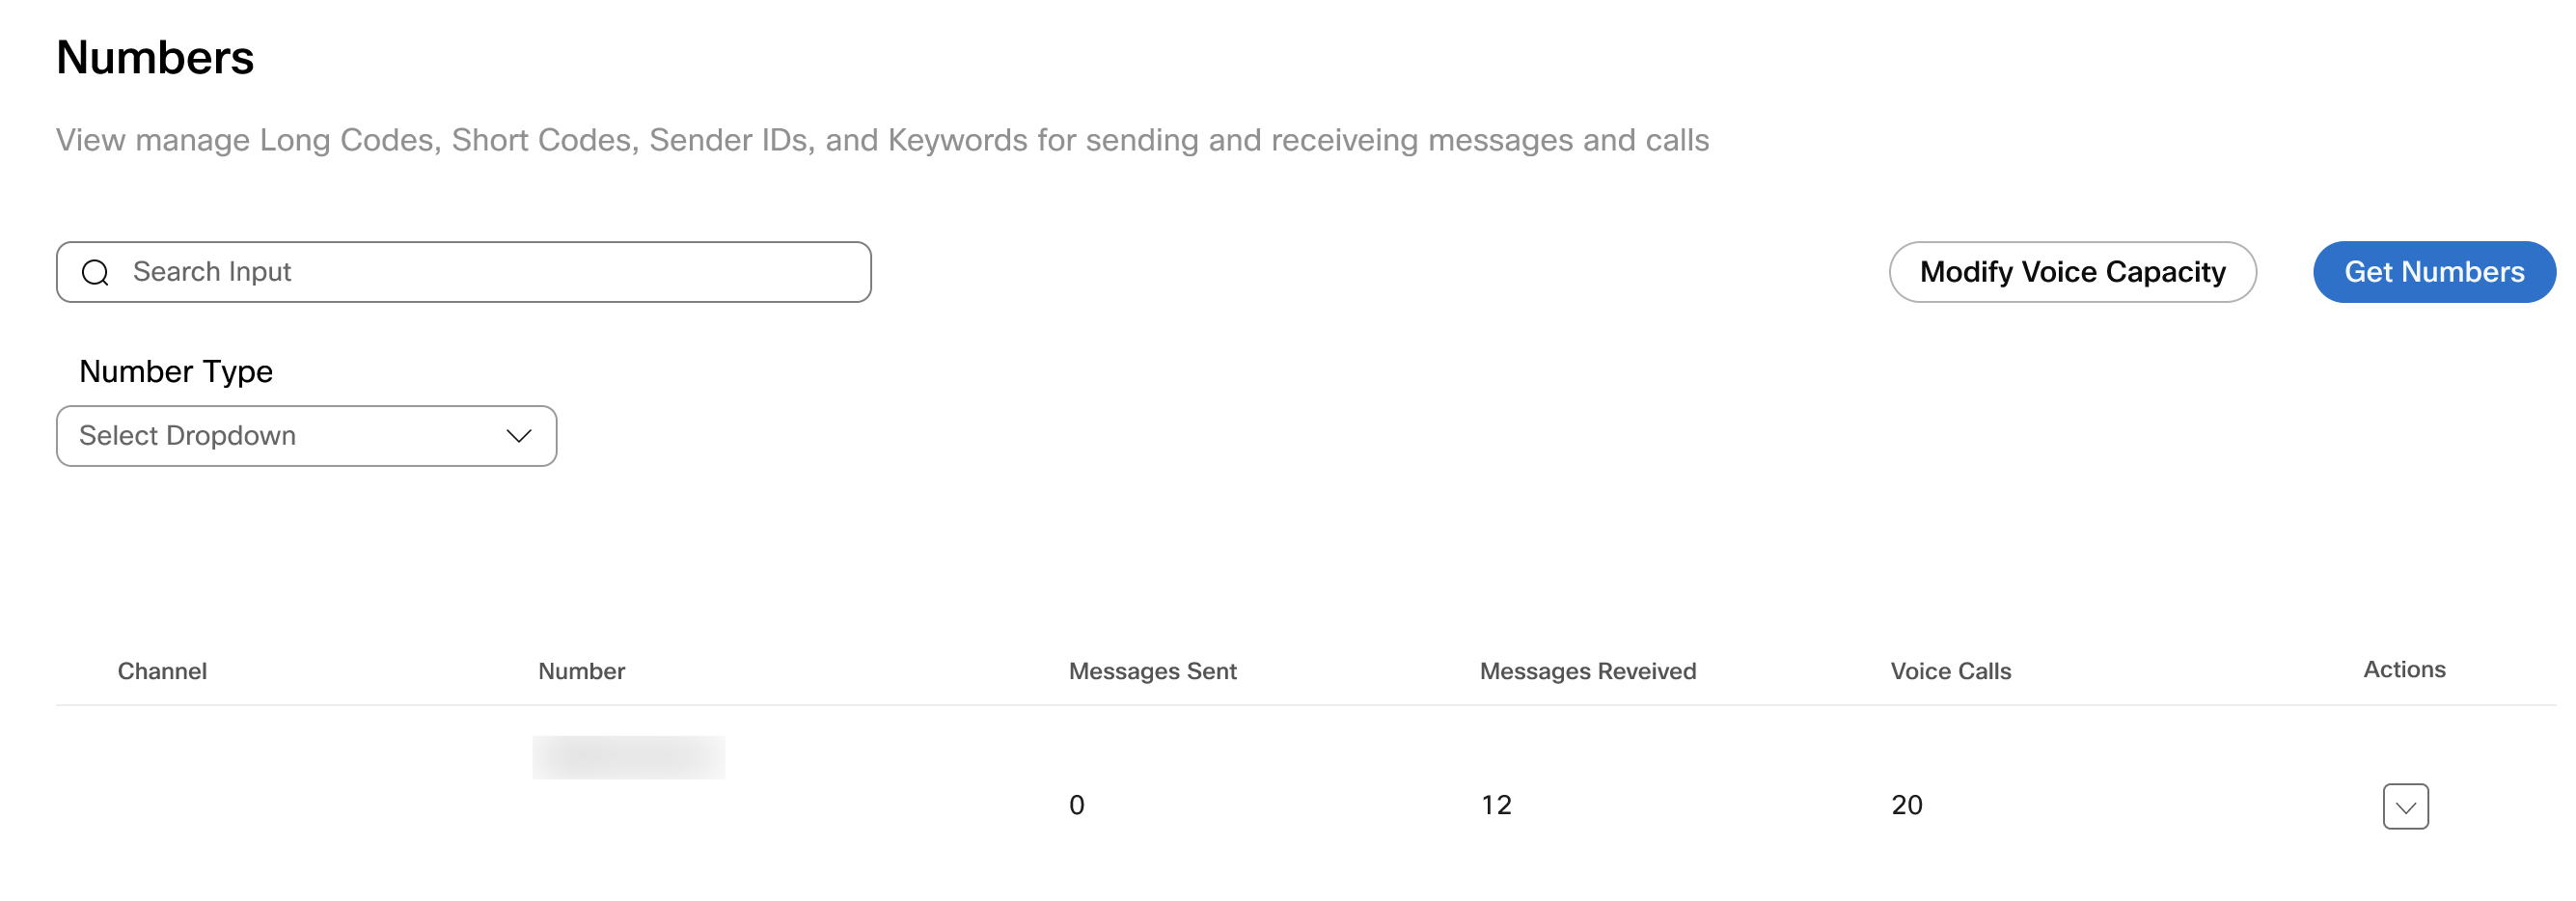
Numbers List
The Numbers page under Assets lists all the phone numbers added in the current tenant. You can search for or filter the numbers list by Number Type. The different number types available to filter are:
- All Numbers
- Short Code
- Phone Number
- Sender ID
- Keyword
Note
From 5.6.2 onwards, the numbers ordered with SMS capability will be enabled as Sender ID by default.
Note
- In order to comply with the US market requirements, we send SMS to US and Canada using only pre-approved, pre-registered products: 10 Digit Long Codes, Toll Free Numbers, and Short Codes. International long numbers cannot send SMS to US or Canada.
- Delivery with a country's long number to another country is best effort, but we cannot guarantee it. If it's against the regulations (such as using other countries' long numbers to deliver to the US) the traffic will be actively blocked.
Get a Number
- Select Numbers from the Assets menu and choose the Phone Number option from the Get Numbers drop-down list box.

- Select the Country, Number Type, and click Find Numbers.
Unavailability
In case you cannot find the country you are looking for, please reach out to the Support Team using the details mentioned in the ‘Contact Support’ section within your Webex Connect account.
Voice Numbers purchased in the certain countries have a limitation on the "From Number" displayed on the handset. We are working with our Voice providers to resolve this.
Search Numbers
- Select Numbers from the Assets menu and choose the Phone Number option from the Get Numbers drop-down list box.

-
Select the Country, Type, and Features, and click Find Numbers.
If you selected United States or Canada as the Country, you can also search by Area Code or Location. -
Click Find Numbers.
Number Availability
The type of phone numbers available in different countries may vary depending on the local government regulations and restrictions. If you cannot find a phone number for a certain country, reach out to your regional support team.
Unavailability
In case you cannot find the country you are looking for, please reach out to the Support Team using the details mentioned in the ‘Contact Support’ section within your Webex Connect account.
Order Numbers
When you search for numbers, all the available numbers based on the search criteria are displayed.
- Click Buy associated with the desired number.
- Click Confirm Purchase on the confirmation dialog box to confirm the order. If the number is available, you will see the message "Number purchased and added to your account" and the number will be added to the Numbers list. If the order is pending, you will see a Pending badge against the number. Click the badge to view the order status.
Release Number
You can stop using a number without deleting it.
To release a number:
- Navigate to Assets → Numbers.
- Click Action → Manage associated with the number you want to release.
- On the Manage Phone Number page, click Release Number.
- On the confirmation dialog, click Release Number to confirm the release.
Modify Voice Capacity
Depending on the type of tenancy (shared or dedicated) you can modify the voice capacity for your tenant on a whole or for an individual number respectively.
Before you modify the voice capacity, you must ensure that the contract is changed to increase the voice capacity.
To modify the voice capacity at the tenant level (for shared tenancy):
- Go to Assets > Numbers.
- Click Modify Voice Capacity.
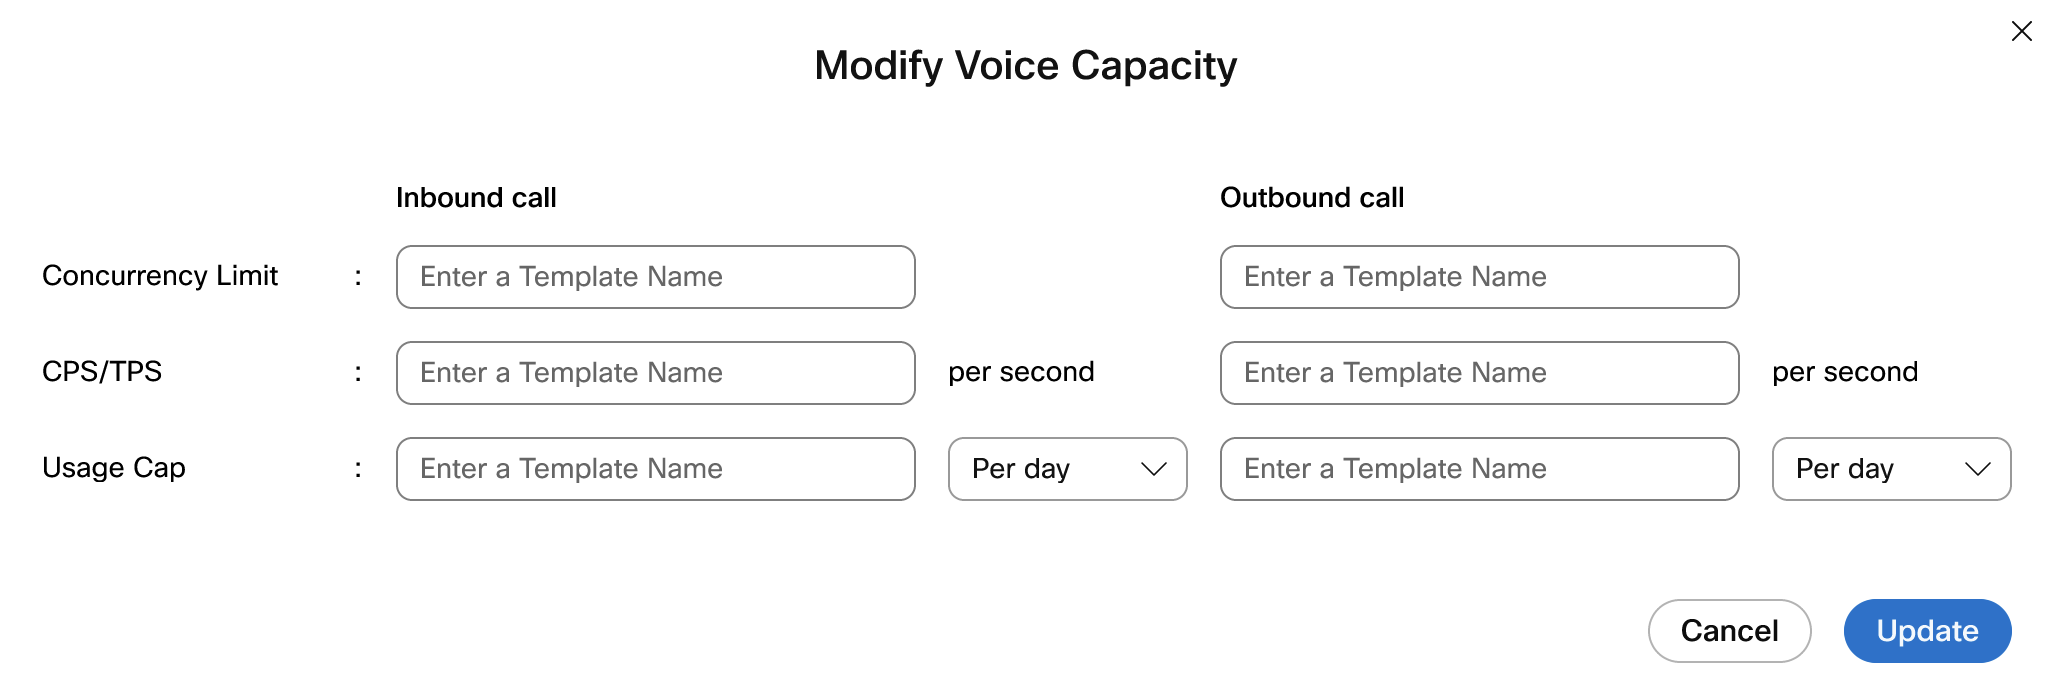
- On the Modify Voice Capacity pop-up, enter/update the values for the following for inbound and outbound calls:
- Concurrency Limit
- CPS/TPS
- Usage Cap
- Click Update.

To modify the voice capacity at a number level (for dedicated tenancy):
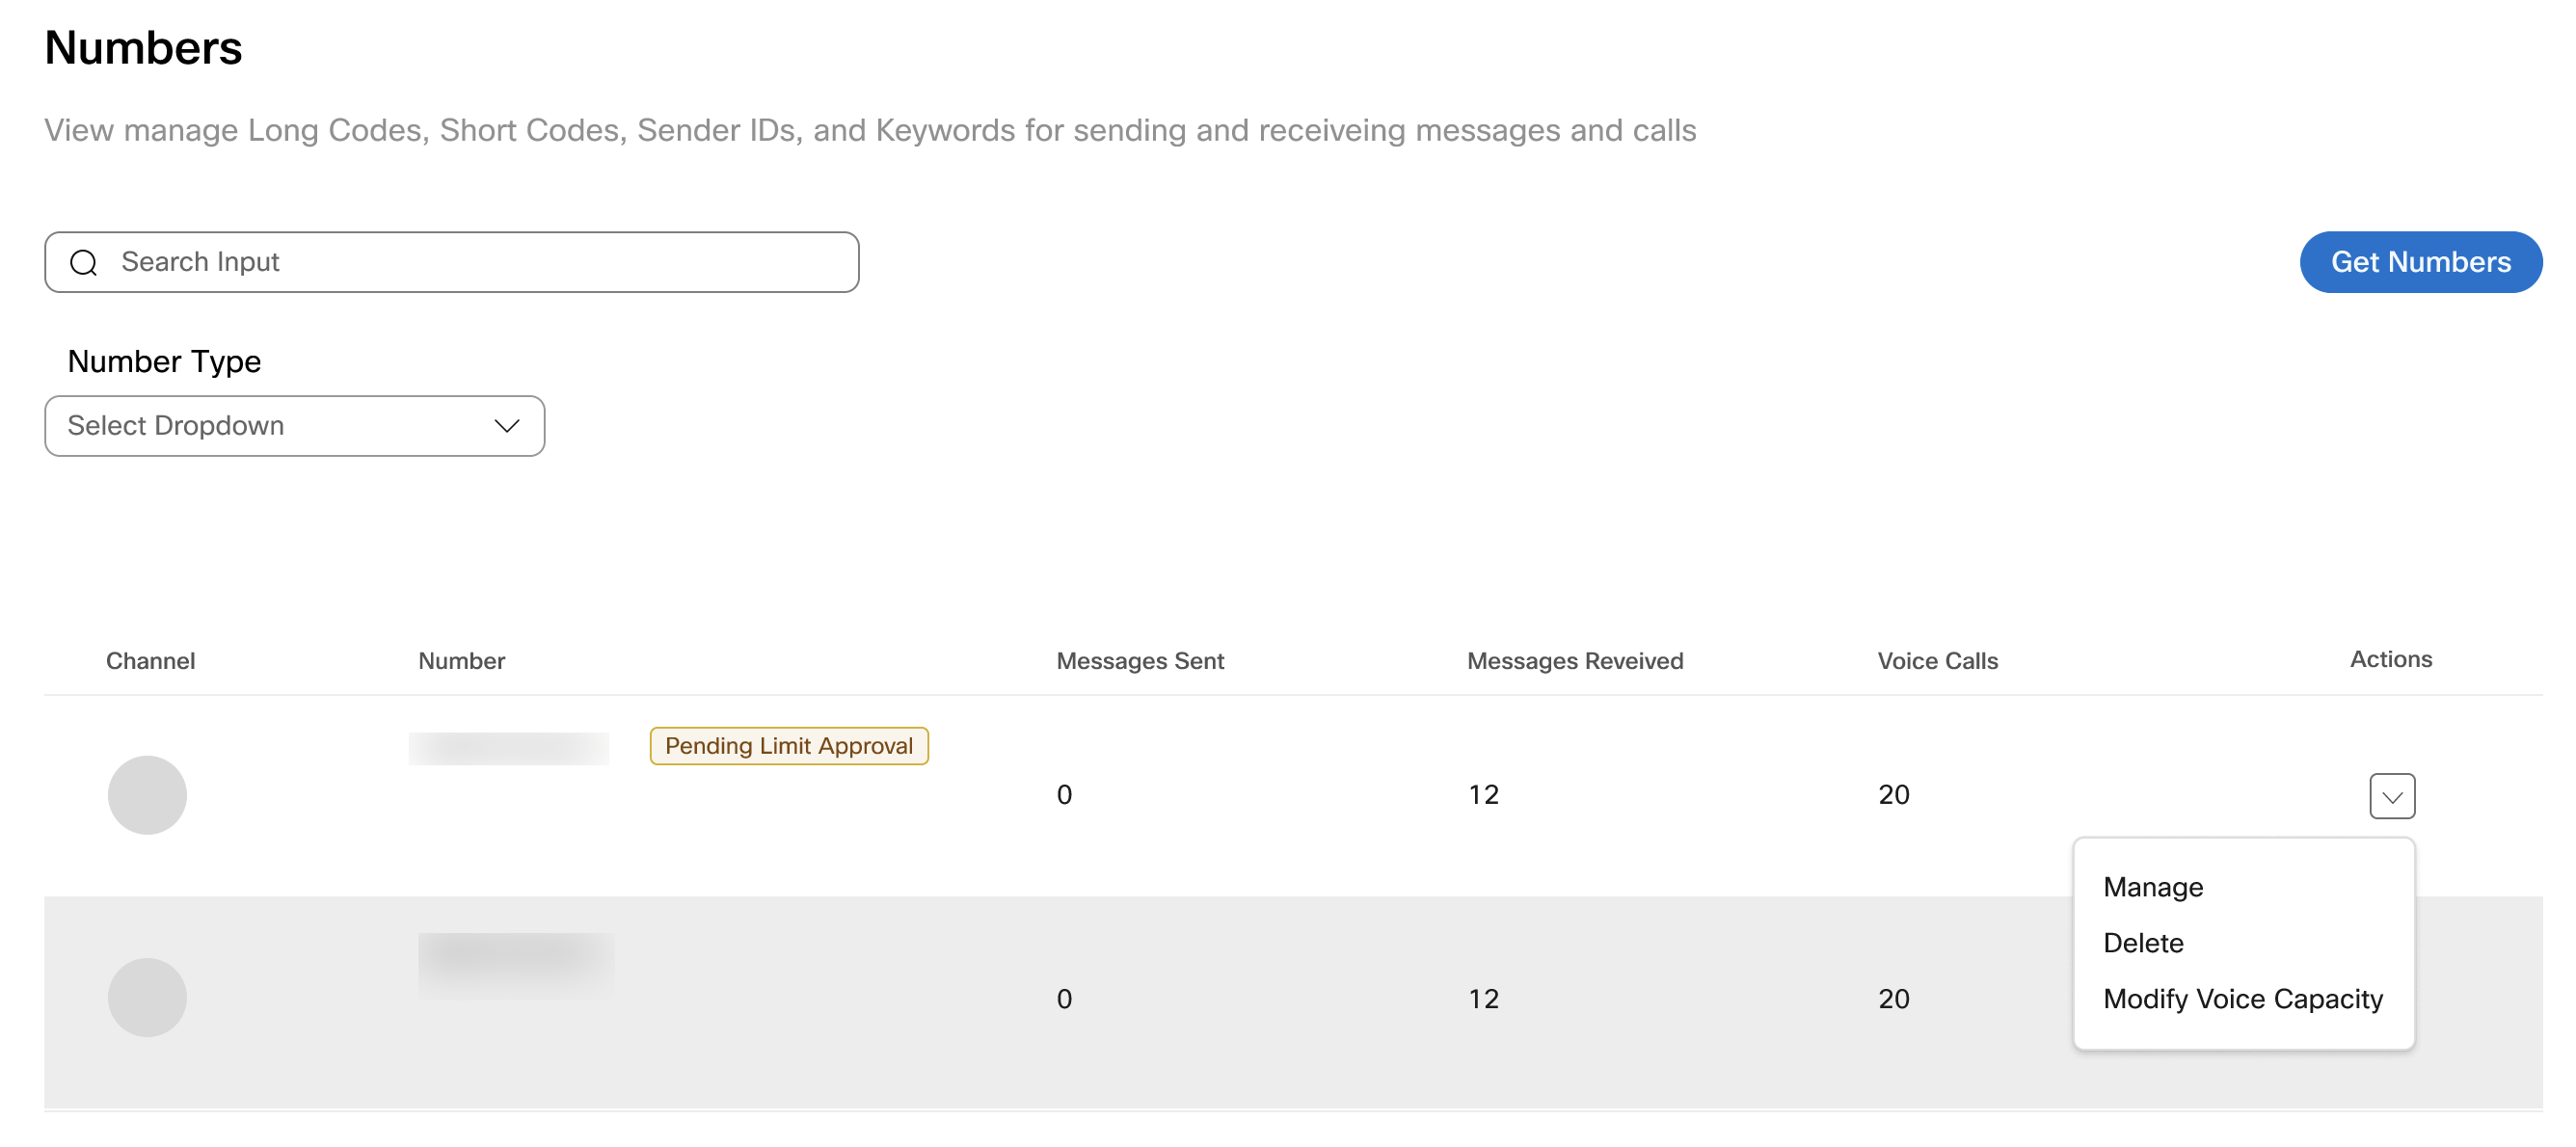
- Go to Assets > Numbers.
- Click Actions > Modify Voice Capacity associated with the number for which you want to modify the voice capacity.
- On the Modify Voice Capacity pop-up, enter/update the values for the following for inbound and outbound calls:
- Concurrency Limit
- CPS/TPS
- Usage Cap
- Click Update.
Enabling SMPP Service On Webex Connect Tenant Dashboard
To enable SMPP Integration:
- Login to the SMPP enabled tenant on the Webex Connect platform.
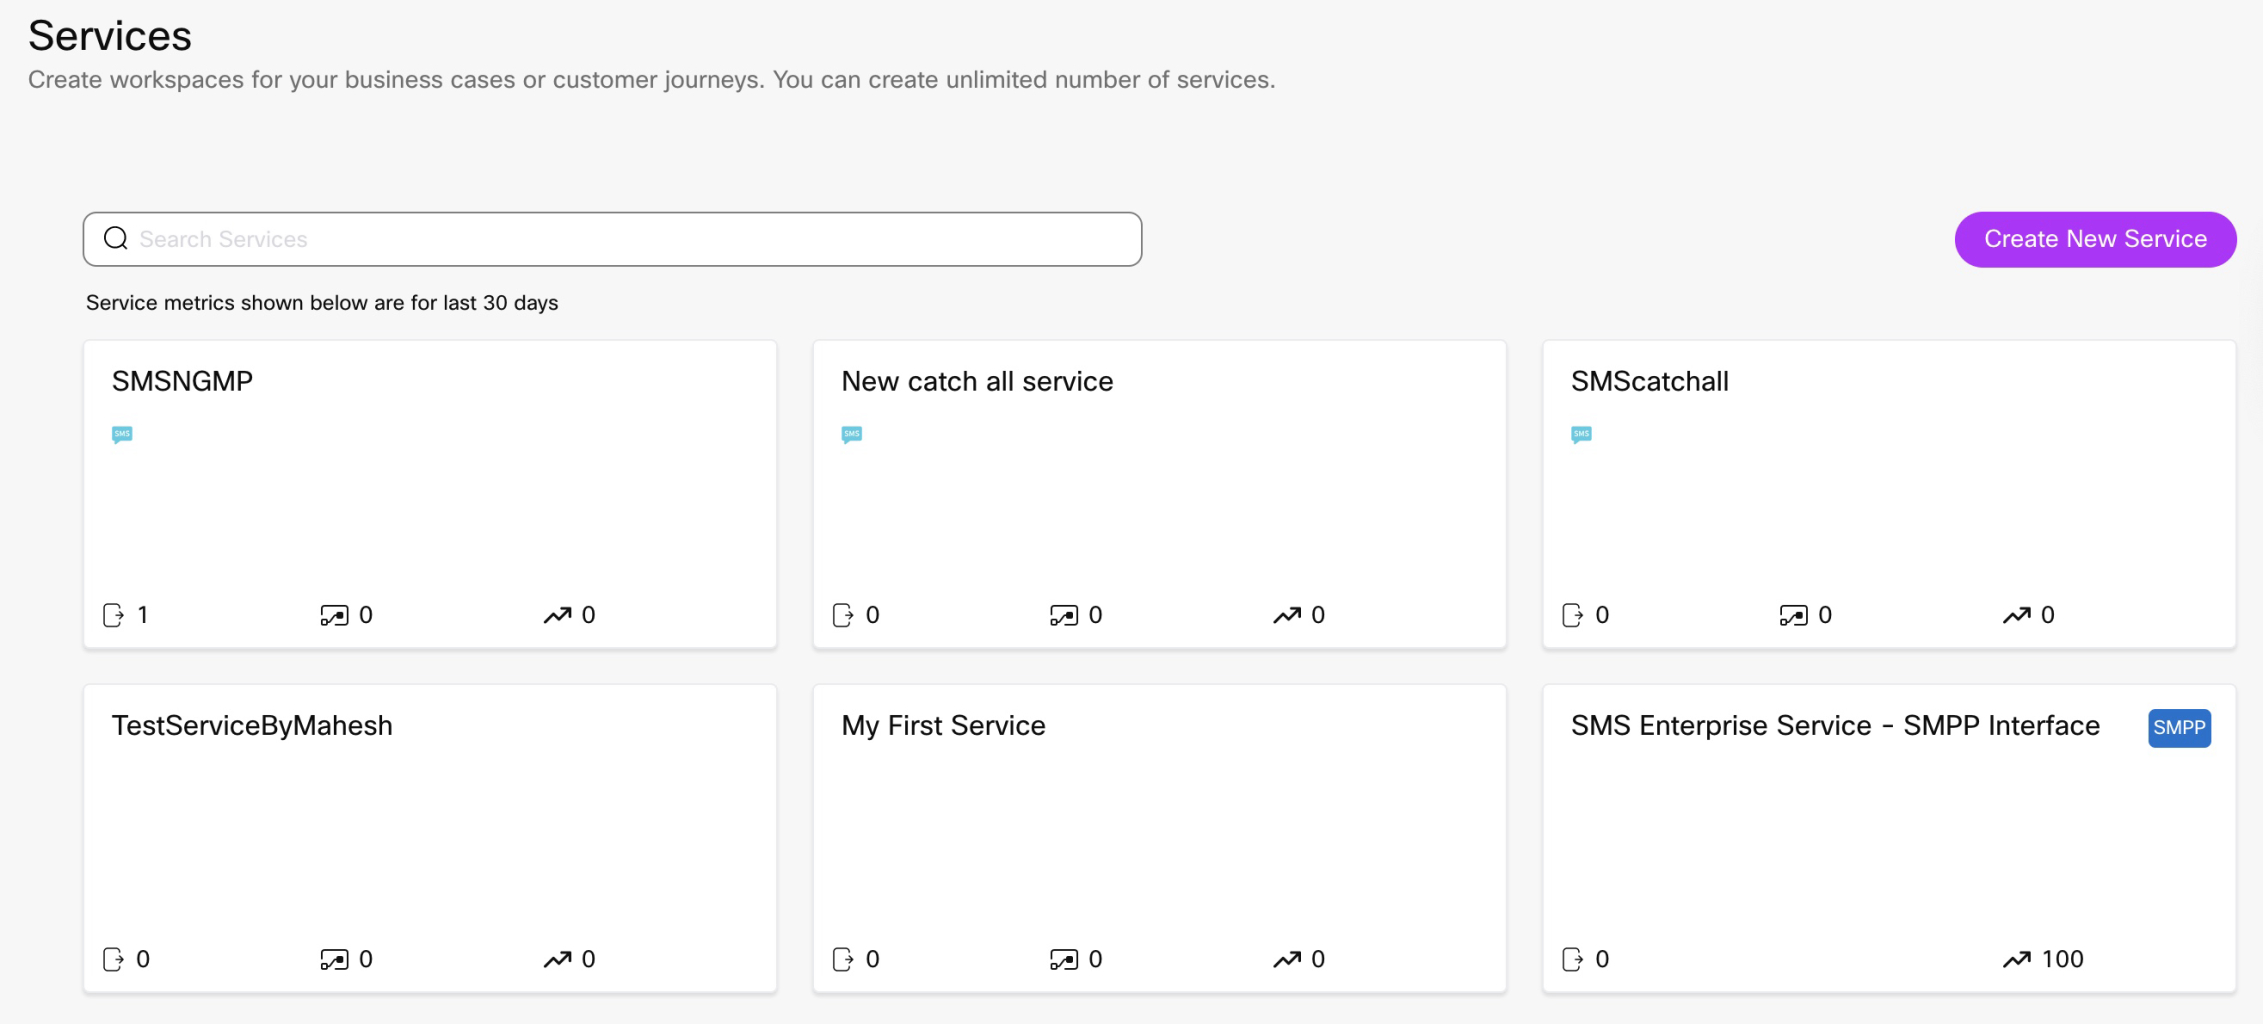
- By default, you will see two services called SMS Enterprise Service - SMPP Interface and My First Service on the Services dashboard. You cannot change the names of these services. The number of flows executed is not displayed for the SMS Enterprise Service - SMPP Interface service. Connect features likes rules, flows etc will not be available on the SMPP service. Also, once the tenant is onboarded, you cannot create another SMPP service. The SMPP service is applicable only at client-level, not at a group- or team-level.
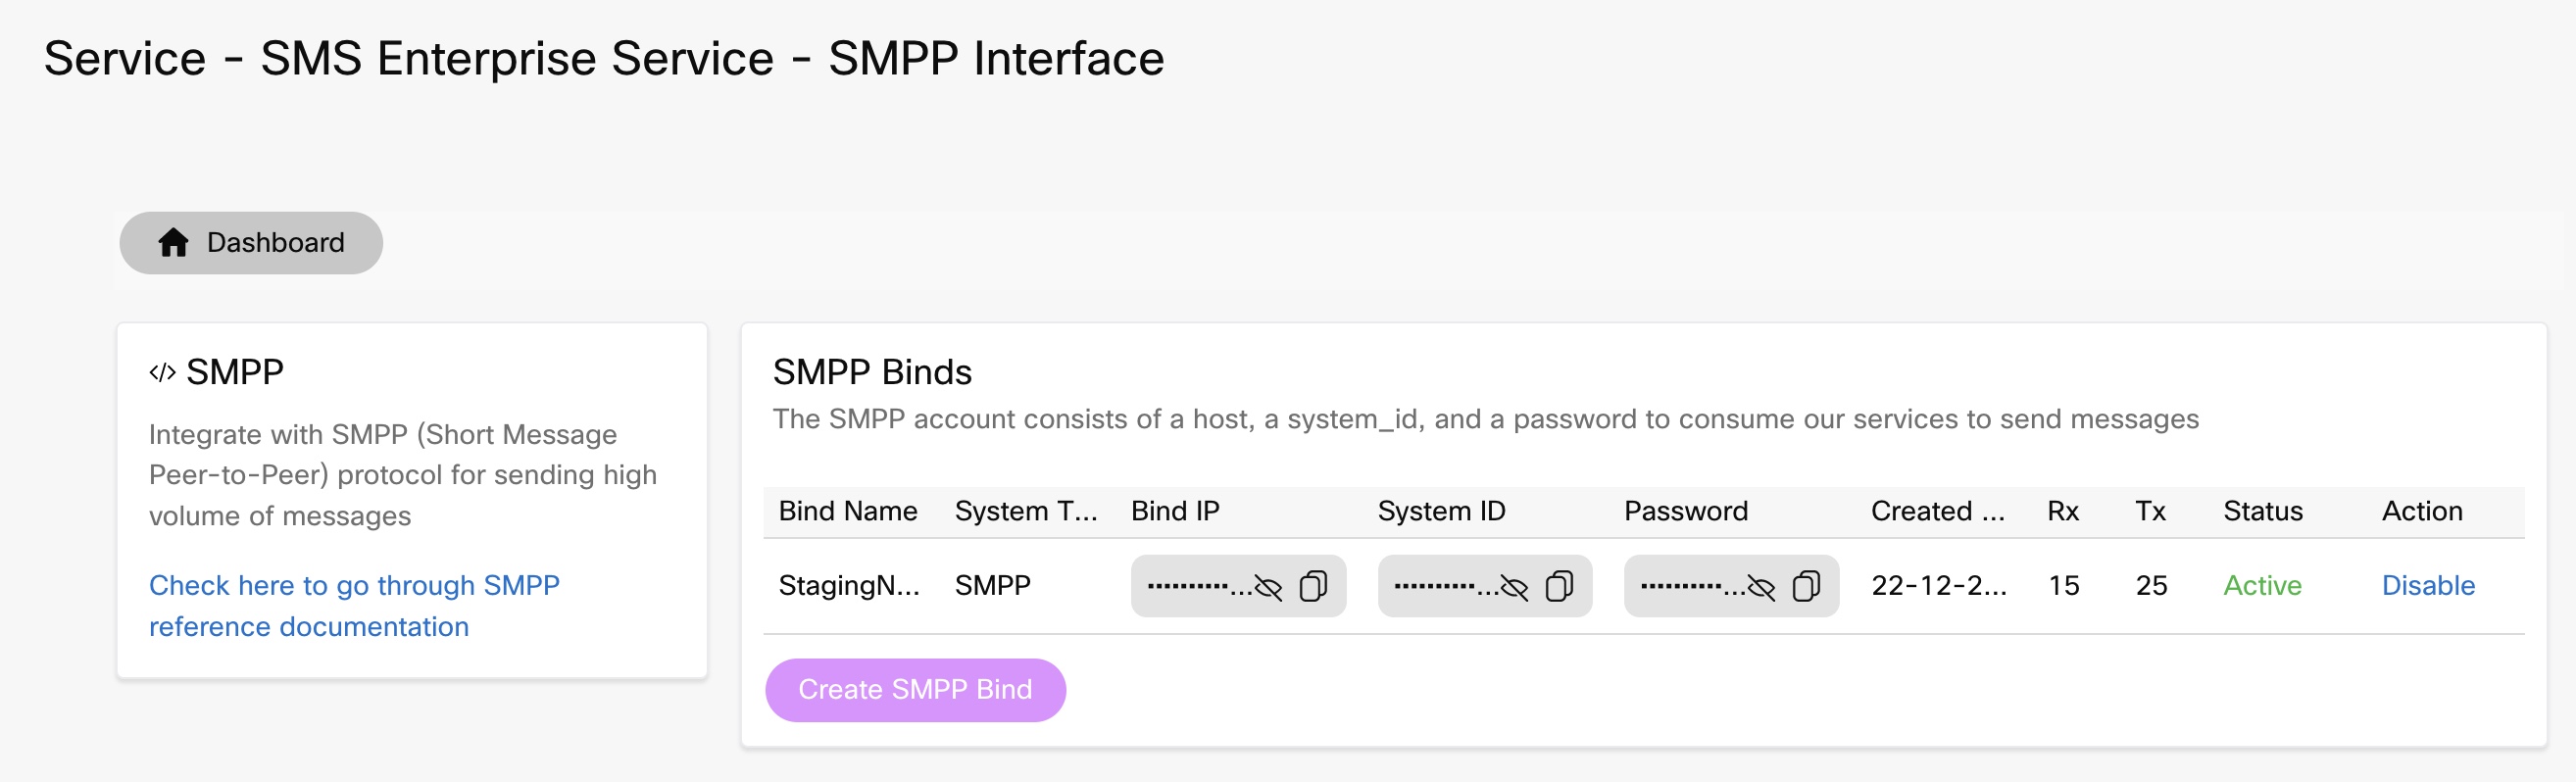
When you open the SMPP service, the elements you see will differ from the usual services. The SMPP service displays the SMPP Bind details. You can create a maximum of two (2) binds per a tenant. However, this can be configured from the Admin console. Reach out to your system administrator to change the maximum number. After every refresh of the page, the platform retrieves the maximum number of binds. The Create SMPP Bind button is disabled after creating the maximum number of binds.
While creating a bind, you must enter only the bind name. The other bind details would be fetched from the SMPP server.
- System Type - The System Type parameter is used to categorize the type of ESME that is binding to the gateway. Default value would be ‘SMPP'.
- Bind IP - Displays the IP address of the bind.
- System ID - The System ID parameter is used to identify an ESME at bind time.
- Password - The password parameter is used by the gateway to authenticate the identity of the binding ESME.
- Created On - Displays the date on which the SMPP bind is created
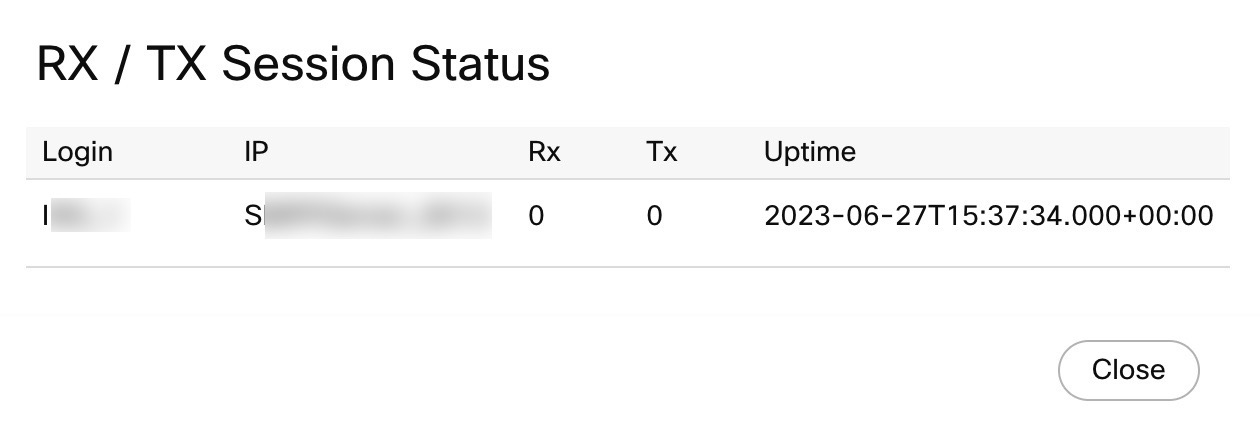
- RX - This stands for "Received" and refers to the number of messages that the ESME (External Short Messaging Entity) bind has received from the gateway. Click the value to view the status (online/offline) with the following details:
- Login - displays the login user name
- IP - displays the sever ip address from which the user has logged in
- Rx - displays the count of the messages received
- Tx - displays the count of the messages transmitted
- Uptime - displays the total time for the messages received

- TX - This stands for "Transmitted" and refers to the number of messages that the ESME bind has sent to the gateway. Click the value to view the status (online/offline) with the following details:
- Login - displays the login user name
- IP - displays the sever ip address from which the user has logged in
- Rx - displays the count of the messages received
- Tx - displays the count of the messages transmitted
- Uptime - displays the total time for the messages transmitted
- Status - Displays the status of the SMPP bind (Online/Offline)
- Online: This means that the ESME bind is currently connected to the gateway and can send and receive messages.
- Offline: This means that the ESME bind is not currently connected to the gateway and cannot send or receive messages.
- Action - Allows you to manage.
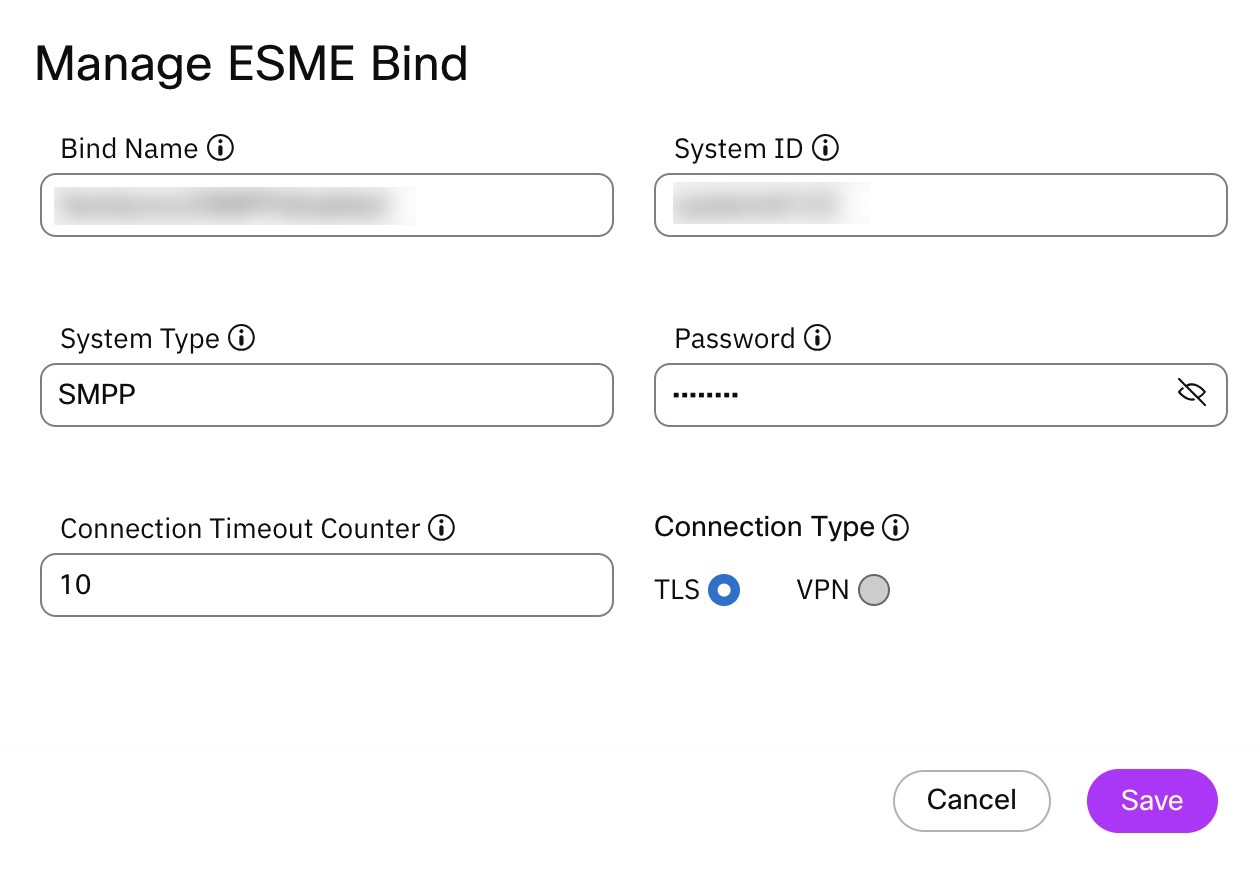
- Bind Name – Friendly name of the ESME bind. Can be named after the usecase ; the bind would be used for.
- System ID – The System ID parameter is used to identify an ESME at bind time
- System Type – The System Type parameter is used to categorize the type of ESME that is binding to the gateway. Default value would be ‘SMPP’
- Password – The password parameter is used by the gateway to authenticate the identity of the binding ESME.
- Connection Timeout Counter – Timeout between TCP Connection retries (seconds)
- Connection Type – Indicates the connection type that would be used for connecting to the SMPP server i.e. TLS or VPN
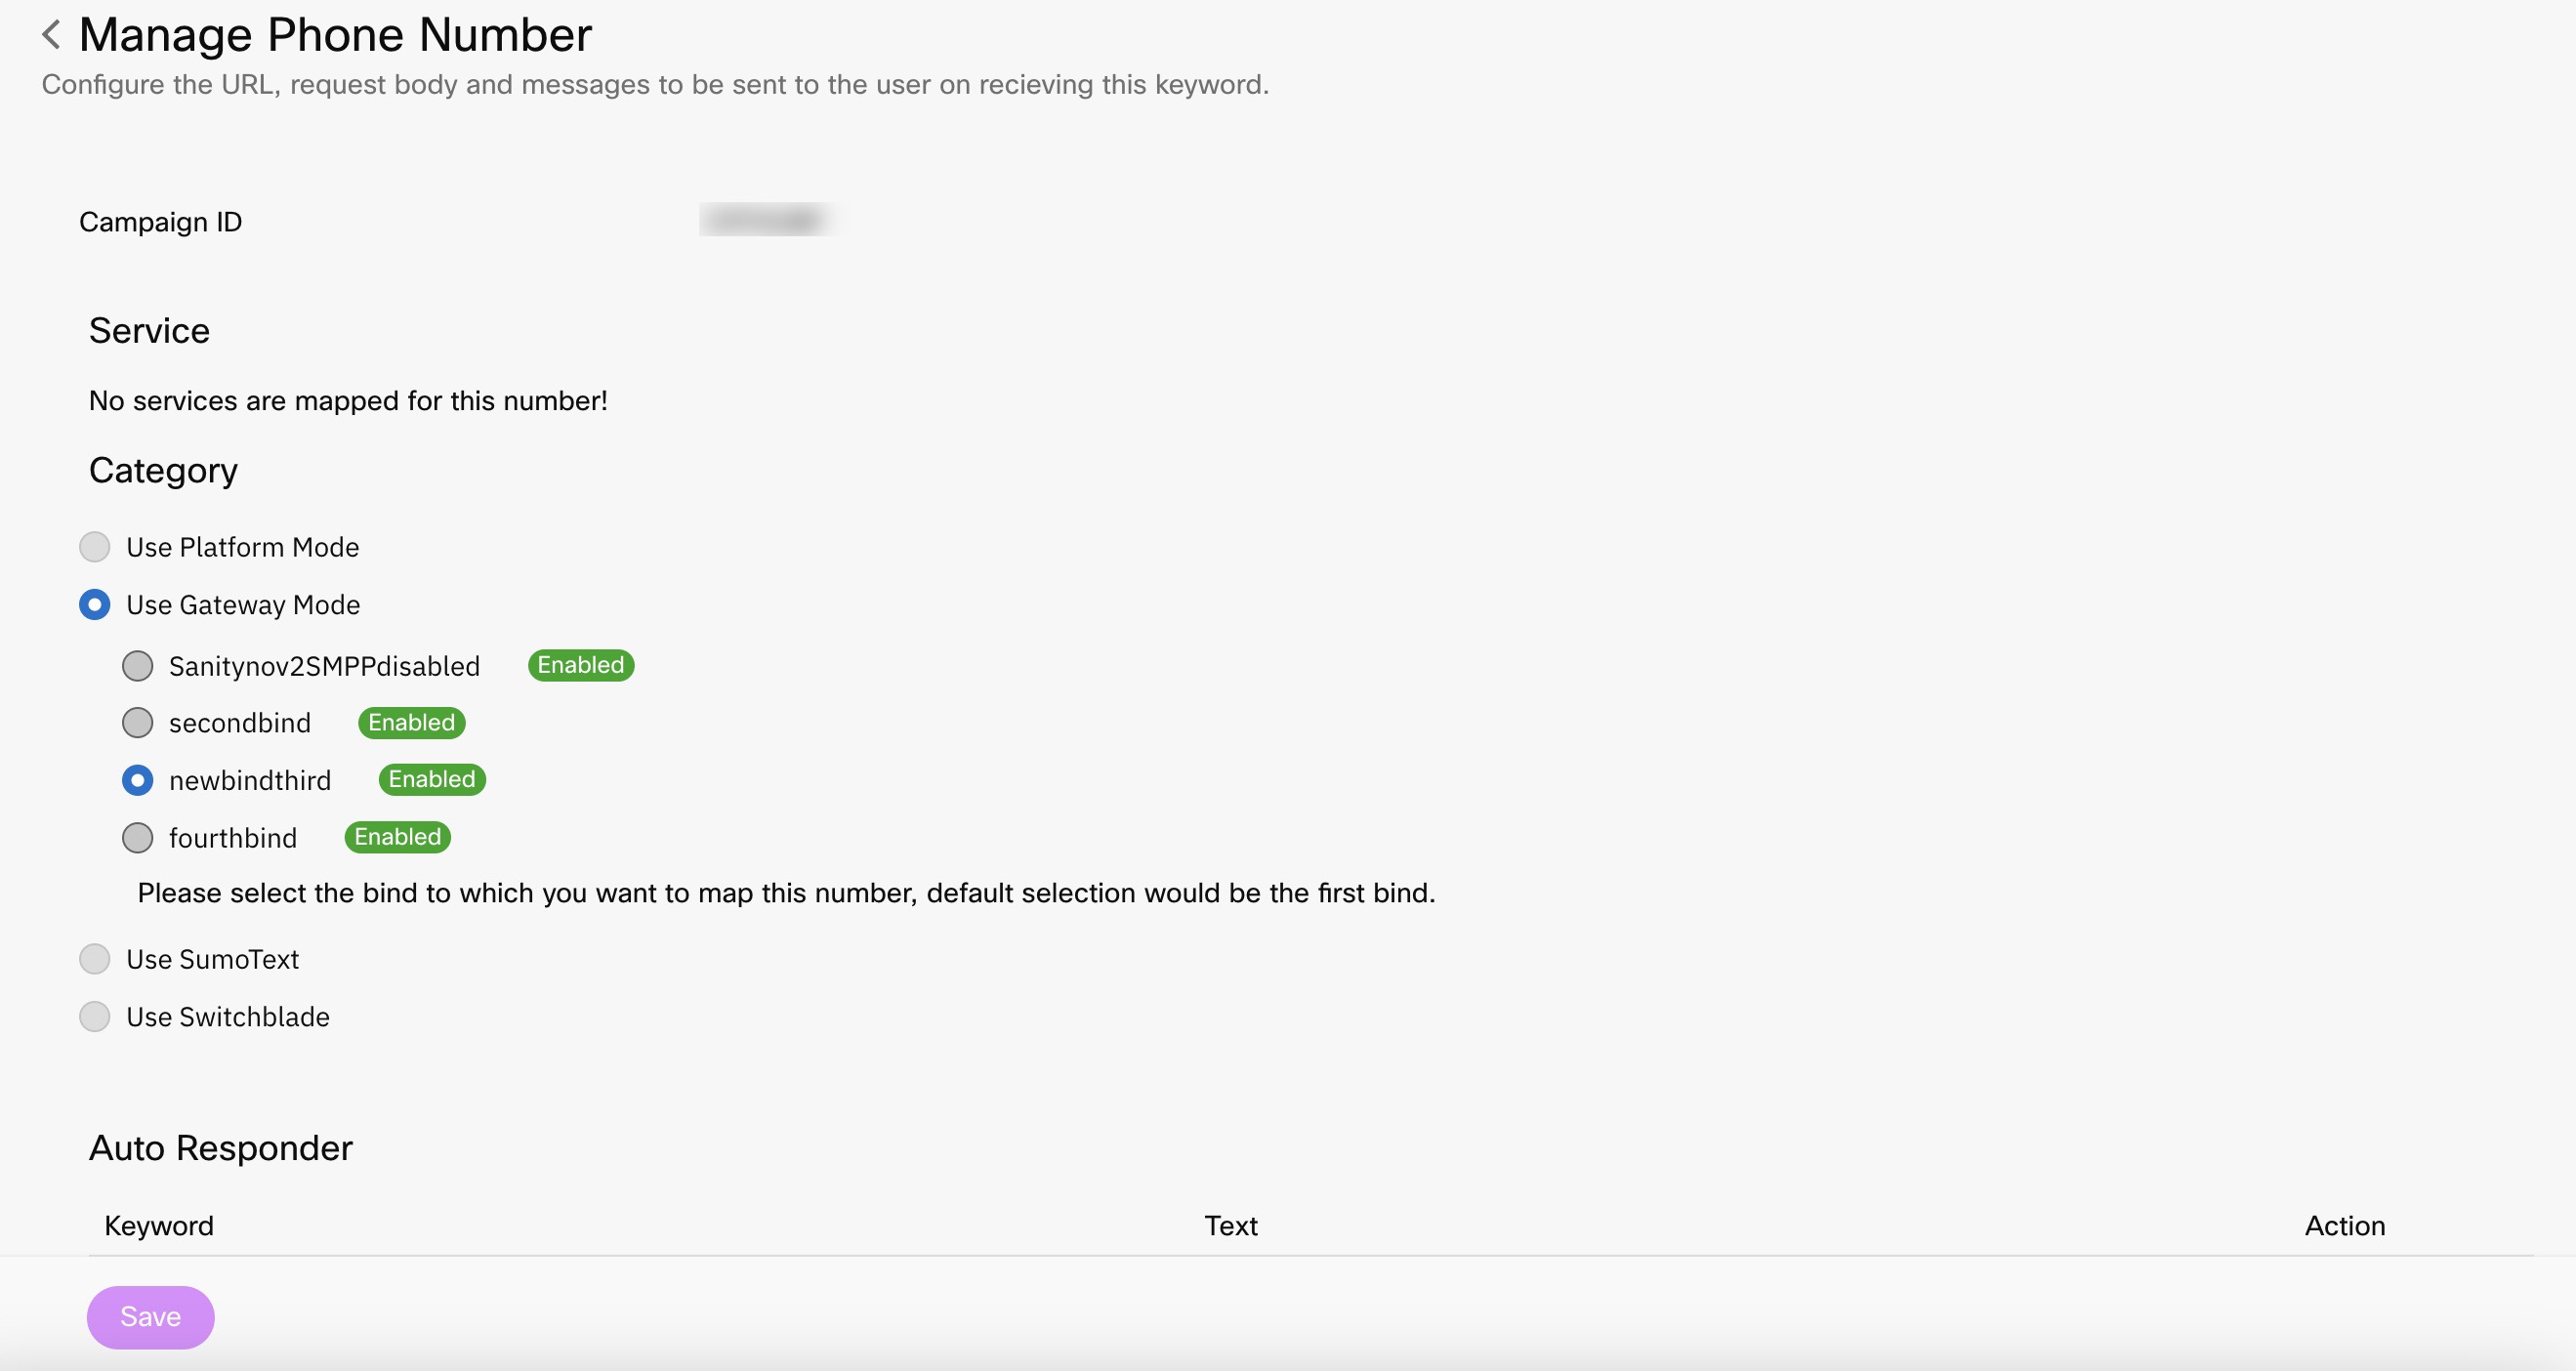
Assign Category for a Phone Number
- Go to Assets > Numbers.
- Click Actions > Manage associated with the phone number you want to assign a category for.
-
Under Category, select the relevant option. If you select Use Gateway Mode, you can choose which bind to use. By default, the first bind will be selected.
-
For SMPP category enabled numbers:
-
An additional section called Auto Responder will be displayed. In the context of the SMPP interface, a keyword refers to a specific word or phrase that triggers a pre-configured response from the autoresponder feature.
For example, if someone sends an SMS message to the SMPP-enabled number with the word "HELP" in the message body, the autoresponder would recognise the keyword "HELP" and send a pre-configured response back to the sender.
The text that is configured for the autoresponder feature is the message that will be sent back to the sender when a keyword is recognised. This text could be anything from a simple acknowledgement message to a more detailed set of instructions, depending on the use case and the needs of the users.
This autoresponder feature can be extremely useful for a variety of scenarios.
For example, it could be used to provide automated customer support, to offer quick and easy access to frequently requested information, or to create a simple voting system. By allowing users to trigger pre-configured responses with specific keywords, we can save time and effort while still providing a valuable service to the customers or users.
-
The Webhooks section is not applicable for the SMPP feature.
-
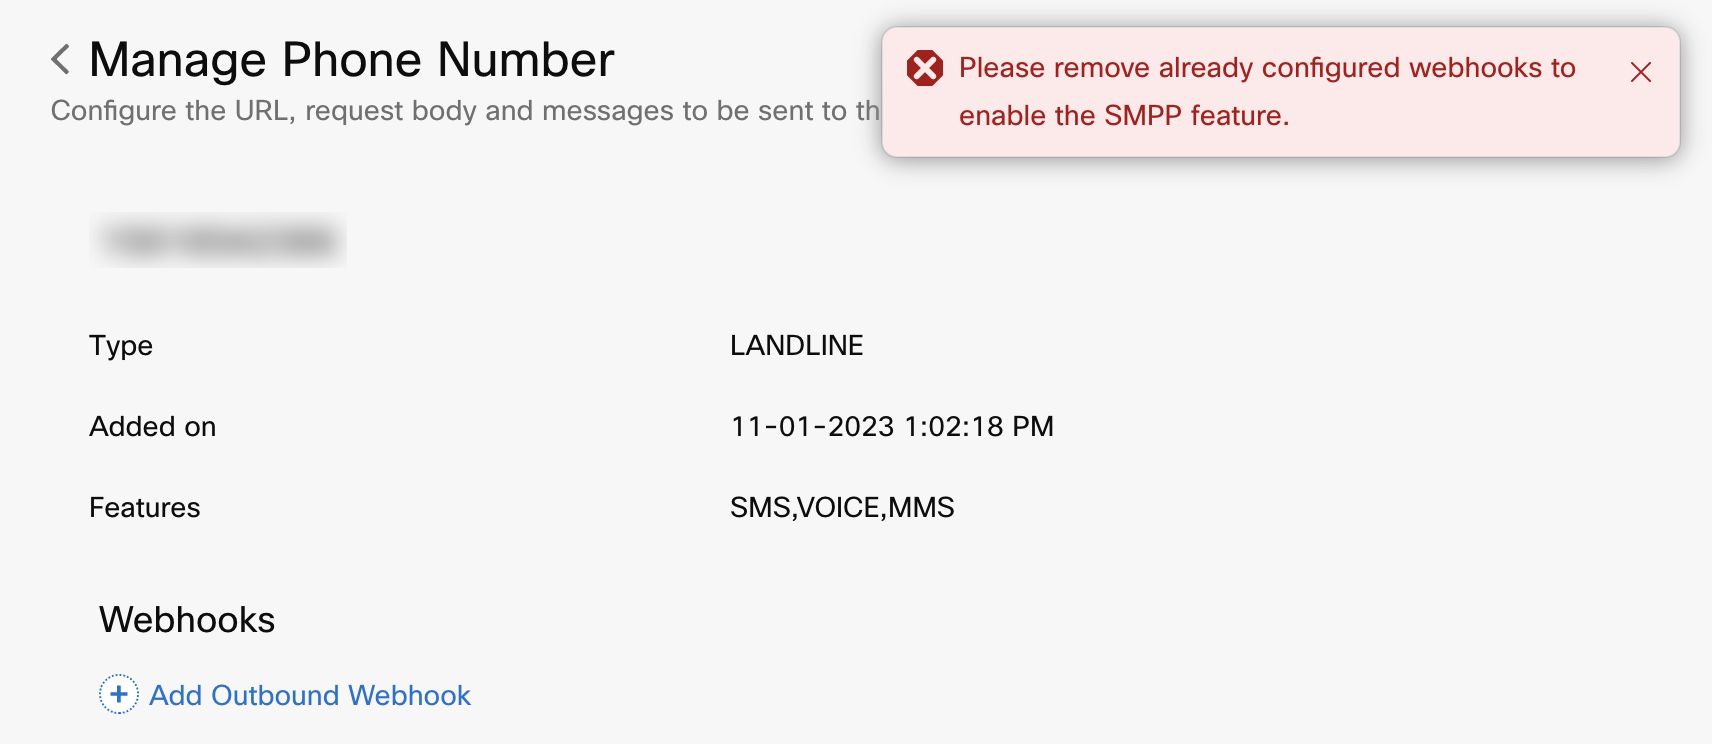
Note
If Outbound webhooks is already available for a number, the Use Gateway option will be disabled. If you try to select Use Gateway, the error message "Please remove already configured webhooks to enable the SMPP feature" is shown.
10 Digit LongCode (10DLC) Numbers
A 10DLC long code is a phone number with the same length as standard mobile or landline numbers (typically a 10-digit number in many countries). In the past, business messaging traffic over long codes was sent over the carriers’ P2P networks, which limited them to very low throughput and restrictions on use from the carriers. With the introduction of 10DLC A2P messaging, carriers in the U.S. have rolled out a verified method of sending A2P traffic which has removed these constraints on business messaging making 10DLC enabled numbers more suitable for lower volume business messaging.
With release v5.6.2, you can buy phone numbers and toll-free numbers by selecting the country as the United States and then the area code or location. These numbers can be provisioned for Voice, SMS, and MMS.
Buy Numbers for the United States
- Select the Country as the United States, and the Type as Landline.
- Select the Features as SMS.
- Search for numbers using either the Area Code or Location and click Buy Number next to the required number.


Note
For 10 Digit Long Code (10DLC) numbers in the US, you can now see the details of brand ID and campaign ID associated with the numbers when you hover over the 10DLC badge in the number listing page.
You can see the number that you have purchased on the Numbers page with a yellow color pending badge. In the Actions drop-down list box against that phone number with the SMS capability, click Request 10DLC. In the pop-up screen, select the Request 10DLC checkbox and then select the required brand ID and campaign ID. The brand ID and campaign IDs in the drop-down list are the list of brand and campaign IDs shared by the client with the operations teams and added in the Admin Console.
A badge saying 10DLC Requested appears next to the number. Once this number is enabled for 10DLC and the Sender ID, a badge 10DLC appears next to the number and it can be used in Flows and Rules.
Provisioning the Numbers for MMS, Custom, Bulk, Porting or Vanity TFN (Tollfree)
Click the For MMS, Custom, Bulk, Porting or Vanity TFN Number Requests link. A form appears. In this form, enter the message for requesting the number to provision for MMS and Tollfree number and click Send.

Process for supporting number procurement requests
The new number management system provides an option to request existing numbers to be text-enabled by attaching the Letter of Authority (LOA) documents. LOAs provide the necessary authorization needed for Webex Connect to register a number owned by another service provider for messaging on its network. The Webex Connect staff will authenticate the LOA before text enabling or porting the number.
Additionally, the newly enhanced number management system includes the following updates:
- Custom requests for MMS Numbers, bulk number purchasing, porting, and searches for vanity TFNs from your tenant.
- Adds the capabilities to buy Phone Numbers with ‘Voice’ and ‘Voice, SMS’ and Toll-free ‘Voice’ and ‘Voice, SMS’ in the United States and Canada
- Usage Reports: In the Numbers section we’ve added ‘US 10DLC Brand ID’, ‘US 10DLC Campaign ID’, and the ‘US TFN Verified Sender’.
Enabling an Existing Number for sending Text Messages
Click the For Text Enabling an Existing Number link. A form appears where you need to enter a request message for enabling the existing number for sending text messages.
The new number management system provides an option to request existing numbers to be text-enabled by attaching the Letter of Authority (LOA) documents. LOAs provide the necessary authorization needed for Webex Connect to register a number owned by another service provider for messaging on its network. The Webex Connect staff will authenticate the LOA before text enabling or porting the number.
Click Attach LOA and attach the letter of authority. Click Attach List and attach the list of numbers, in case of multiple numbers.

Send SMS from 10DLC and TFN numbers
With this release, you can send SMS from TFN and 10DLC enabled phone numbers in Webex Connect:
- All phone numbers added as a Sender ID with 10DLC enabled label confirmation can be used to send SMS via Messaging API v1, v2, and v3.
- All numbers are available to be used in the rules and flows to send and receive SMS in the tenant.
- TFN numbers can also be authorized as a verified sender ID by going through a similar registration process like 10DLC. Verified sender ID for TFNs permits high messaging and prevents carrier blocks.
TFN and VSF
The time taken for number provisioning may vary by region based on the operator requirements.
For example, in the US, TFNs may take 2 weeks, and long codes take about 2 days, based on review and registration requirements.
The current processing time for a verified sender form for TFN to be vetted and approved is estimated at 15 business days.
The Cisco code management communicates the approval via email and updates all the labels indicating that your Toll-Free Numbers (TFNs) are cleared to send messages.
Reserved Keywords
You can reserve and associate particular keywords to a specific number. Up to a maximum of 50 keywords is allowed per number.
To reserve a keyword:
- Go to Assets -> Numbers.
- Click Manage next to the number to which you want to associate the keywords.
- In the Keywords List section, enter a keyword of 3-30 characters with no spaces and special characters and click Add Keyword. If the specified keyword is available, the platform adds it to your Reserved Keywords list.
Once you add a keyword as a reserve keyword, you can no longer use that keyword as the trigger for a Rule or a Flow within Webex Connect.
When a reserved keyword is received as an SMS, even if you are having a conversation with a customer using a flow, only the URL configured against the reserved keyword will be called, and the flow won’t receive this message. For more information refer to the Start Node chapter.
Delete Number
You can delete a phone number using the Delete option under the Actions menu.
To delete a phone number:
- Go to Assets -> Numbers.
- Click Action -> Delete associated with the number you want to delete.
- On the confirmation dialog, click Delete to confirm the deletion.
When you delete a number, it is deactivated from all the related services and marked as inactive. The inactive status will be shown to all the other users in tenant.
Handle incoming calls via callback URL
Enable this to configure the callback URL that needs to be notified when an incoming call comes to this number. Once configured, this number cannot be used as a trigger for Incoming calls in Rules or Flows. To use it as part of flow you must disable it.
Detailed description of Handling Incoming Calls
Updated 8 months ago