Using Custom Node to configure your own integrations
Custom node allows you to add new system integrations and make them available as a resusable node across flows. Here's how you can use it.
Step 1: Go to Integrations
- Hover over Assets and click Integrations from the menu bar on the left to navigate to the Integrations screen.
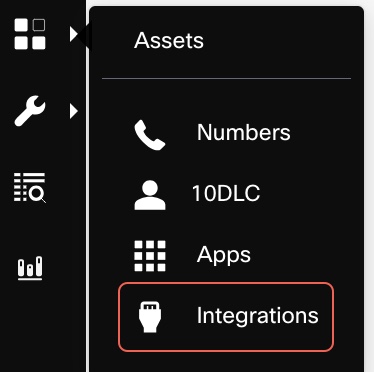
Assets -> Integrations
Step 2: Add a custom node
- Click ADD INTEGRATION button and select CUSTOM NODE from the drop-down.
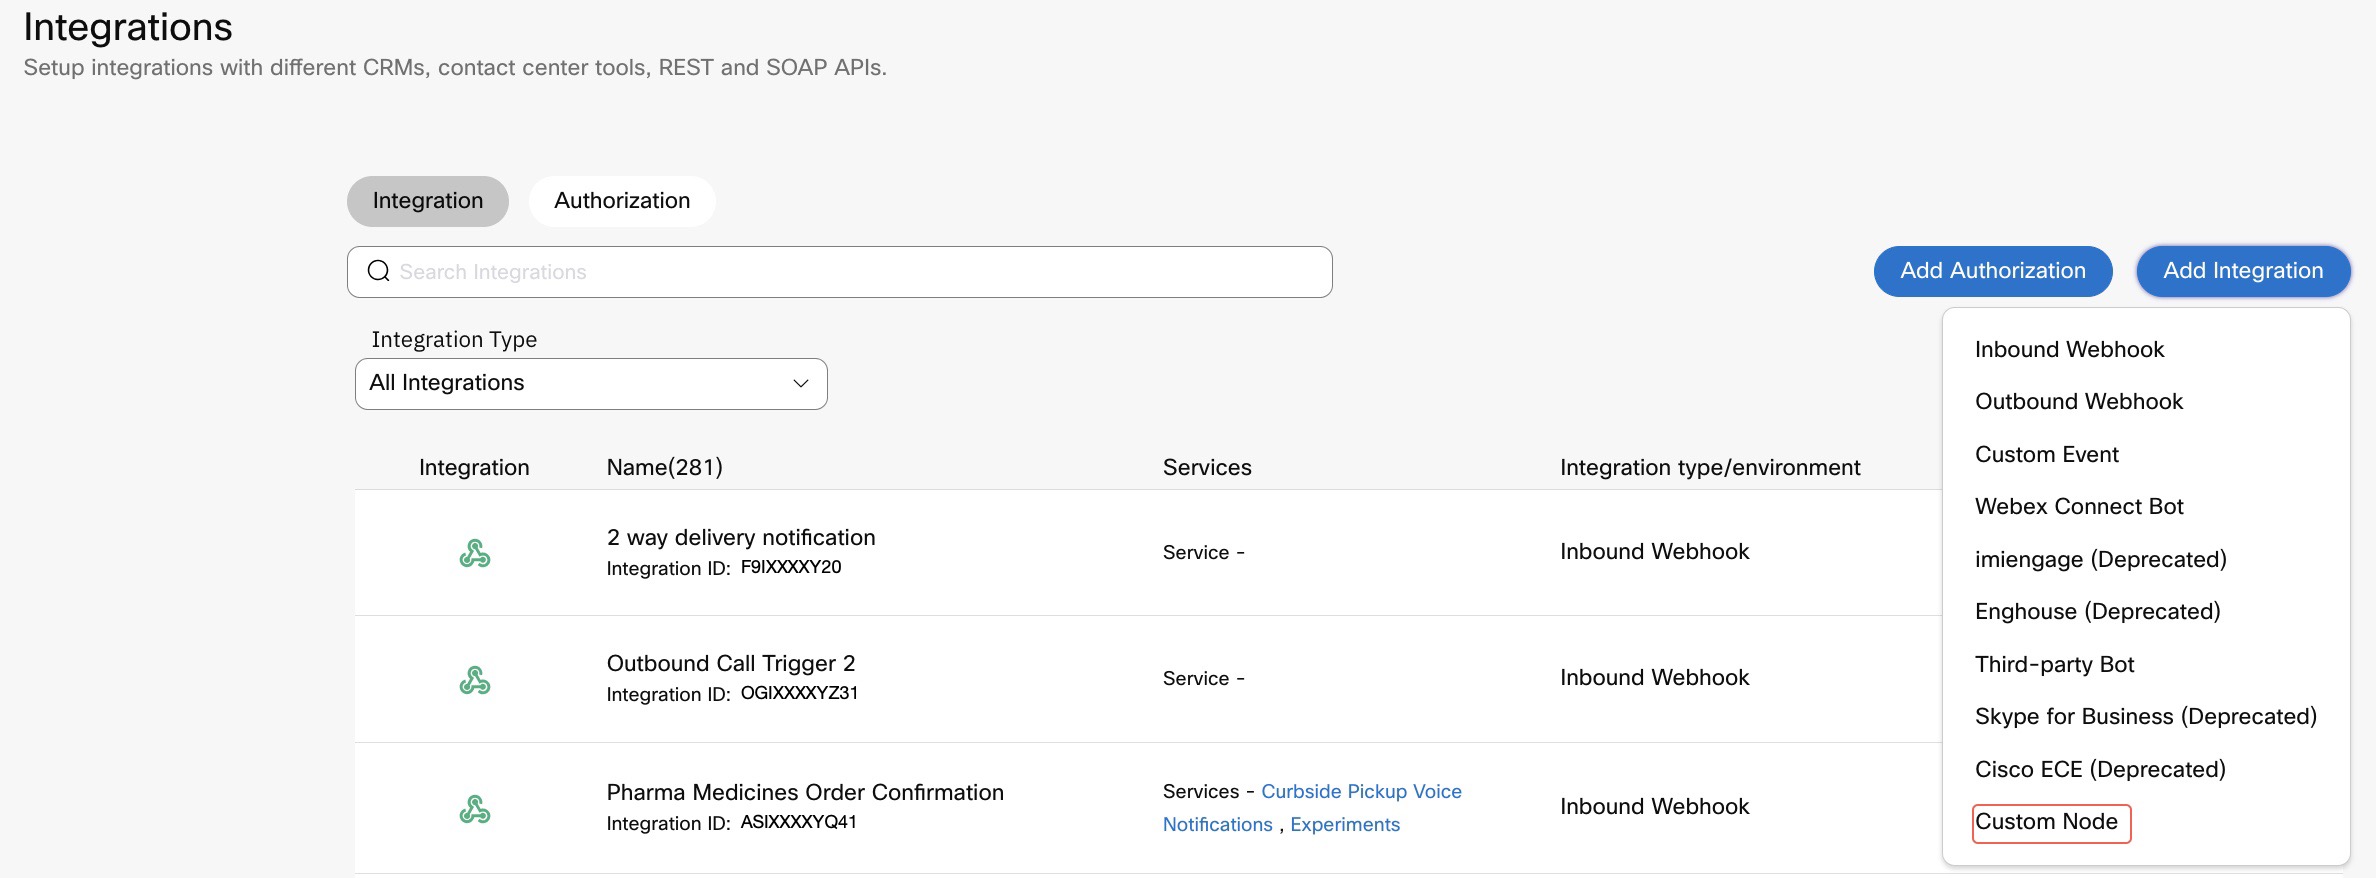
Add Integration -> Custom Node
Once you click the Custom Node option, a 'Create new custom node' pop-up appears as shown below. As you would notice, Webex Connect enables you to integrate with both Rest API and Soap API compliant systems.
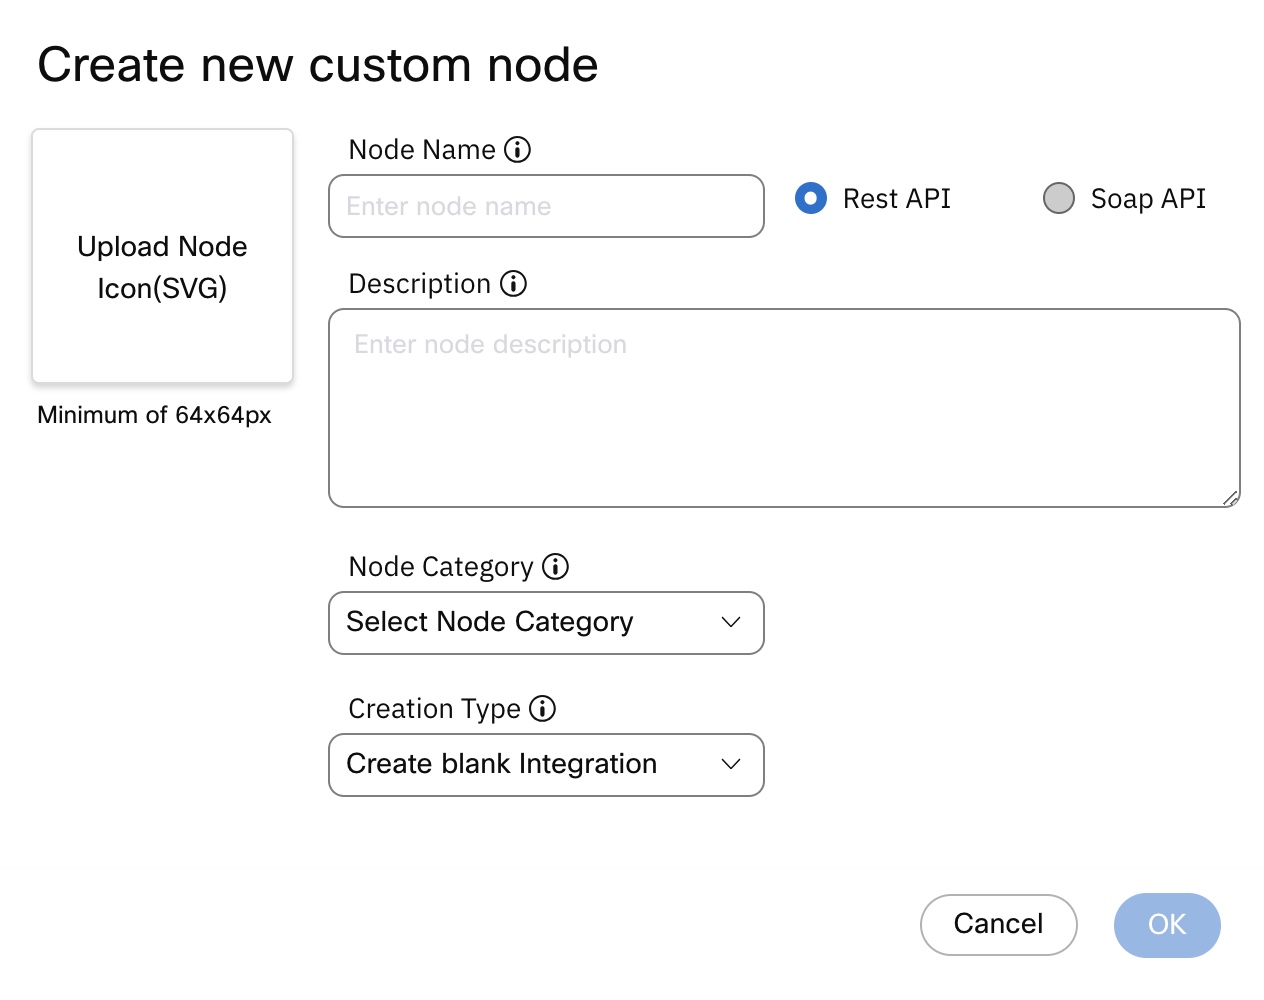
Provide a user friendly node name and description. Upload a relevant SVG image for your integration.
In this example, we are going to show how you can integrate the REST API integration option to configure a reusable integration with IBM Watson Tone Analyzer API.
Note:
The following integration follows the IBM Watson Tone Analyzer API reference.
Step 1: Configure the Watson REST API under the SETTINGS tab
- Enter a name in the Request Name field on the Request Details window.
- Choose POST as the TYPE from the drop-down.
- Enter the API Resource URL: https://cloud.ibm.com/apidocs/tone-analyzer in the Resource URL field as available on IBM Watson API reference.
- Configure the request parameter version as follows:
- Enter “version” in the Parameter field
- Choose DYNAMIC from the Parameter value type drop-down.
- Enter “version” in the Field Value field.

Configure Request
Step 1.1: Configure the Authorization
- Choose BASIC AUTH as the Authorization Type.
- Configure the User Name
- Enter username in the Username field.
- Choose DYNAMIC as the Parameter value type from the drop-down.
- Enter Username in the Field name field.
- Assign a Password
- Enter the password in the Password field.
- Choose DYNAMIC as the Parameter value type from the drop-down.
- Enter Password in the Field name field.

Configure Authorization
Step 1.2: Configure the Headers
- Enter Content-Type as the Parameter.
- Choose Static from the Parameter value type drop-down.
- Enter application/json under the Parameter value field.

Configure Headers
Step 1.3: Configure the Body
- Choose JSON(application/json) from the drop-down.
- Enter the code as shown below:
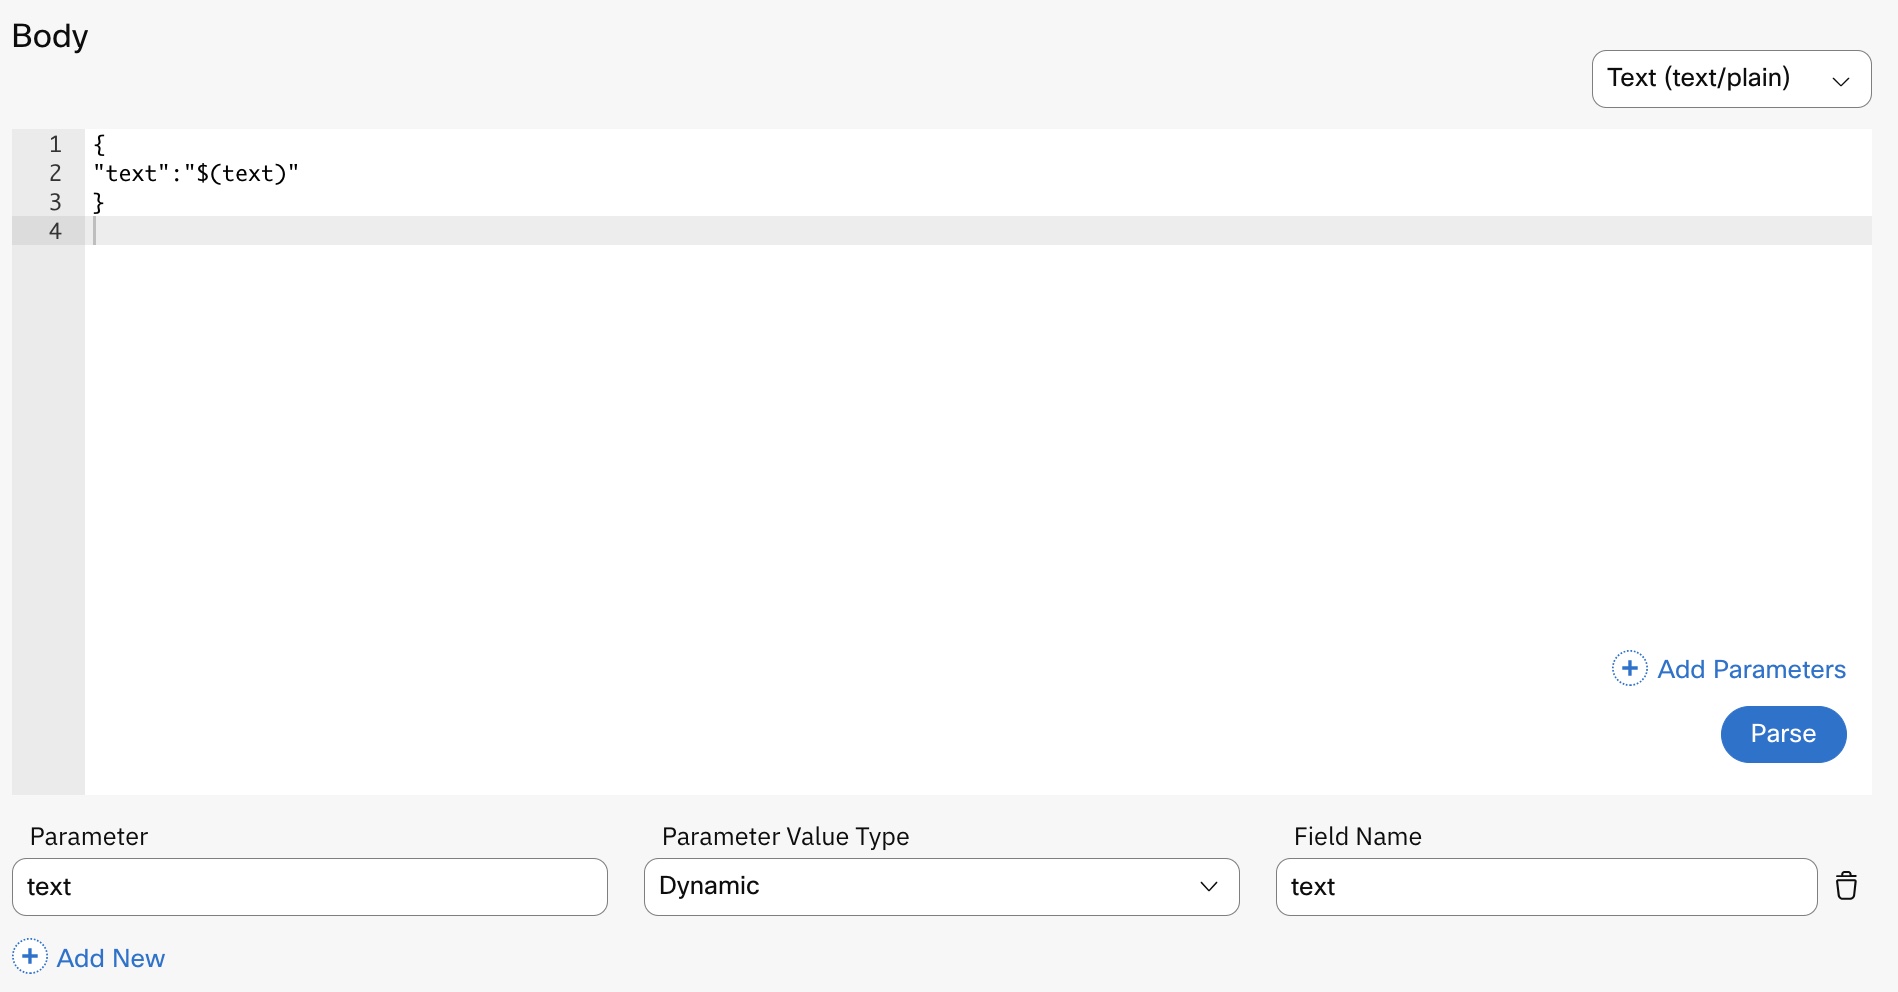
Configure Body
{
"text":"$(text)"
}
- Enter text under the Parameter field.
- Choose DYNAMIC as the Parameter value type from the drop-down.
- Enter text under the Field Value field.
Step 1.4 : Configure the Response
- Configure a node event for the success response :
- Enter success under the Node Event field.
- Choose HTTP Status from the drop-down.
- Choose equals from the drop-down.
- Enter the value 200 in the Value field.
- Choose Success from the Node Edge drop-down.
- Click Add New and configure another node event for an error response
- Enter error under the Node Event field.
- Choose HTTP Status from the drop-down.
- Choose not equals from the drop-down.
- Enter the value 200 in the Value field.
- Choose Error from the Node Edge drop-down.

Configure Node Edge
3.Map the response object to a node variable
- Enter ToneId in the Parameter Name field.
- Choose Body from the drop-down.
- Enter $.document_tone.tones[0].tone_id under Response Path field.
- Click Add New from the bottom.
- Enter ToneName in the Parameter Name field.
- Choose Body from the drop-down.
- Enter $.document_tone.tones[0].tone_name in the Response Path field.
- Click Add New from the bottom.
- Enter ToneScore in the Parameter Name field.
- Choose Body from the drop-down.
- Enter $.document_tone.tones[0].score in the Response Path field.

Configure Response Path
Step 2: Configure the NODE UI Tab
- Enter a name in the INFORMATION TEXT field (e.g., Authentication).
- Choose Text box from the Field Type drop-down under Username.
- Check the Mandatory parameter checkbox.
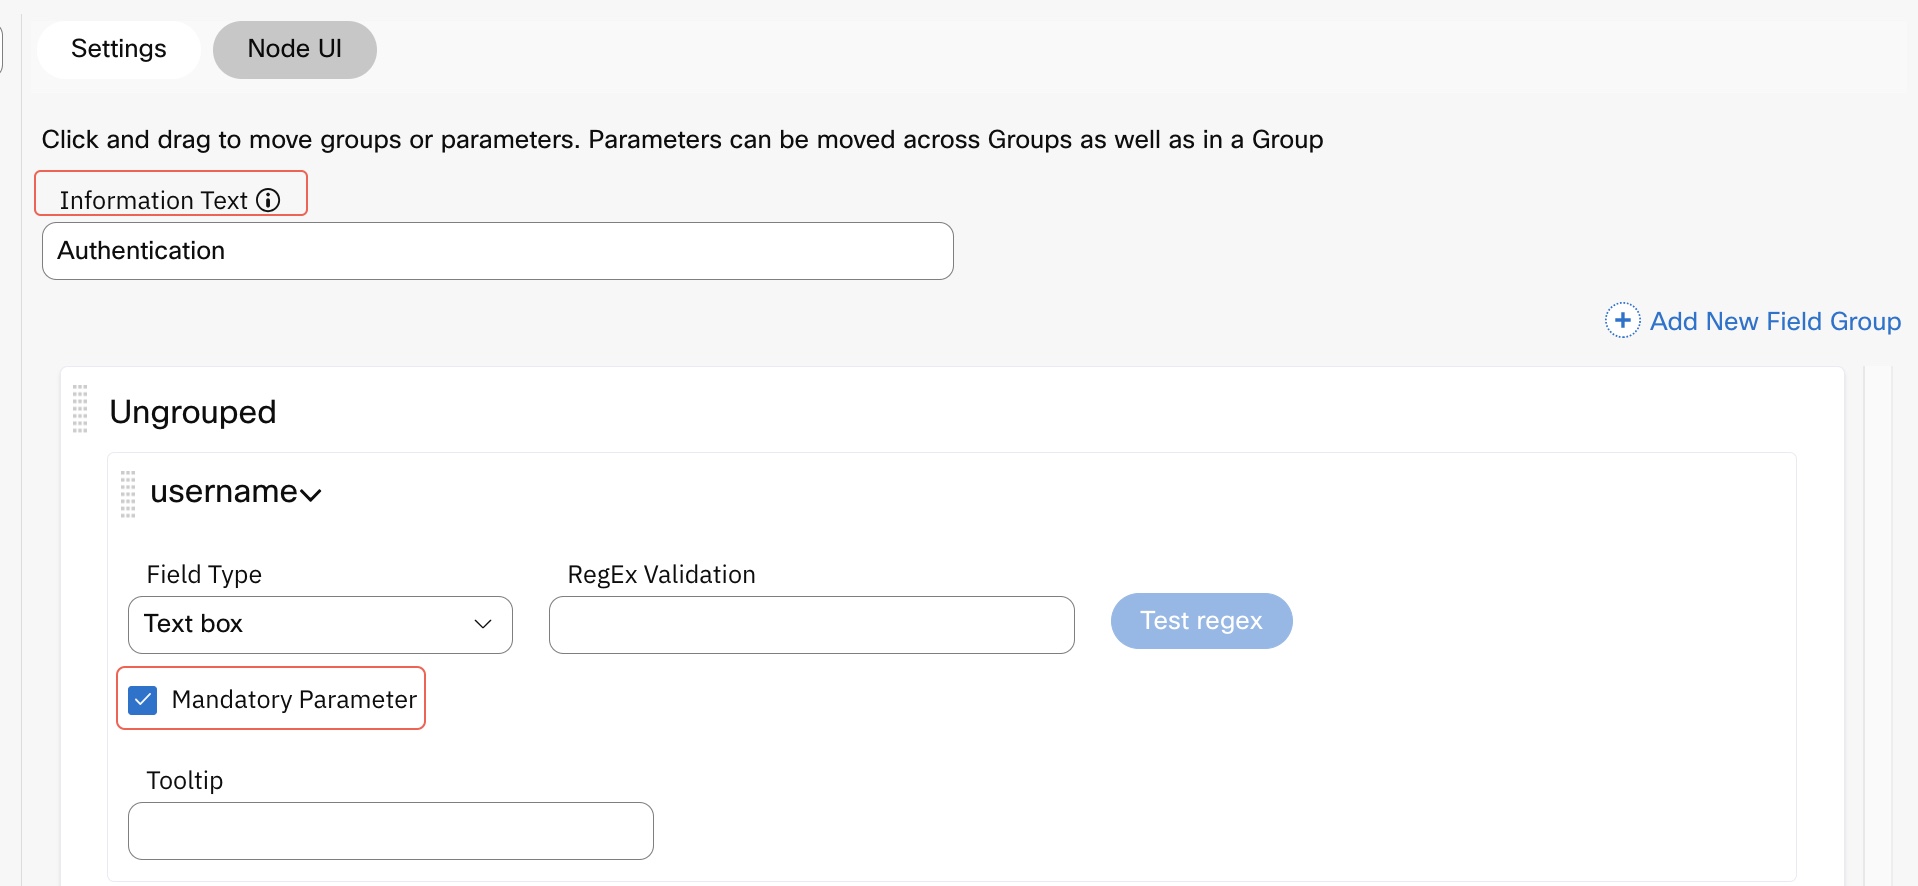
Node UI
- Choose Text box from the Field Type drop-down under Password.
- Check the Mandatory parameter checkbox.
- Choose Text box from the Field Type drop-down under version.
- Check the Mandatory parameter checkbox.
- Choose Text box from the Field Type drop-down under user input.
- Check the Mandatory parameter checkbox.
- Click SAVE at the bottom of the screen.
Updated about 1 month ago
