Using bot as a Virtual Agent in Webex Engage
This article covers the steps required to configure a bot in the bot builder as a Virtual agent in Webex Engage.
Webex Engage setup
To use a bot as a virtual agent in Webex Engage, you will need to create a virtual agent, create and configure a channel asset and set up appropriate intelligent routing rules.
Creating a virtual agent
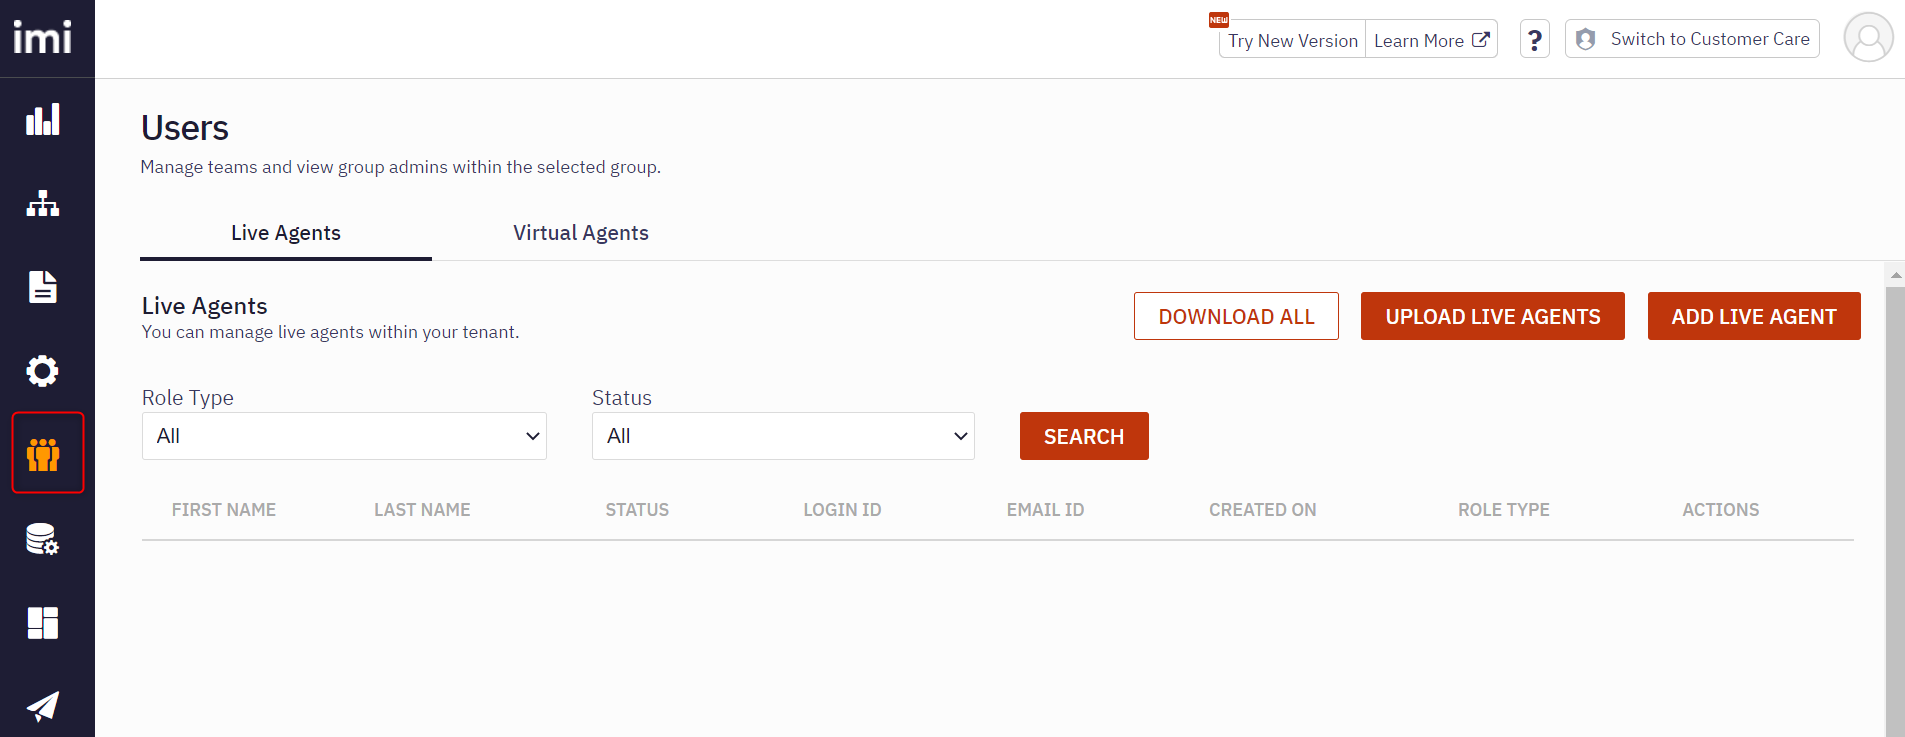
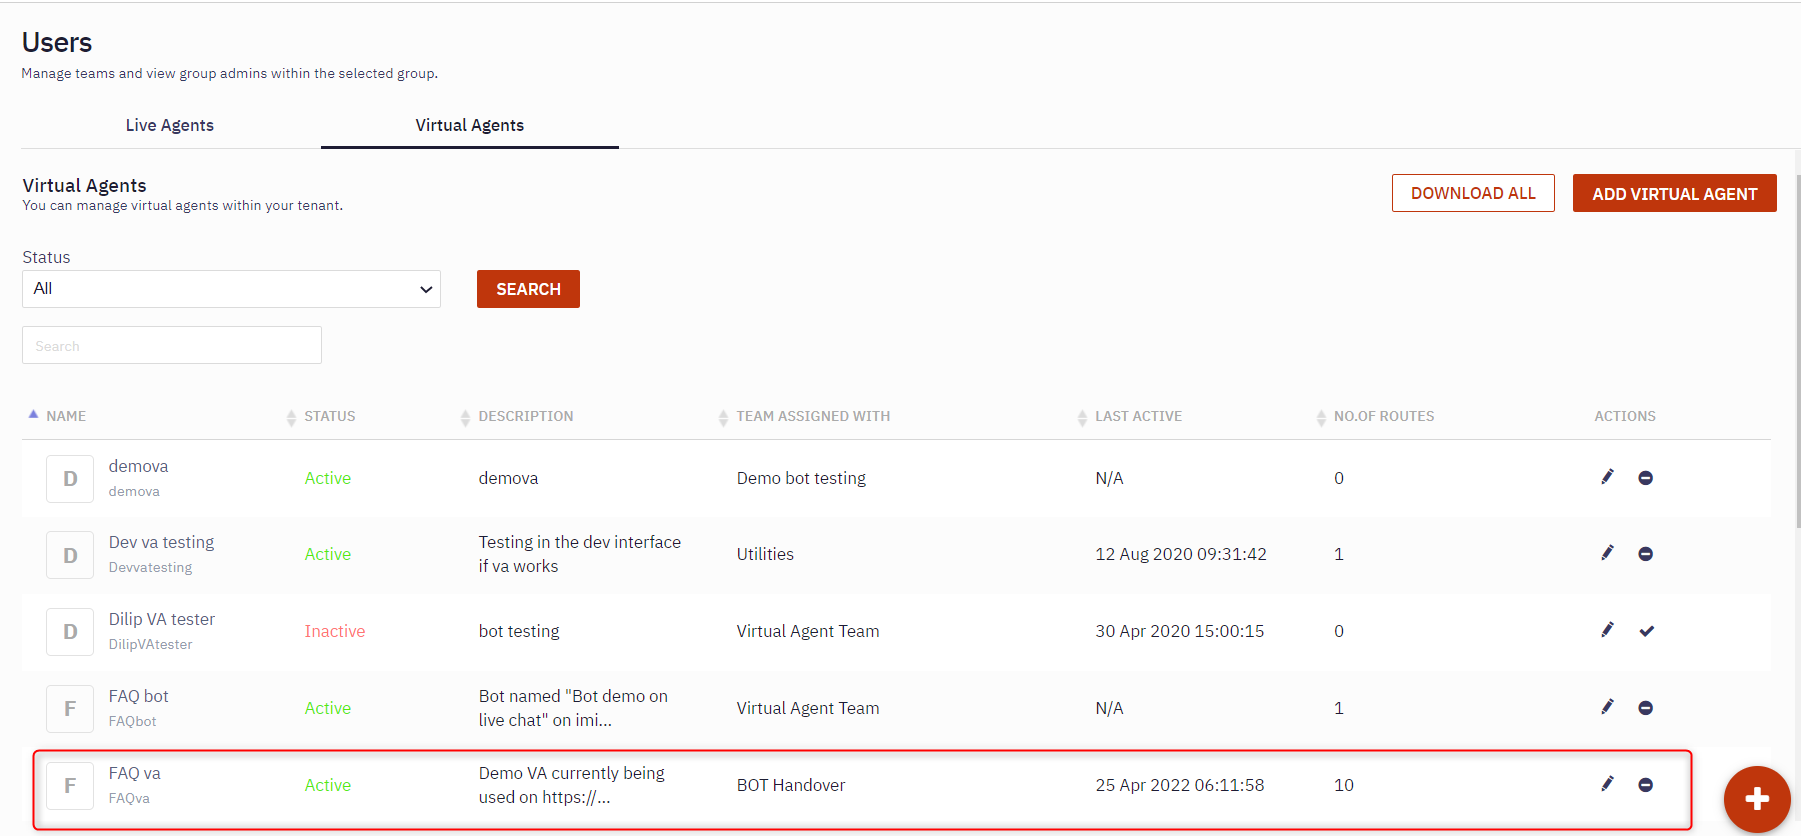
- Click Users on the left vertical navigation bar. The Users screen appears.
- Click the Virtual agents tab.
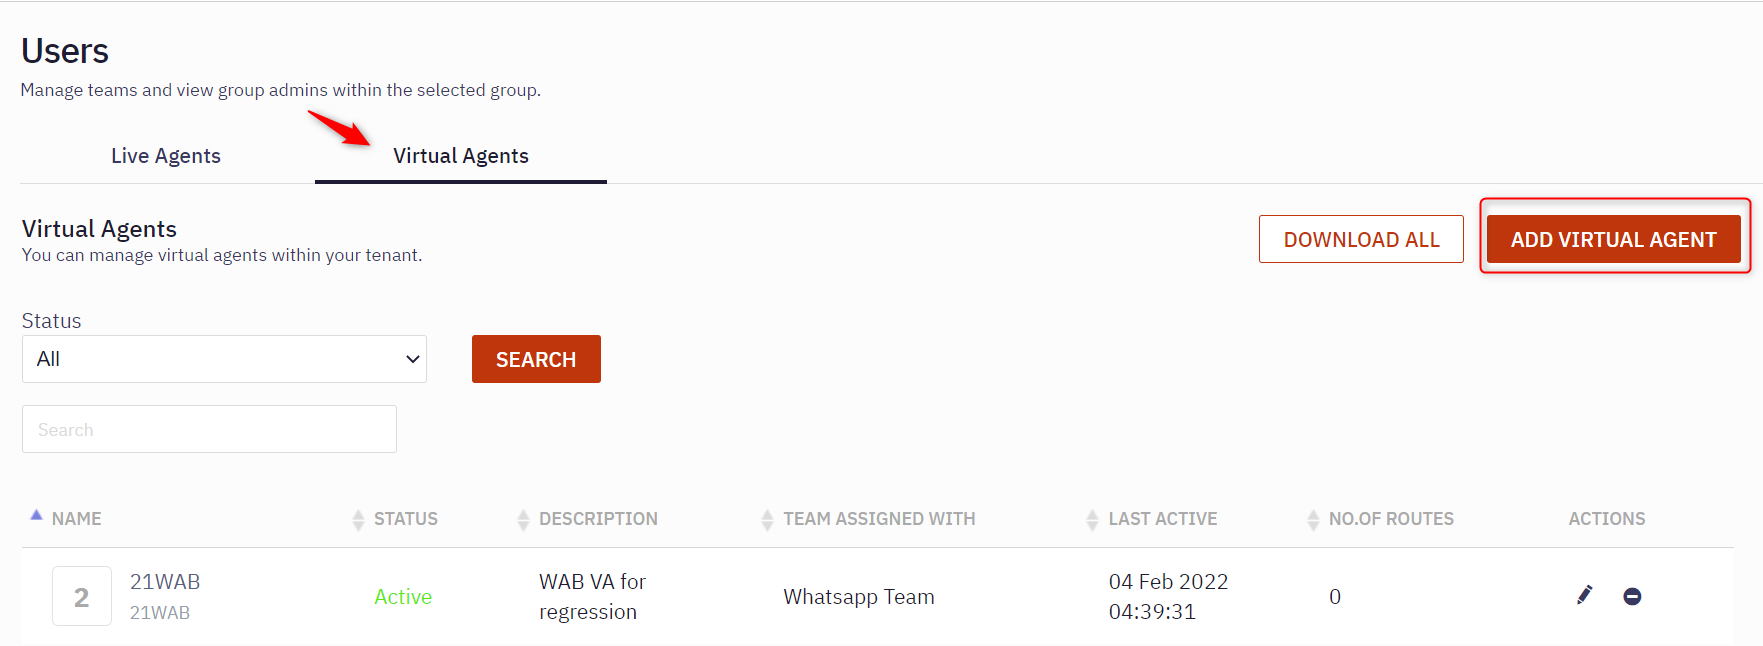
- Click Add Virtual agent. The Add Virtual agent screen appears.
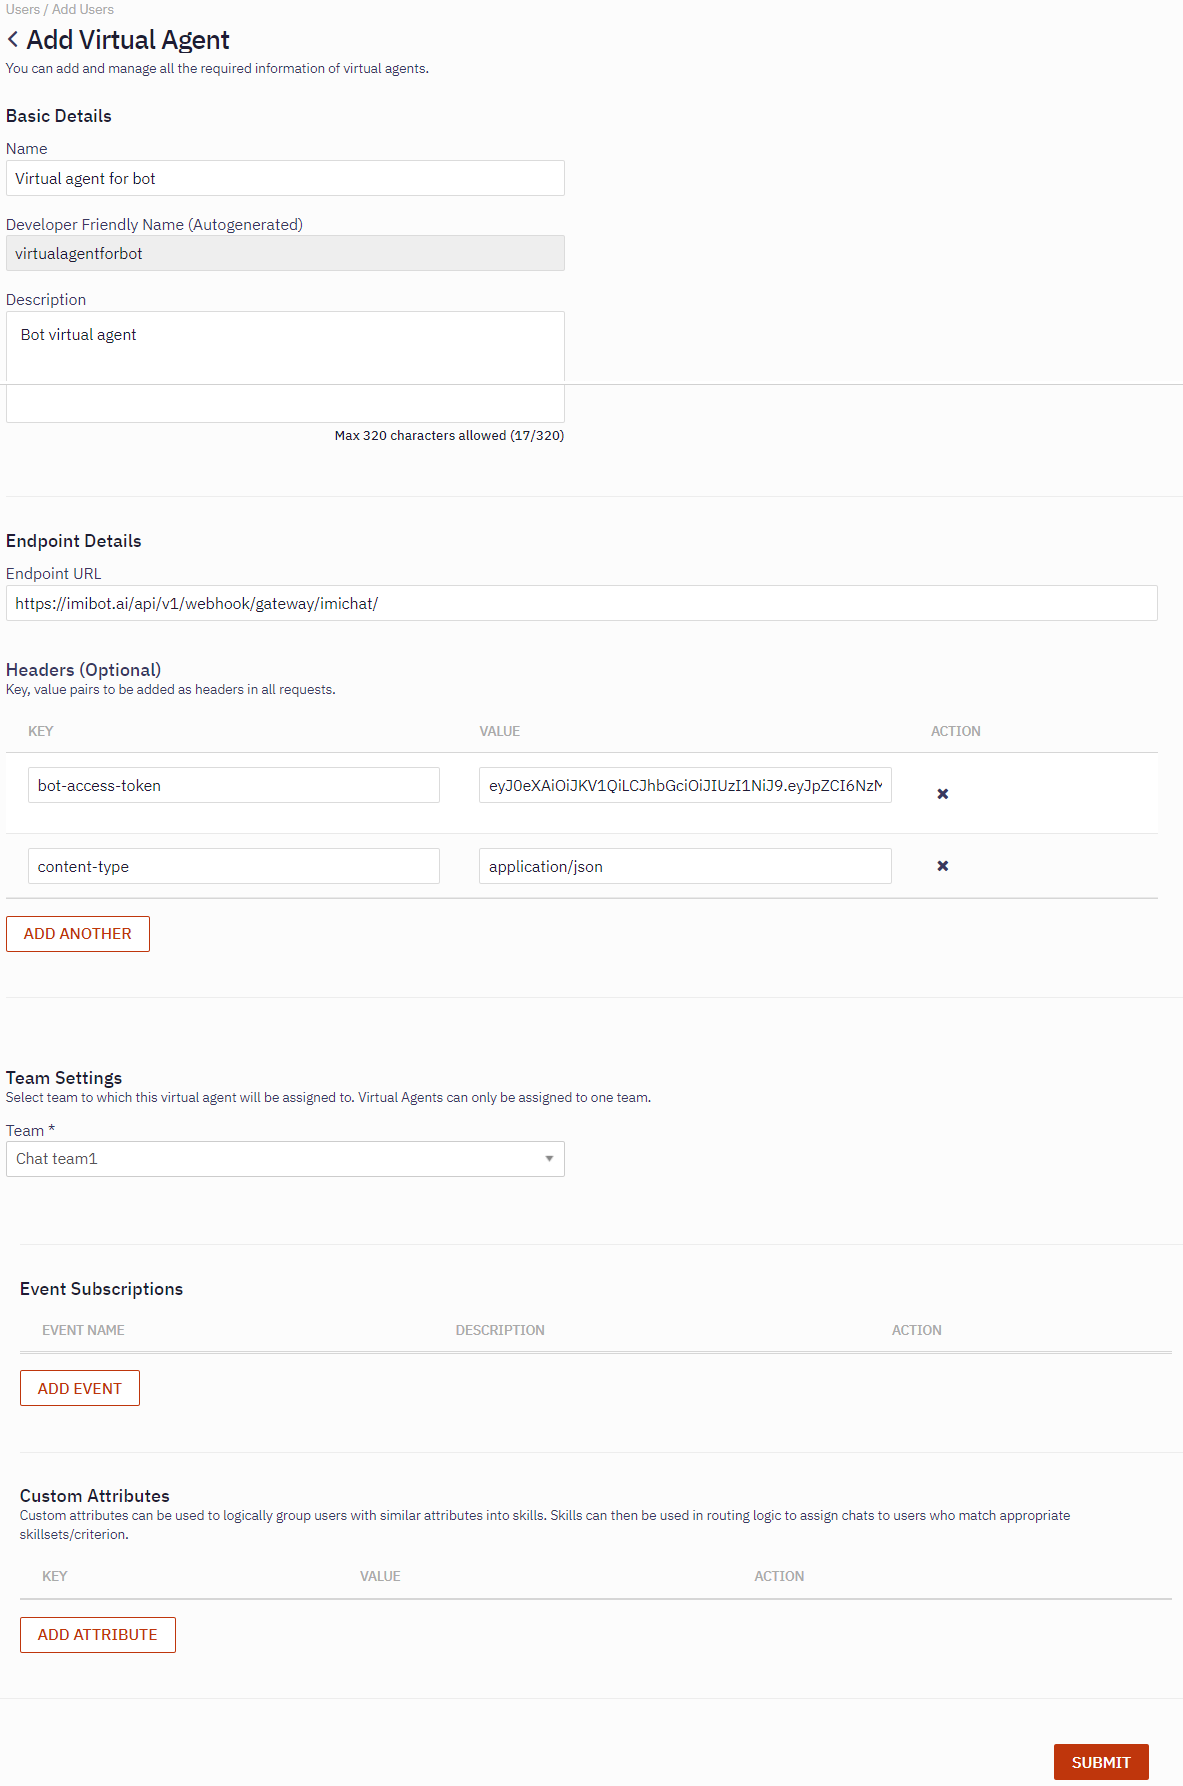
- Specify a name and description for the VA. Make sure the name is unique and easily recognizable
- Specify the Endpoint URL in the respective field
- Add the headers in the headers field
- Select the virtual agent team to which this virtual agent must be added, in the Team settings section.
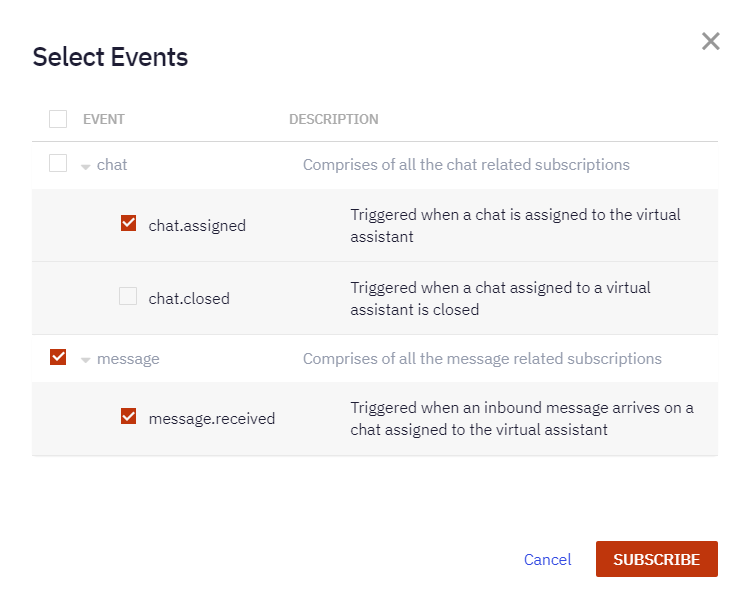
- Select the event subscriptions.
- Select the Custom attributes.
- Click Submit.
Configuring a channel asset
- Click Floating Action Button on the bottom-right-corner of Admin Console.
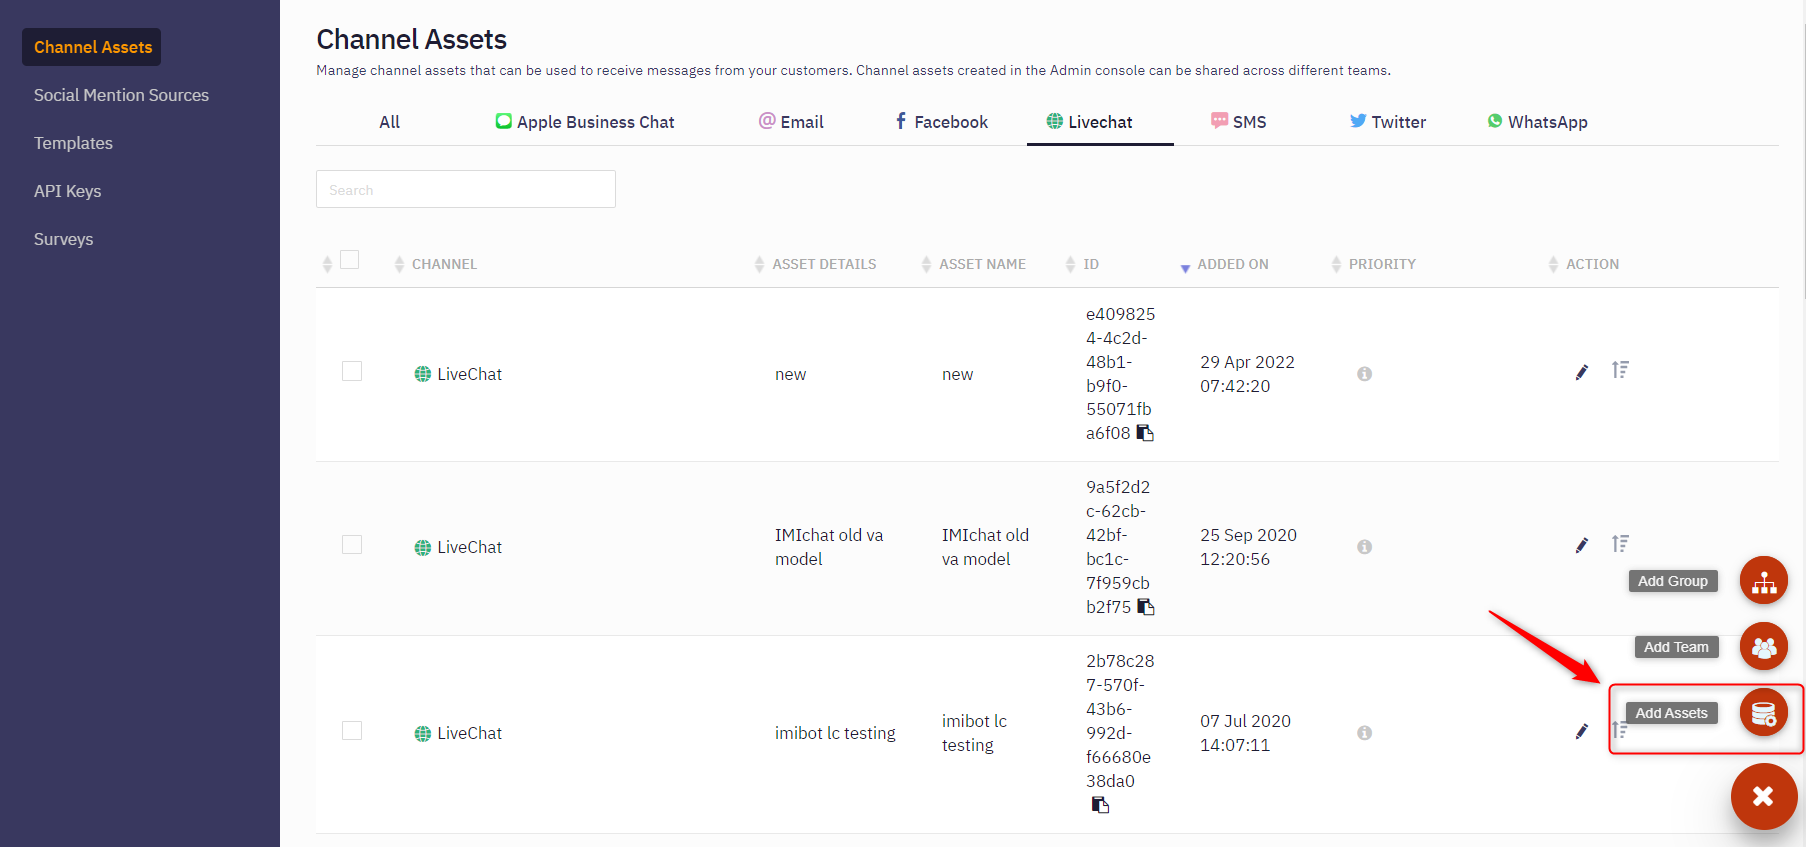
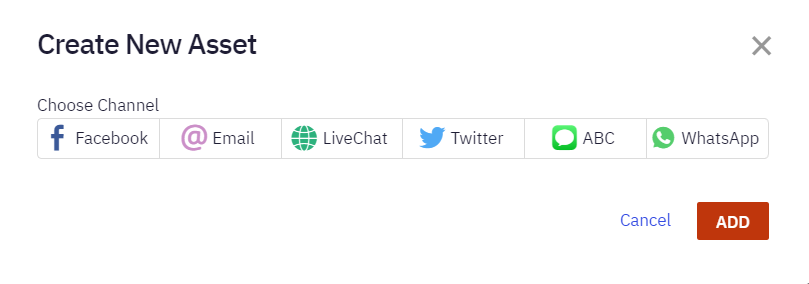
- Click Add Assets and select LiveChat from the asset selection window and click Add.
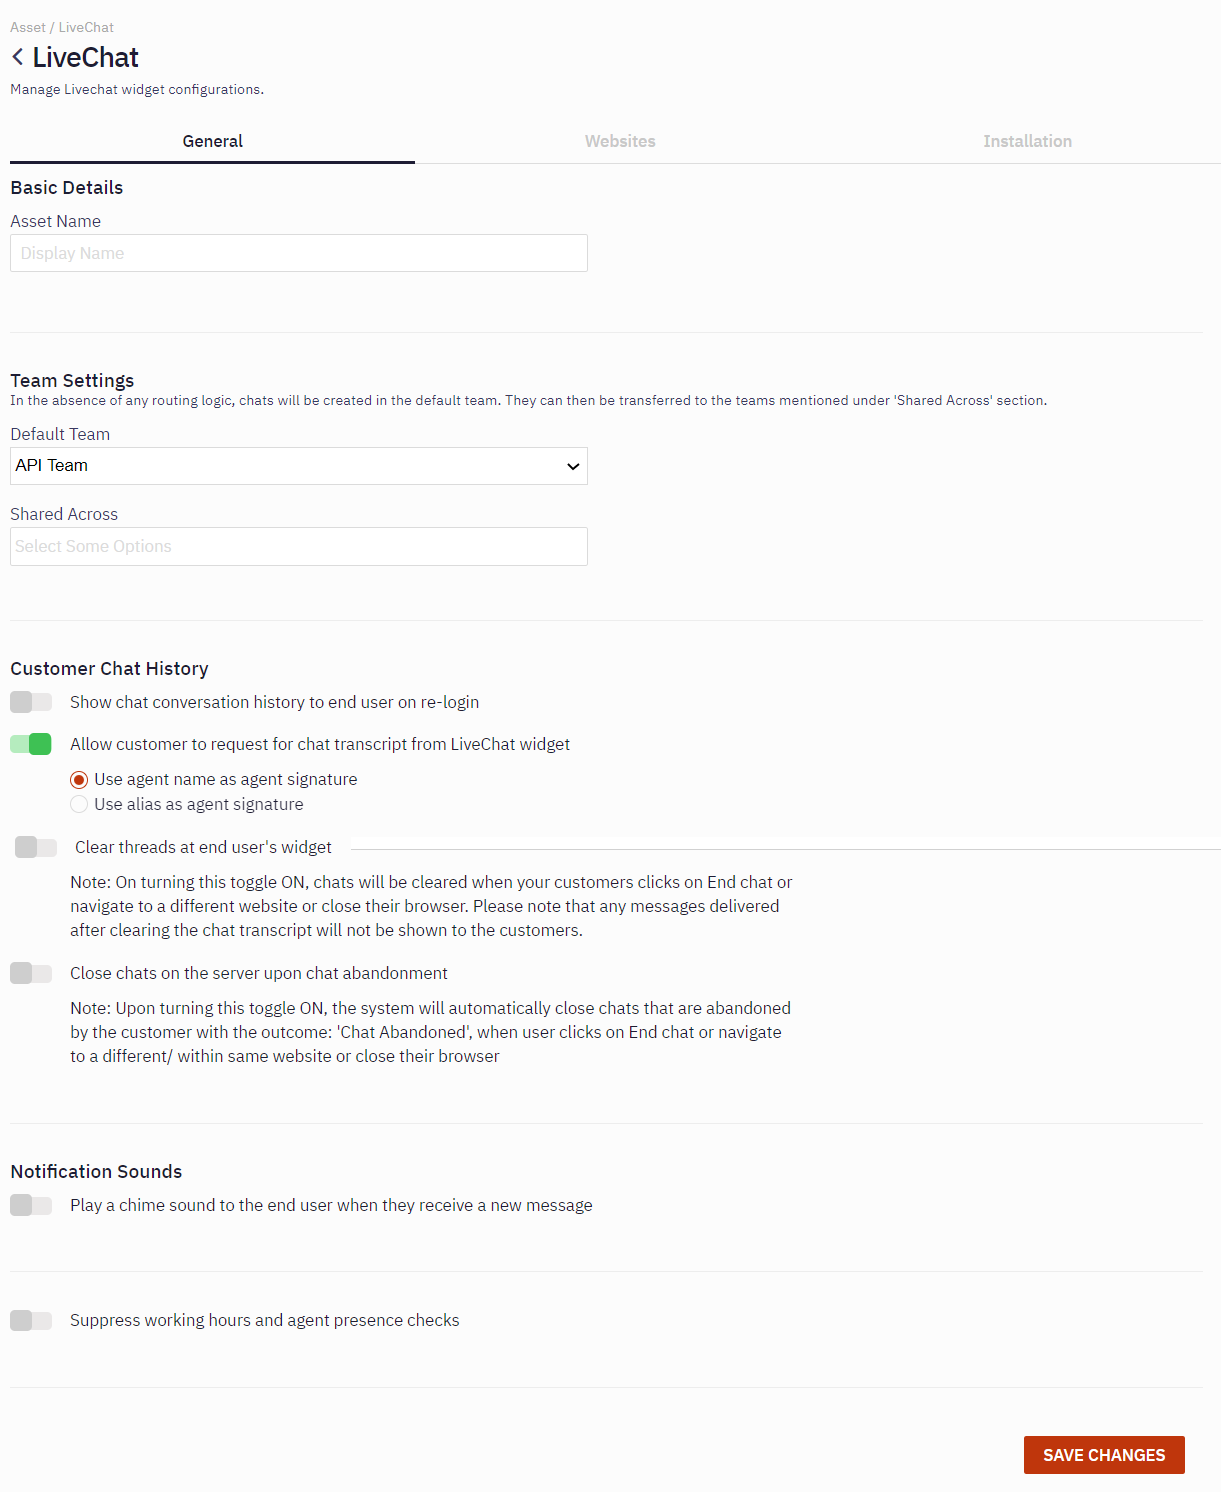
- Specify this information in the Basic Details tab of the General tab:
Asset Name
The name of the asset.
Default team
The default team across which the LiveChat widget is shared
Show chat conversation history to the end user on re-login
Turn ON this toggle to show or hide the previous chat conversation history to customers on re-login.
Allow customer to request for chat transcript from LiveChat widget:
Turn ON this toggle to allow customers to request for chat transcript from the LiveChat widget.
Clear threads at end user's widget
Turn ON this toggle to clear chats when the customer clicks on End chat or navigate to a different website or close their browser.
Close chats on the server upon chat abandonment
Turn ON this toggle button to automatically close chats on the server when the chats are abandoned by the customer.
Notification sounds
Turn ON this toggle to play a chime sound to the end user on receiving a new message.
Suppress working hours and agent presence checks
Turn ON this toggle to make the widget available 24*7 regardless of whether the team is out of scheduled working hours, or no agents available. - Click Save Changes
Note: Make sure that the asset you want to integrate the virtual agent with also has the virtual agent team added either as the default team or shared across team.
Asset through which consumers can chat with the virtual agent and handover the conversation to the agent.

Configuring a website for LiveChat asset
Webex engage provides an option to use a single LiveChat widget across multiple websites.
To configure or add a website:
- Click Add Website on the top-right corner of the screen.

The Website Settings screen appears.
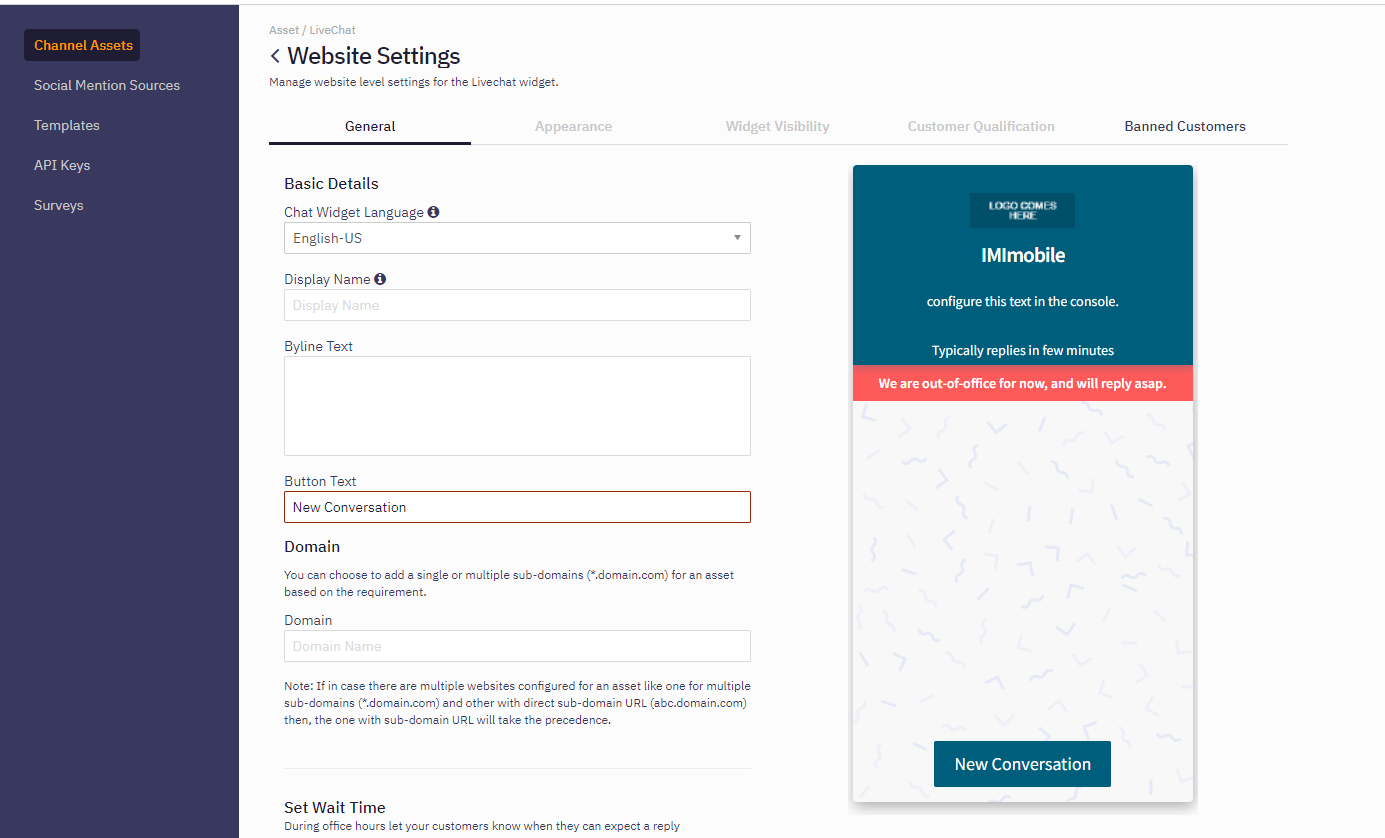
- Specify this information on the General tab
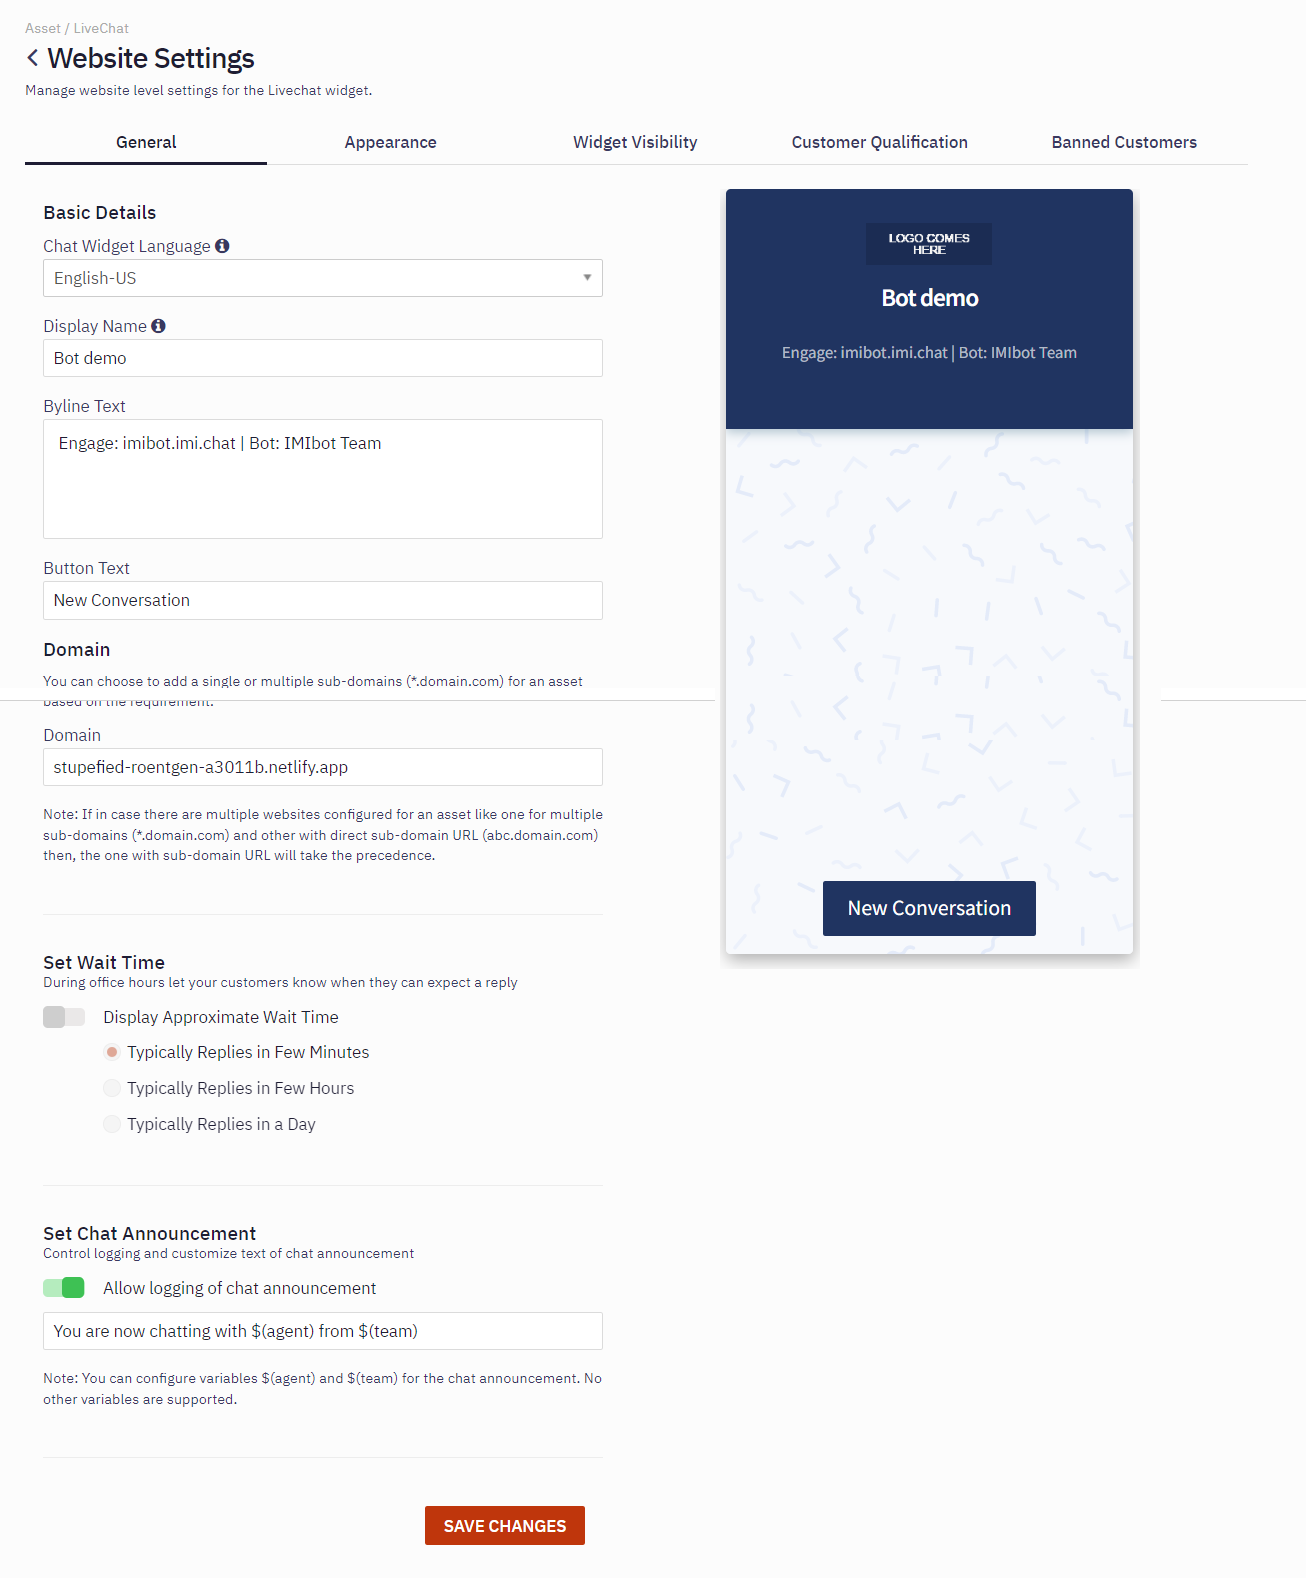
Chat Widget Language
Select a language from the drop-down list.
Display Name
The name that appears on the widget header.
Byline Text
The support text that appear below the header.
Button Text
The call-to-action button text. The maximum number of characters allowed is 30. If the text is not configured, by default the New Conversation text is displayed on the customer widget.
Domain
The domain name of the website on which the widget is embedded.
Set Wait Time
Turn On the toggle and select how many minutes, hours or days that customers must wait to receive a reply from the agent.
Set Chat Announcement
Compose the announcement using $(agent) and $(team) as variables in the text field. This announcement is logged when an agent sends the first MT from the chat console.
- Click Save Changes.
- Specify this information in the Customize Widget Style section of the Appearance tab:
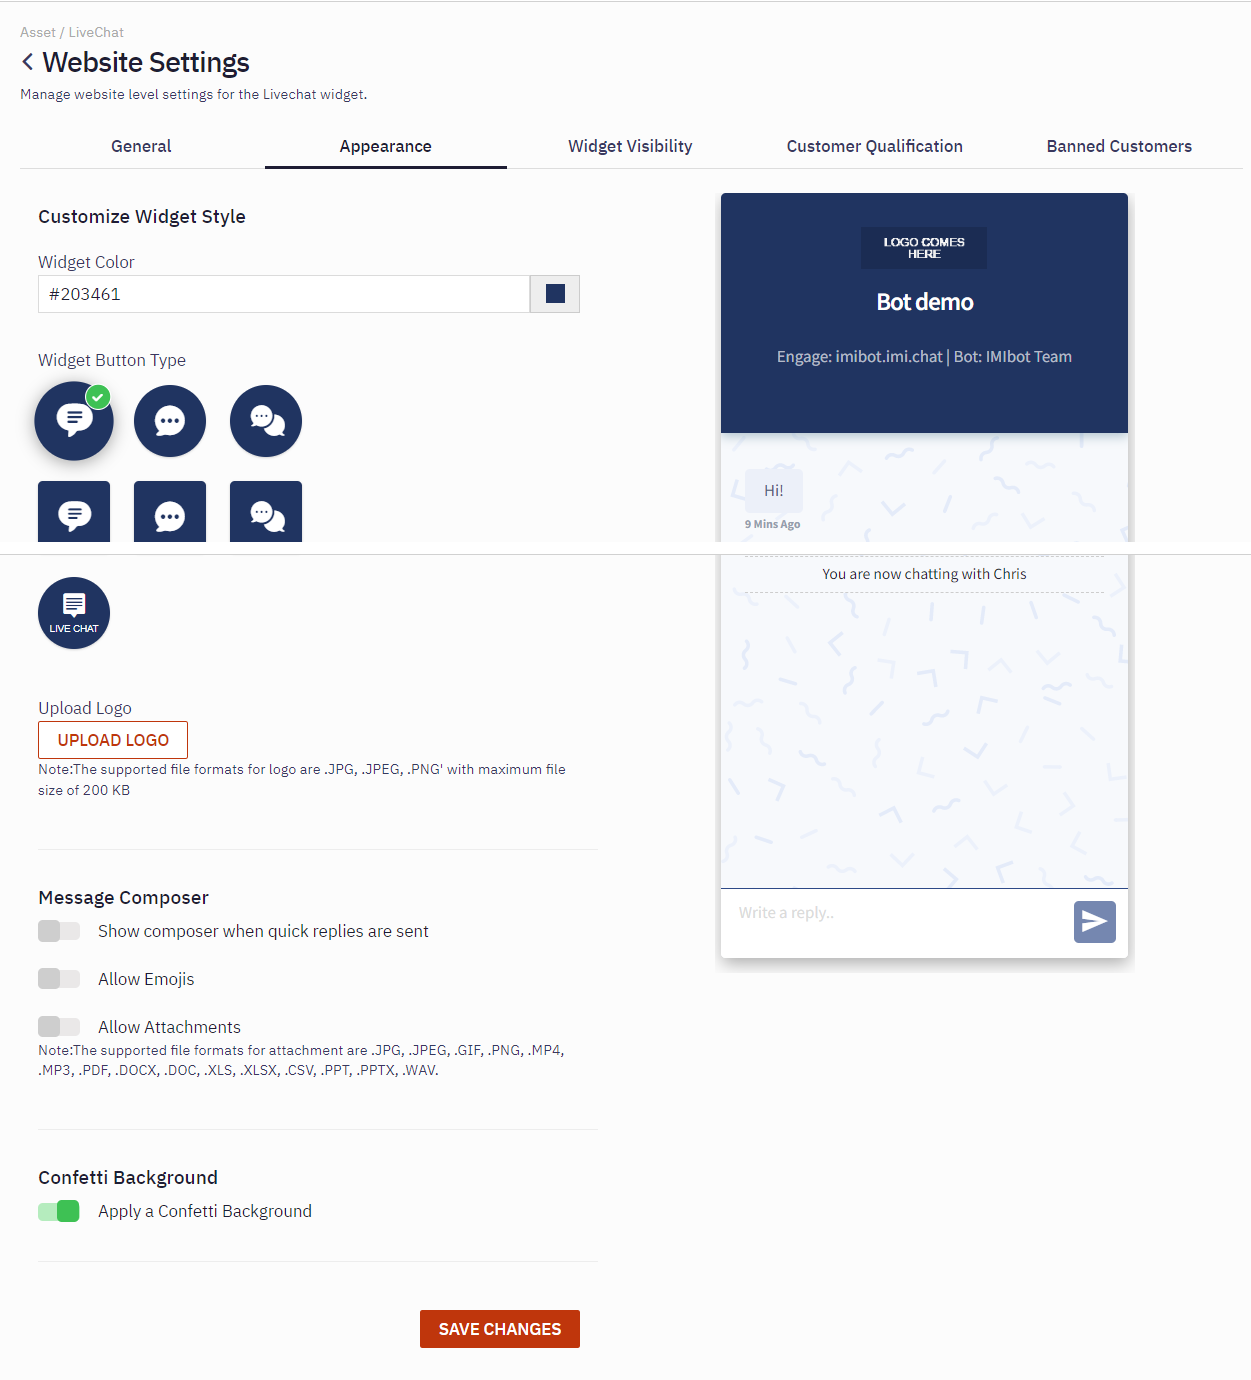
Widget color
Select the widget color from the color picker or provide a hex code of the color .
Widget Button Type
Select the type of widget button that must appear on the website
Upload logo
Upload the logo of the company.
-
Specify this information in the Message Composer of the Appearance tab:
Show composer when quick replies are sent
Turn ON this toggle to allow customers to manually type the responses if the suggested quick replies do not match the intent of the customer.
Allow Emojis
Turn ON this toggle to allow customers use emojis during the conversation.
Allow Attachments
Turn ON this toggle to allow customers share attachments on the widget during the conversation with an agent. -
Turn ON the Confetti Background toggle to allow or restrict the background appearance on the widget, in the Confetti Background section of the Appearance tab.
-
Click Save Changes.
-
Configure the conditions of widget visibility on the website on the Widget Visibility tab:
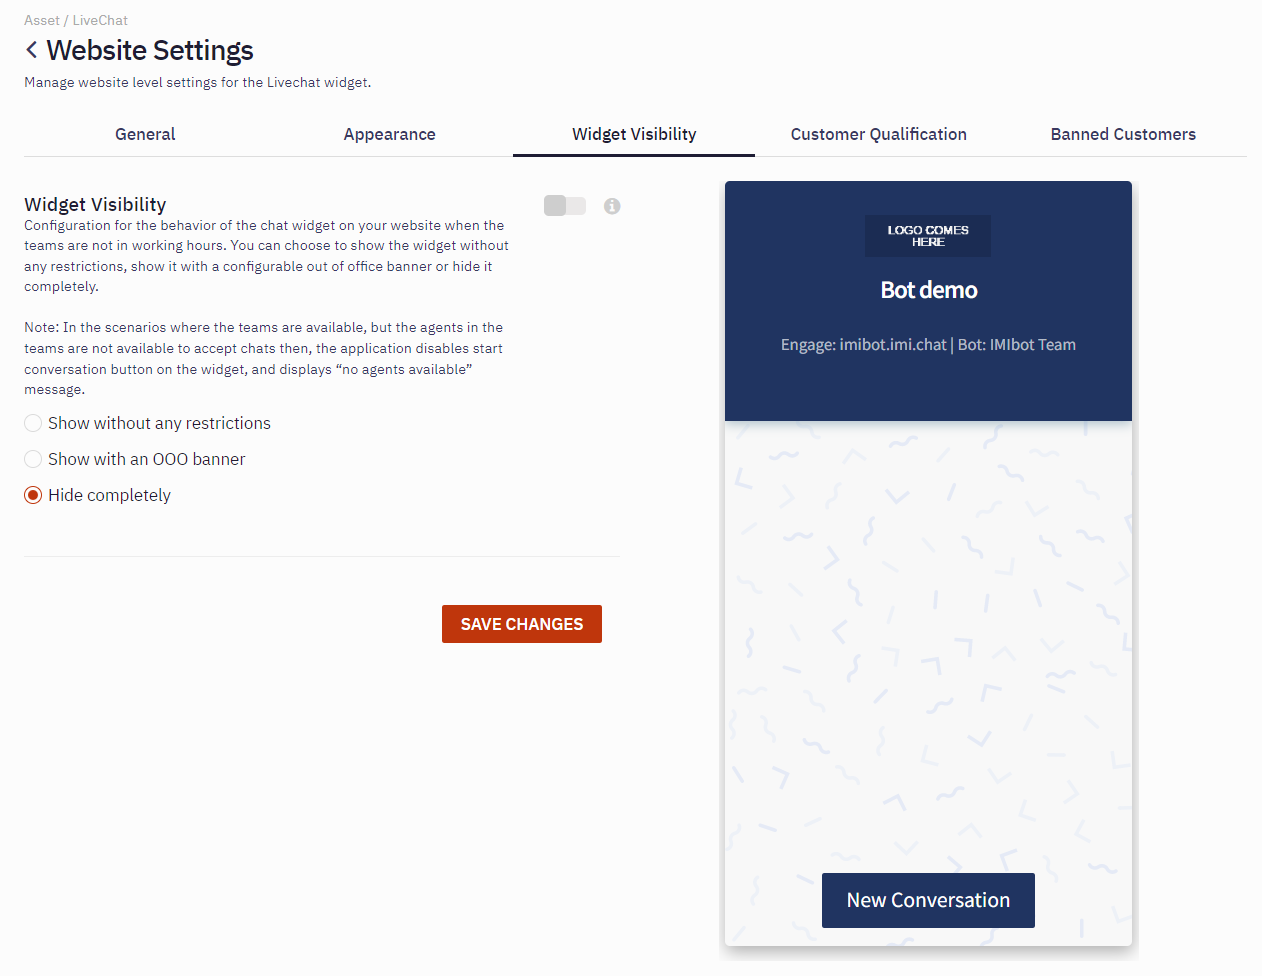
Show without any restrictions
Select this radio button to show the widget on the website all time regardless of any restrictions set for widget visibility
Show with an OOO Banner
Select this radio button to show the widget with an out of office (OOO) banner message. Users with admin role can only configure the OOO message.
Hide completely
Select this radio button to hide the widget completely.
Website Force Turn Off
Turn ON this toggle to view the Unavailability Banner Message text box in which you can enter the banner message.
Hide widget for new customers or when existing customers refresh the browser
This option is displayed only when Website Force Turn Off toggle is turned ON. This toggle allows you to hide the widget for new customers without displaying the banner message.
- Click Save Changes.
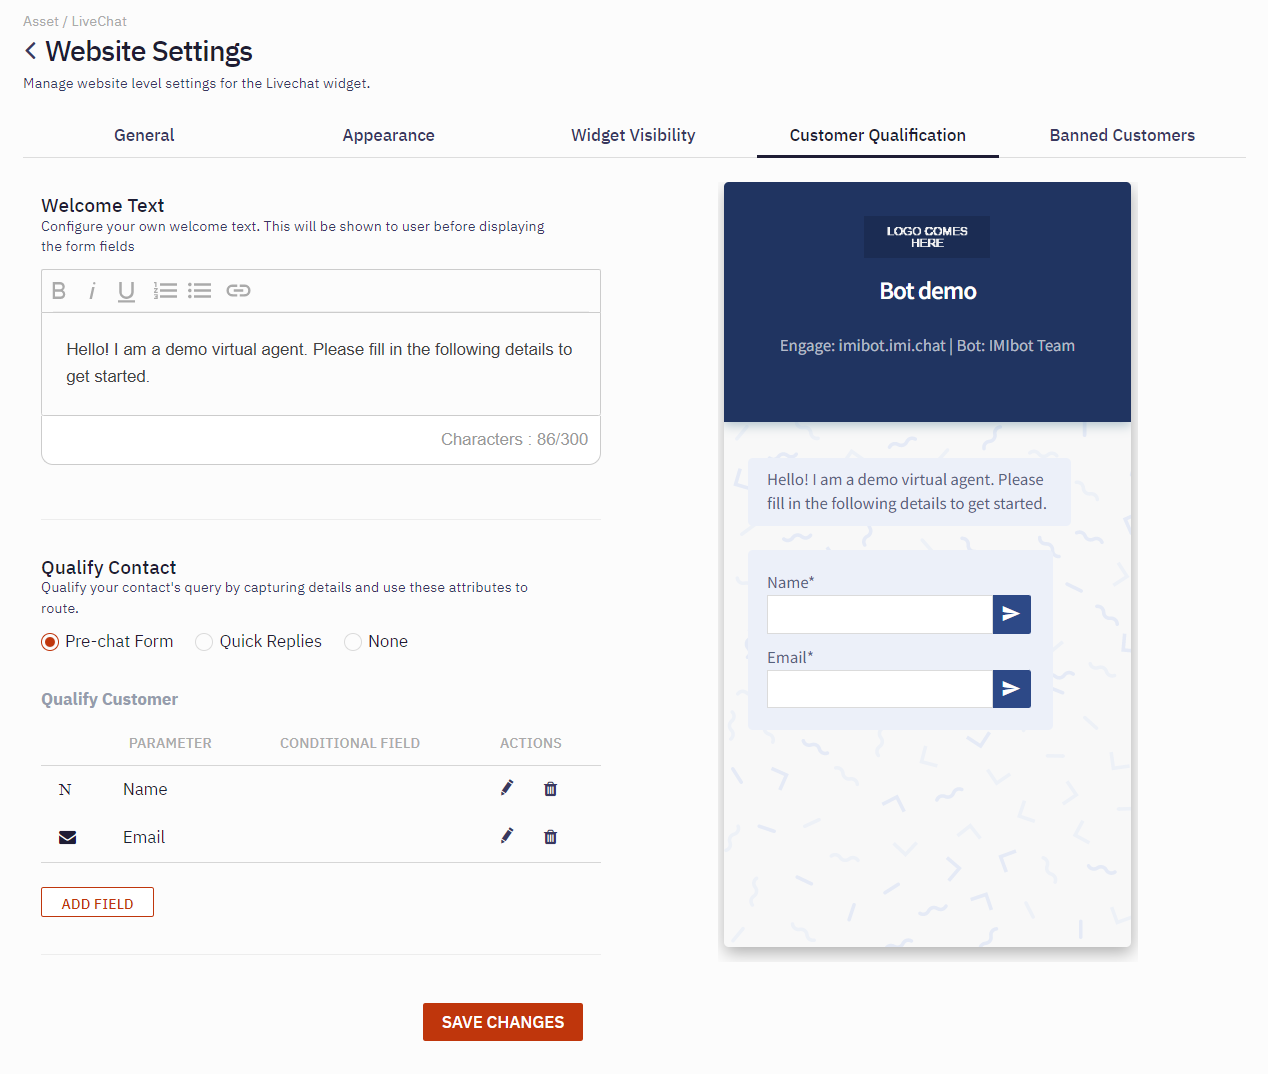
- Configure the "Welcome Text" that is displayed before displaying the form fields in the Welcome Text section of the Customer Qualification tab.
Note: Various formatting options are available to format the welcome text that appears on the widget. - Select the pre-chat form radio button to add custom fields in the Qualify contact section of the Customer Qualification tab. For more information, see Adding Pre-chat form attributes.
- Select Quick Replies radio button in the Qualify contact section of the Customer Qualification tab.
- Click Add Another Quick Reply. The pop-up window appears.
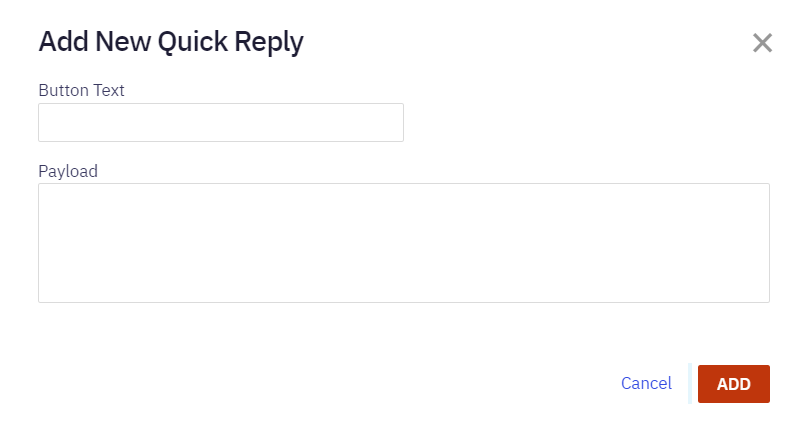
- Specify the Button Text and Payload and then click Add.
- Click Save Changes
- Click Add IP on the Banned Customers tab.
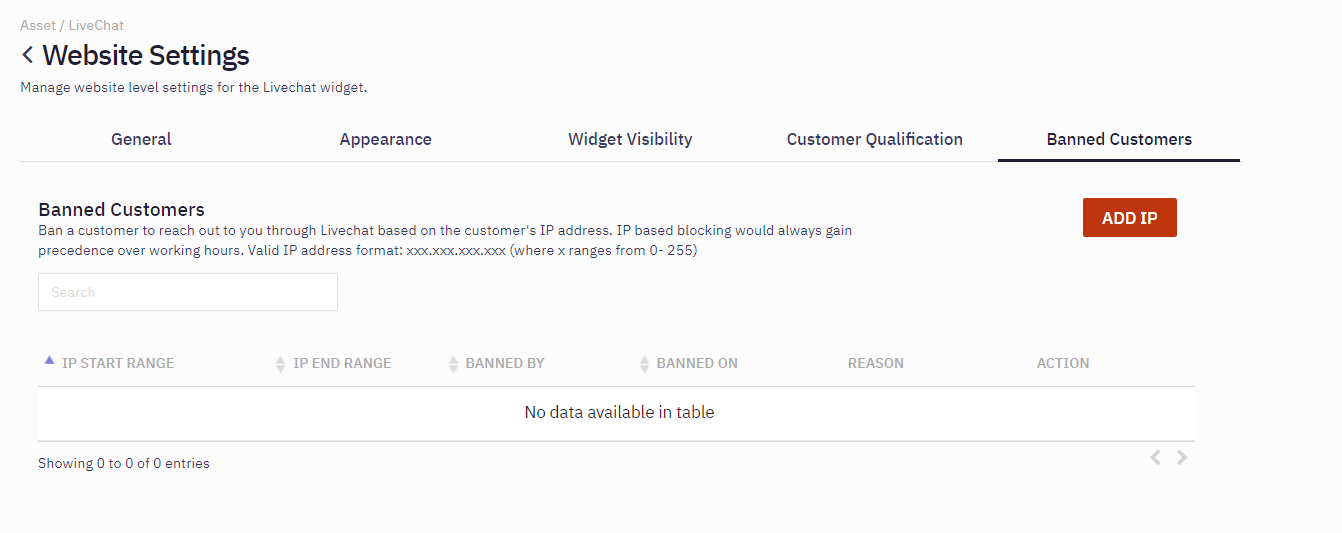
- Enter IP Start Range, IP End Rage, and Reason for banning a customer.
- Click Submit to add the IP details on the banned customers list.
Embedding a chatbot widget in a webpage
You must follow these steps to embed bot widget in a web page.
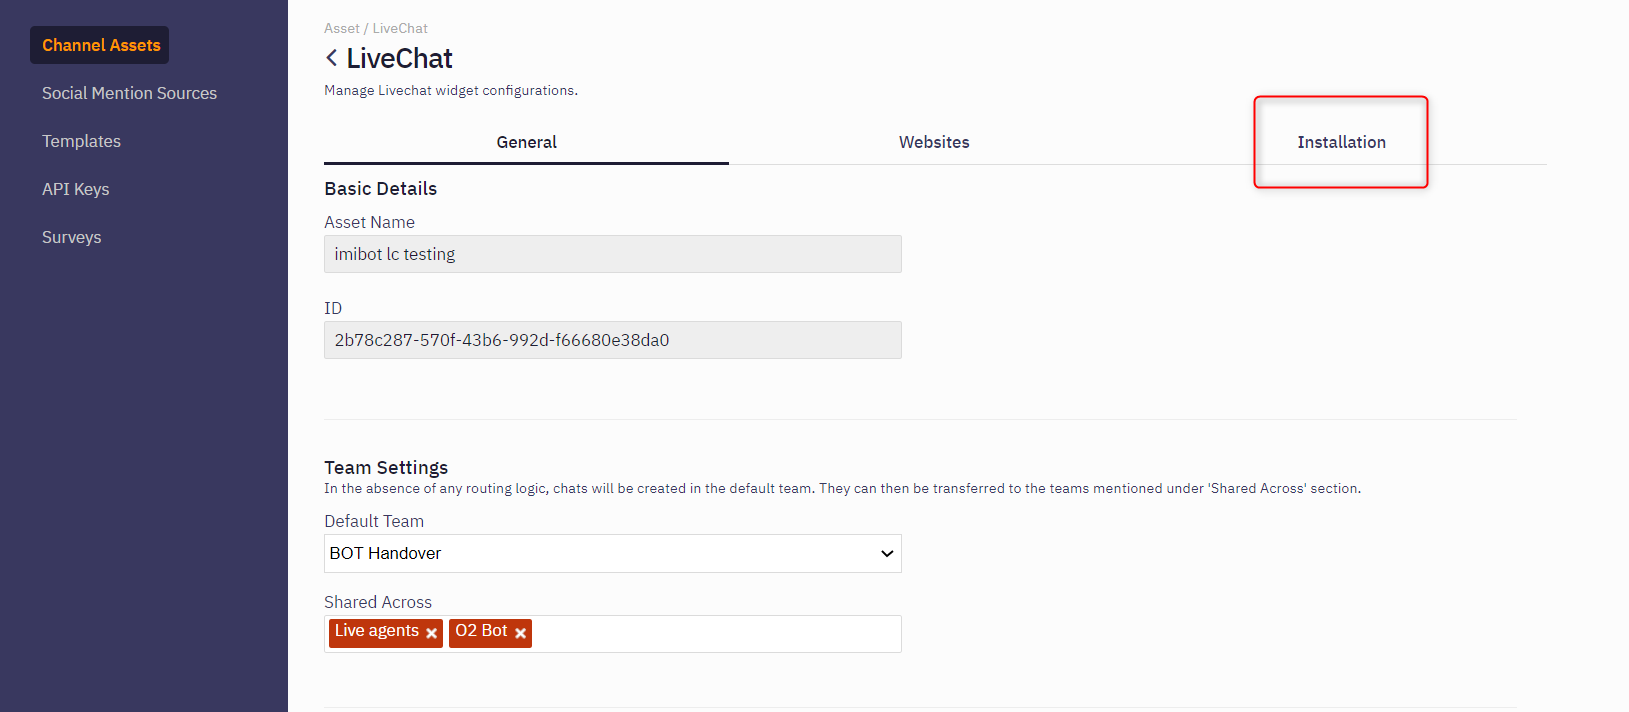
- Click on the Installation tab to view the script that auto-generated when a website added.

- Copy and paste the widget script on the website.
- Add the copied script above the tag in the HTML DOM to view the widget on the website.
Adding Pre-chat form attributes
Use the following procedure to add pre-chat form attributes, which display before initiating the conversation to gather information from customers. The information can be - name, email address, phone number and so on.
- Click Assets on the left vertical navigation bar. The Channel Assets screen appears.
- Click the channel asset to which the pre-chat form attributes must be added .
- Navigate to the website to which the pre-chat form attributes must be added.

- Click Edit in the asset for which the pre-form attributes must be configured. The Website settings screen appears.
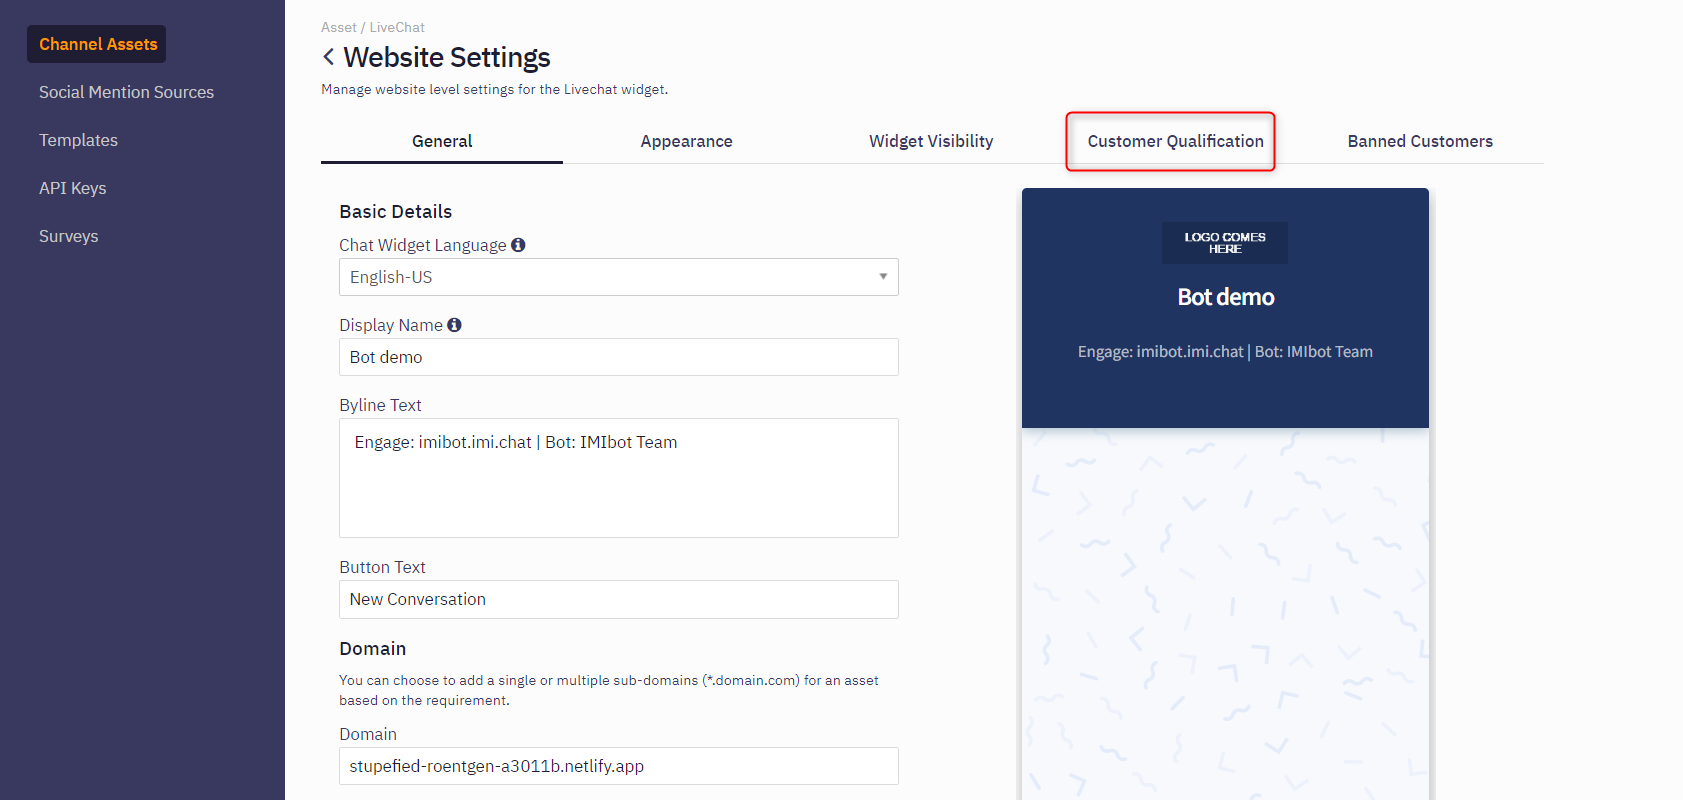
- Click the Customer Qualification tab.
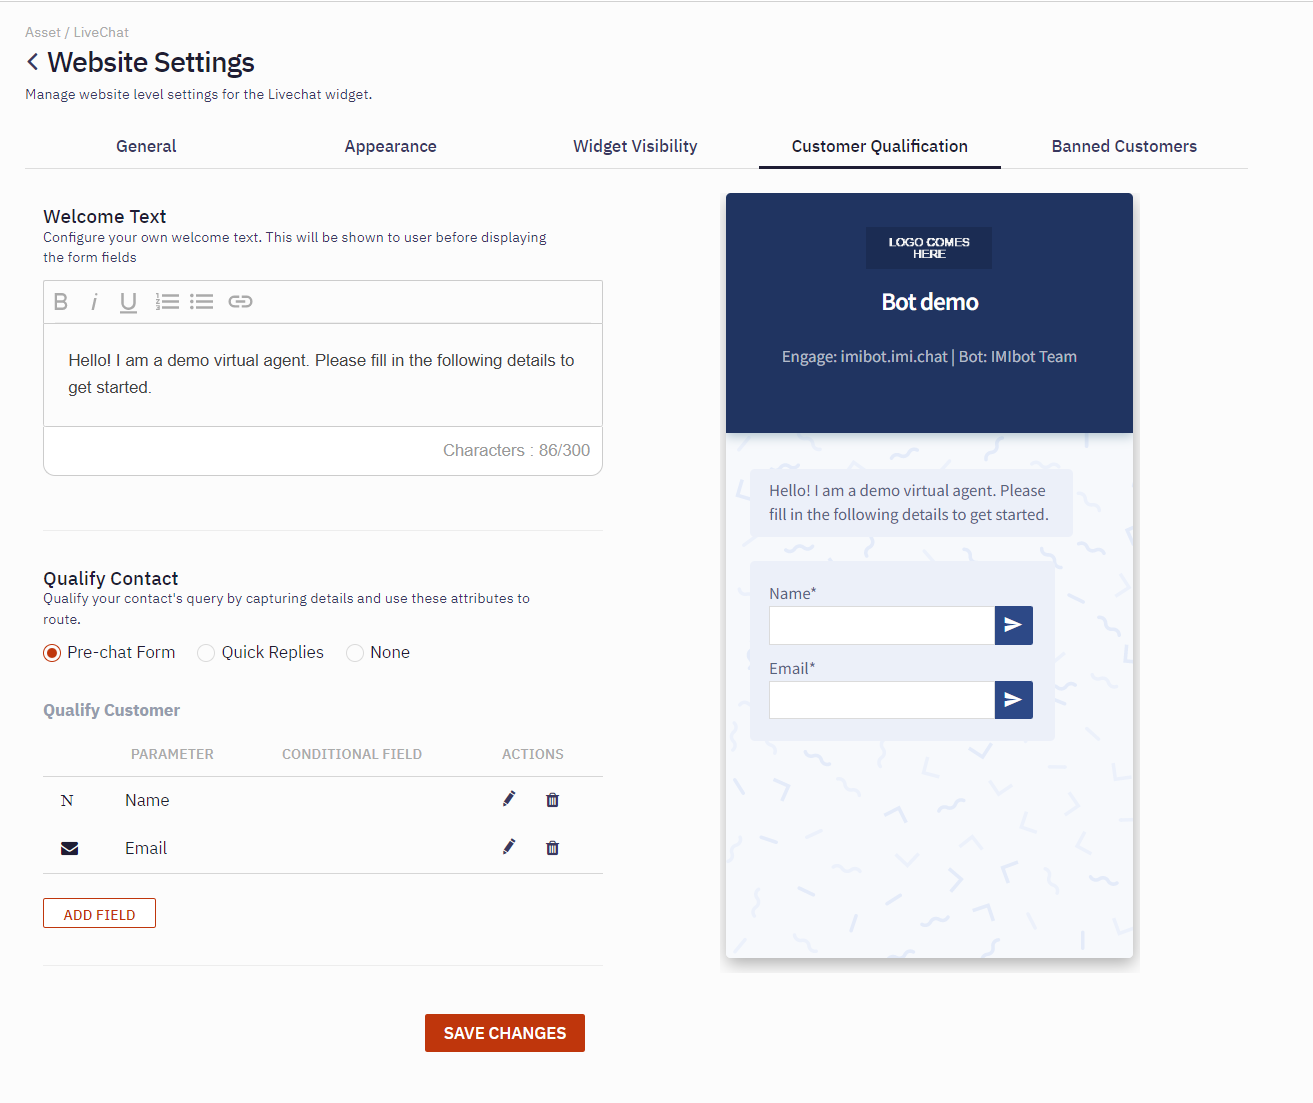
- Select the Pre-chat form button in the Qualify contact section.
- Click ADD FIELD to add new fields. The Add New Custom Field window appears.
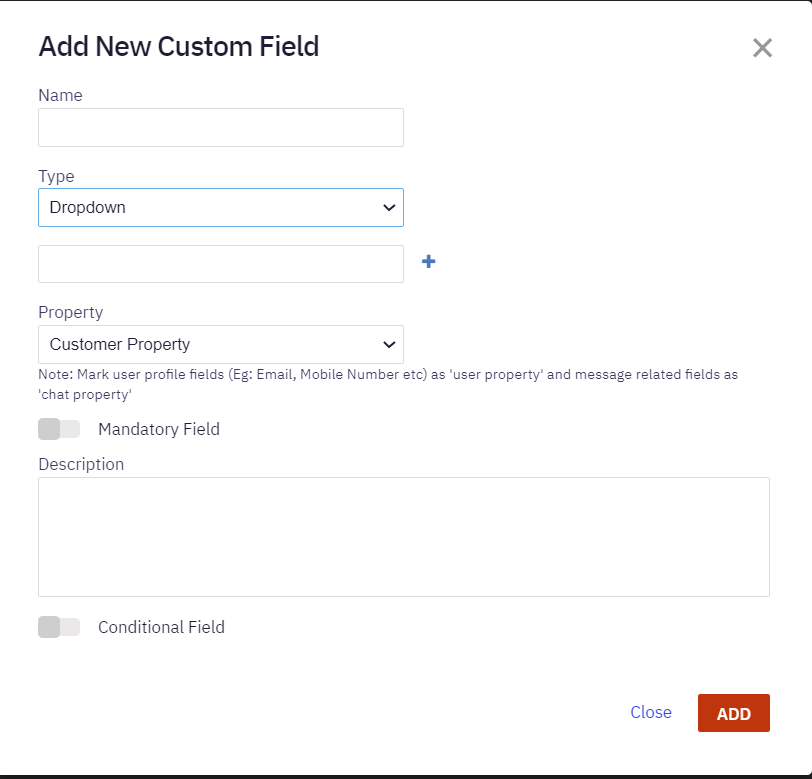
- Enter the field name.
- Select the type of field. Possible values:
- Dropdown
- Text
- Name
- Integer
- Decimal
- Date
Note: If the type of field is set to Dropdown, the text boxes are displayed to add values to the drop-down field.
- Select Property. Possible values:
- Customer Property
- Chat Property
- Enable the Mandatory Field field toggle to mark this field as mandatory in the pre-chat form.
- Enter the description in the text field.
- Click Add. The added fields appear on the pre-chat form of the chat widget.
Intelligent routing (IR) rules
After setting up the virtual agent, make sure that all incoming requests via the required channel first go through the virtual agent.
To create a routing rule:
- Navigate to the intelligent routing tab on the vertical left navigation bar in Webex engage. The Intelligent Routing screen appears.

- Select the channel and the assets linked to the channel are displayed in the drop-down list.
- Select the Asset Name that is created and configured for agent handover process.
- Click Add rule. The Rule screen appears.
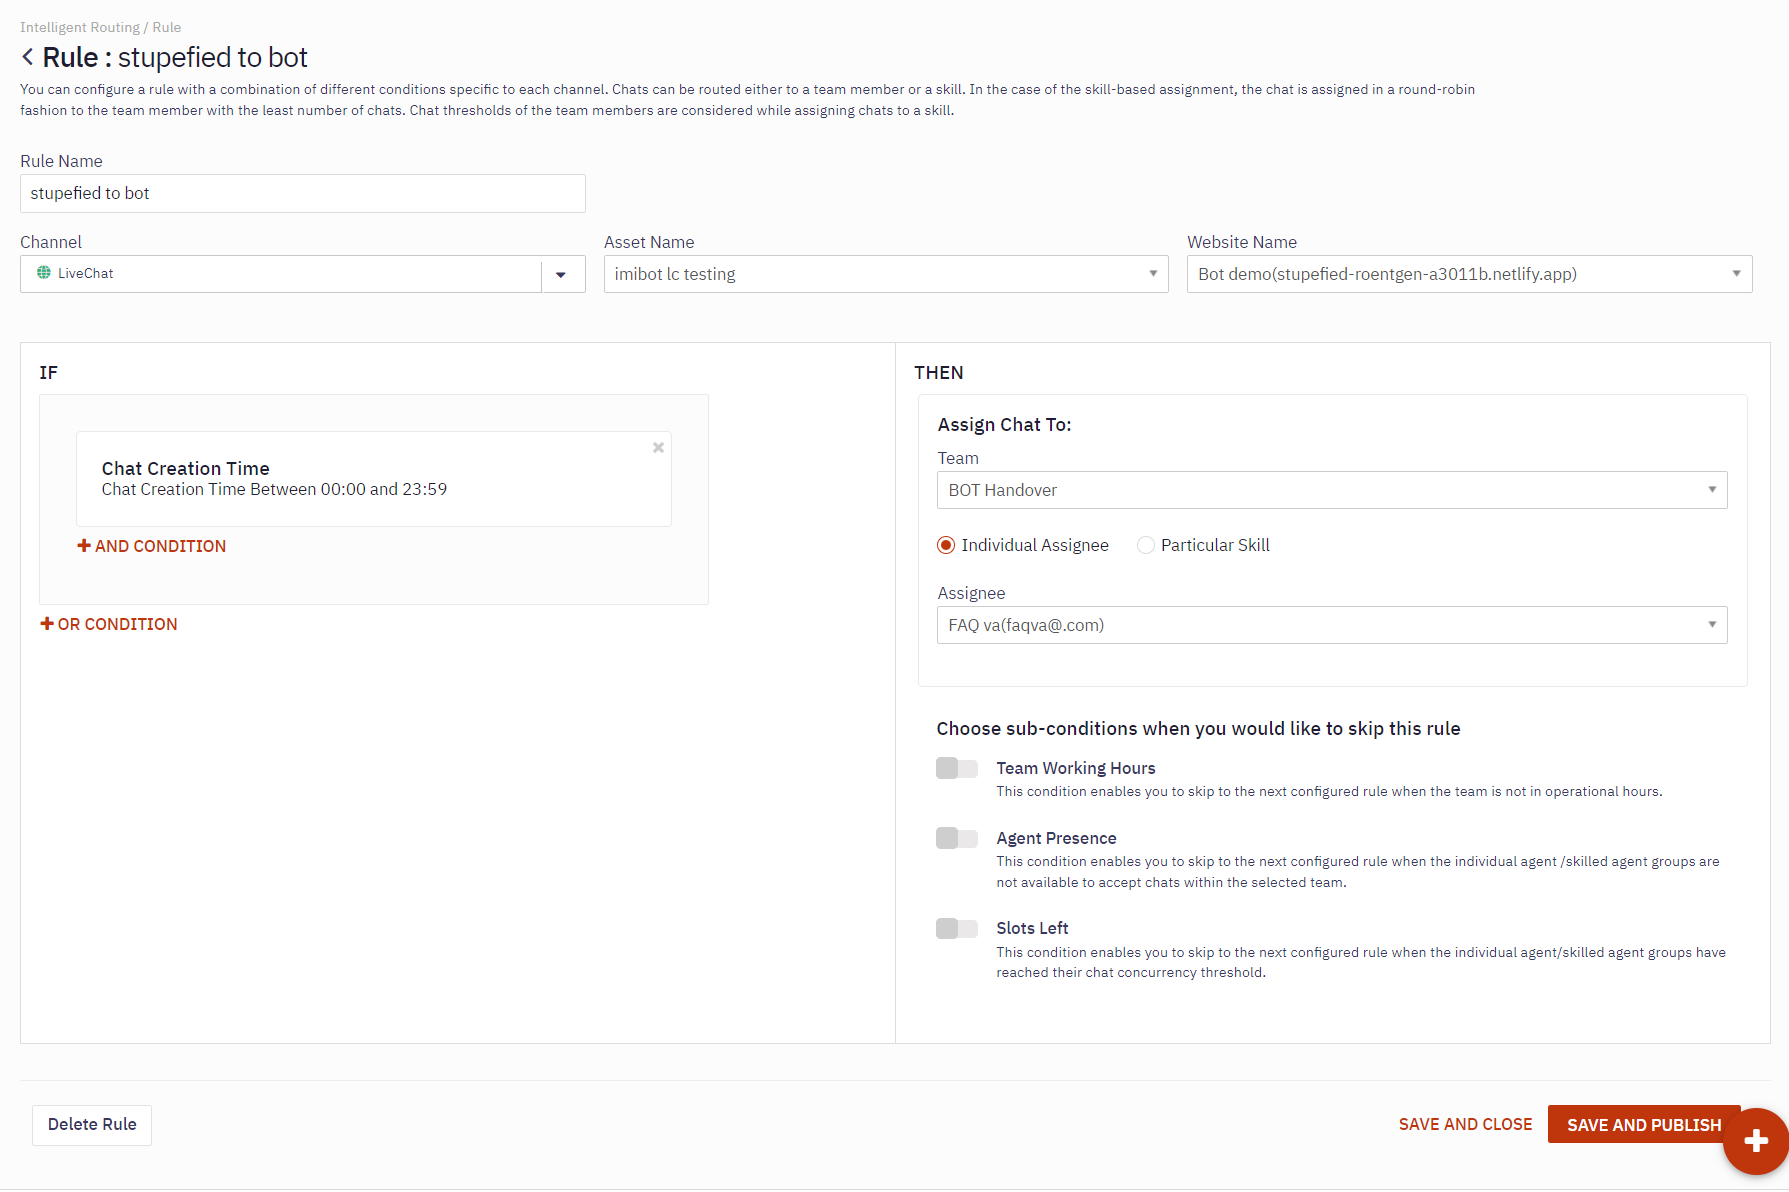
- Provide a name to the rule which is easy to understand.
- Select the channel, asset and website(if applicable) to which you want to wire the bot
- In the If section - select “Chat creation time” and set it to start at 00:00 hrs till 23:59 hrs
Then assign the chat to the virtual agent team and set the assignee to be the virtual agent configured above
Save and publish the rule.
Intelligent routing (IR) to agents based on user intent
Developers can route chats to individual agents or agents with particular skills based on conversation context instead of handover to a team.
In the configuration screen for Webex Engage VA, users have the ability to enable 'Use intelligent routing'. When this is enabled, in cases of agent handover, the user’s intent that was active before agent handover will forwarded to Webex Engage. Using this intent, ‘Intelligent Routing’ rules can be set up in the Engage platform to assign chats handed over with a particular intent to an individual assignee within a team or to all agents in a team with a configured skill.
Intelligent routing rules required for intent based routing
To route certain users to a specific agent or a specific set of agents based on the conversation context, multiple intelligent routing rules need to be set up.
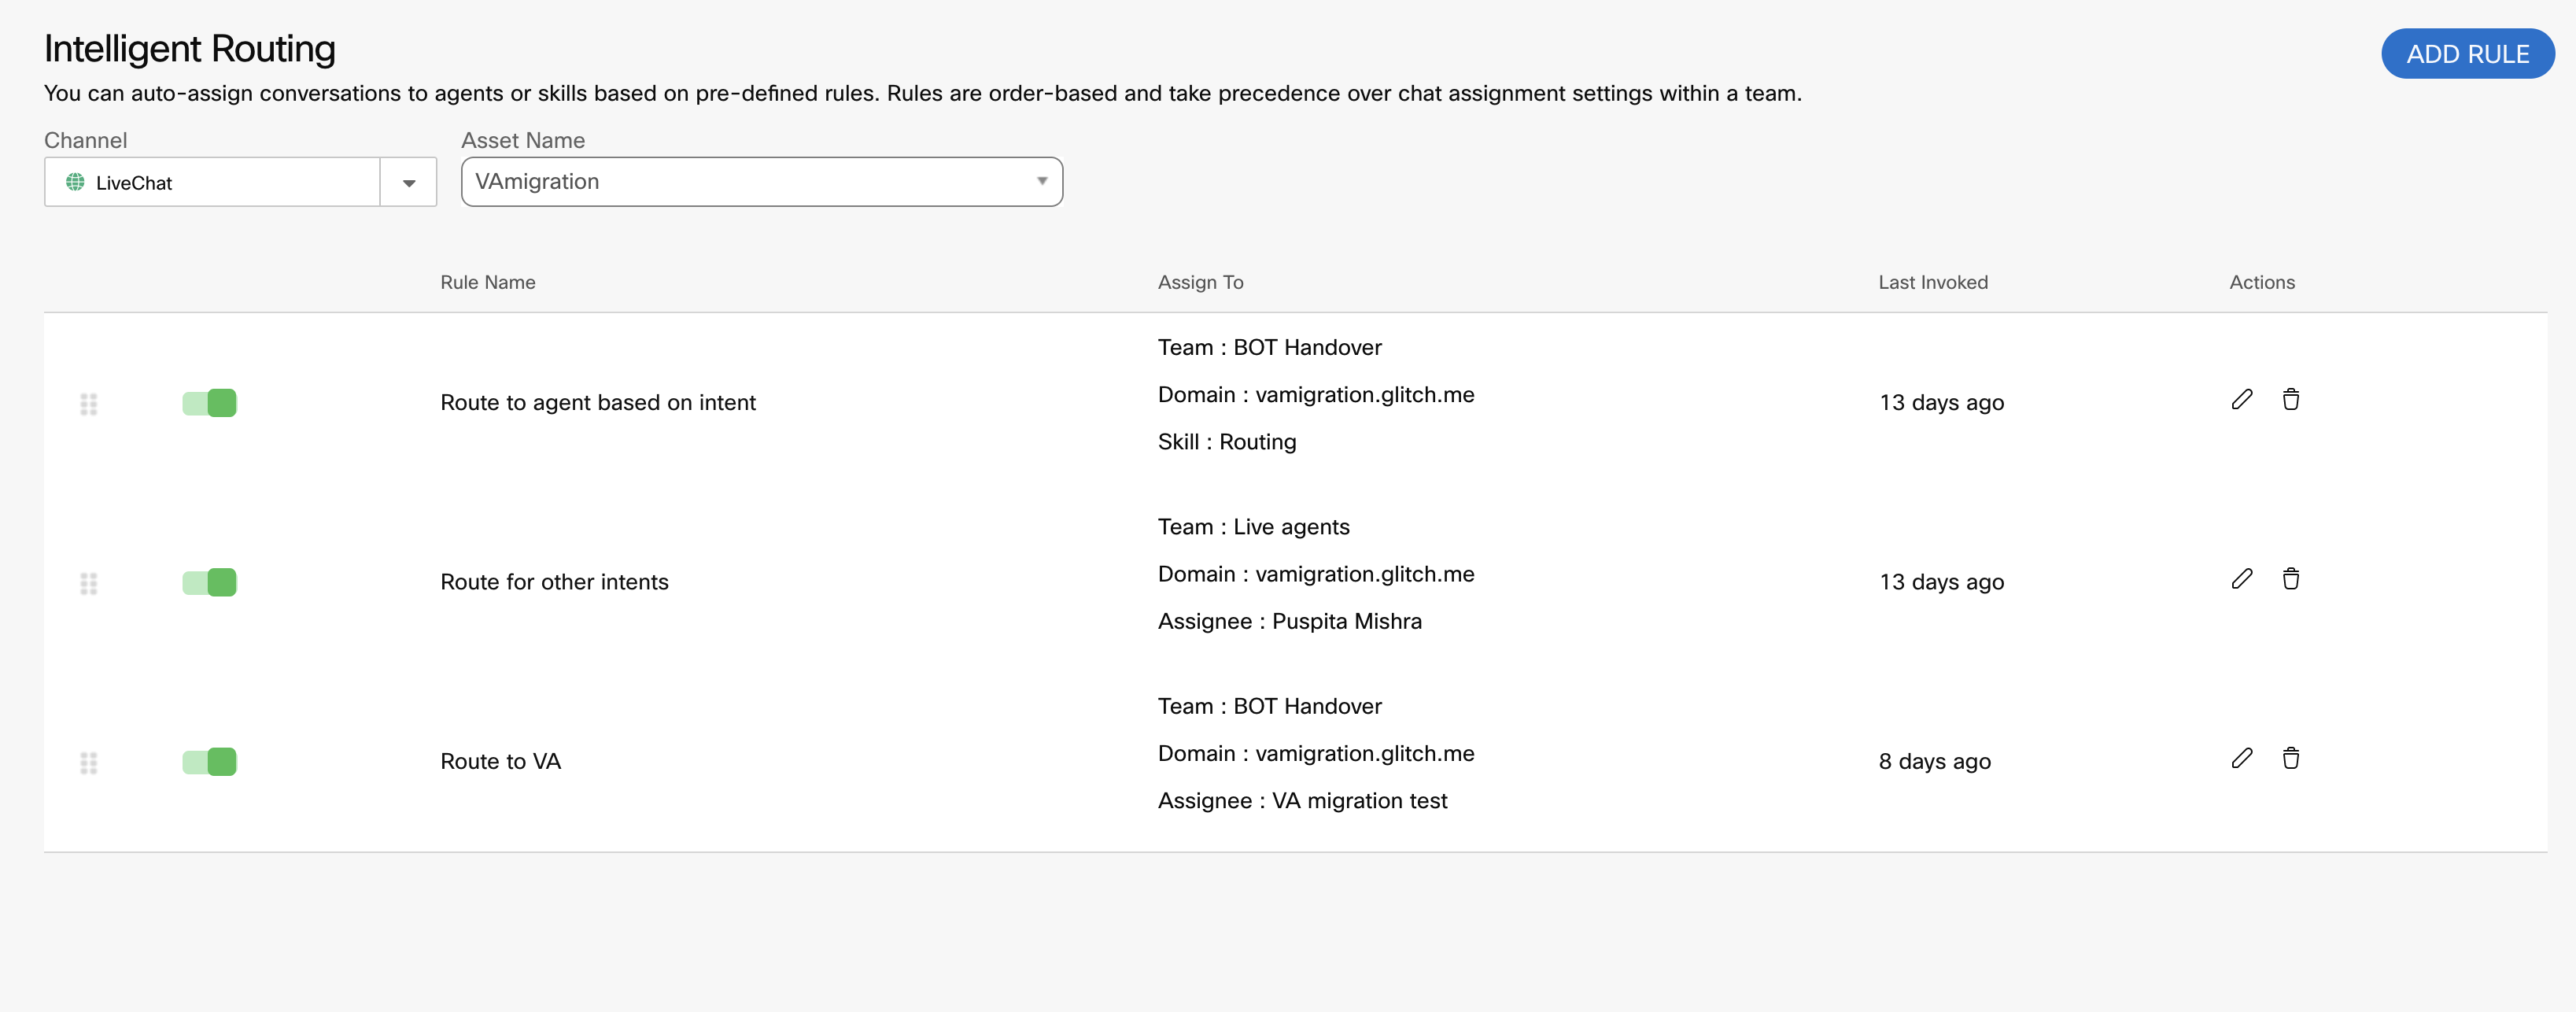
Intelligent routing rules setup for intent based routing
In the above example, we have 3 rules.
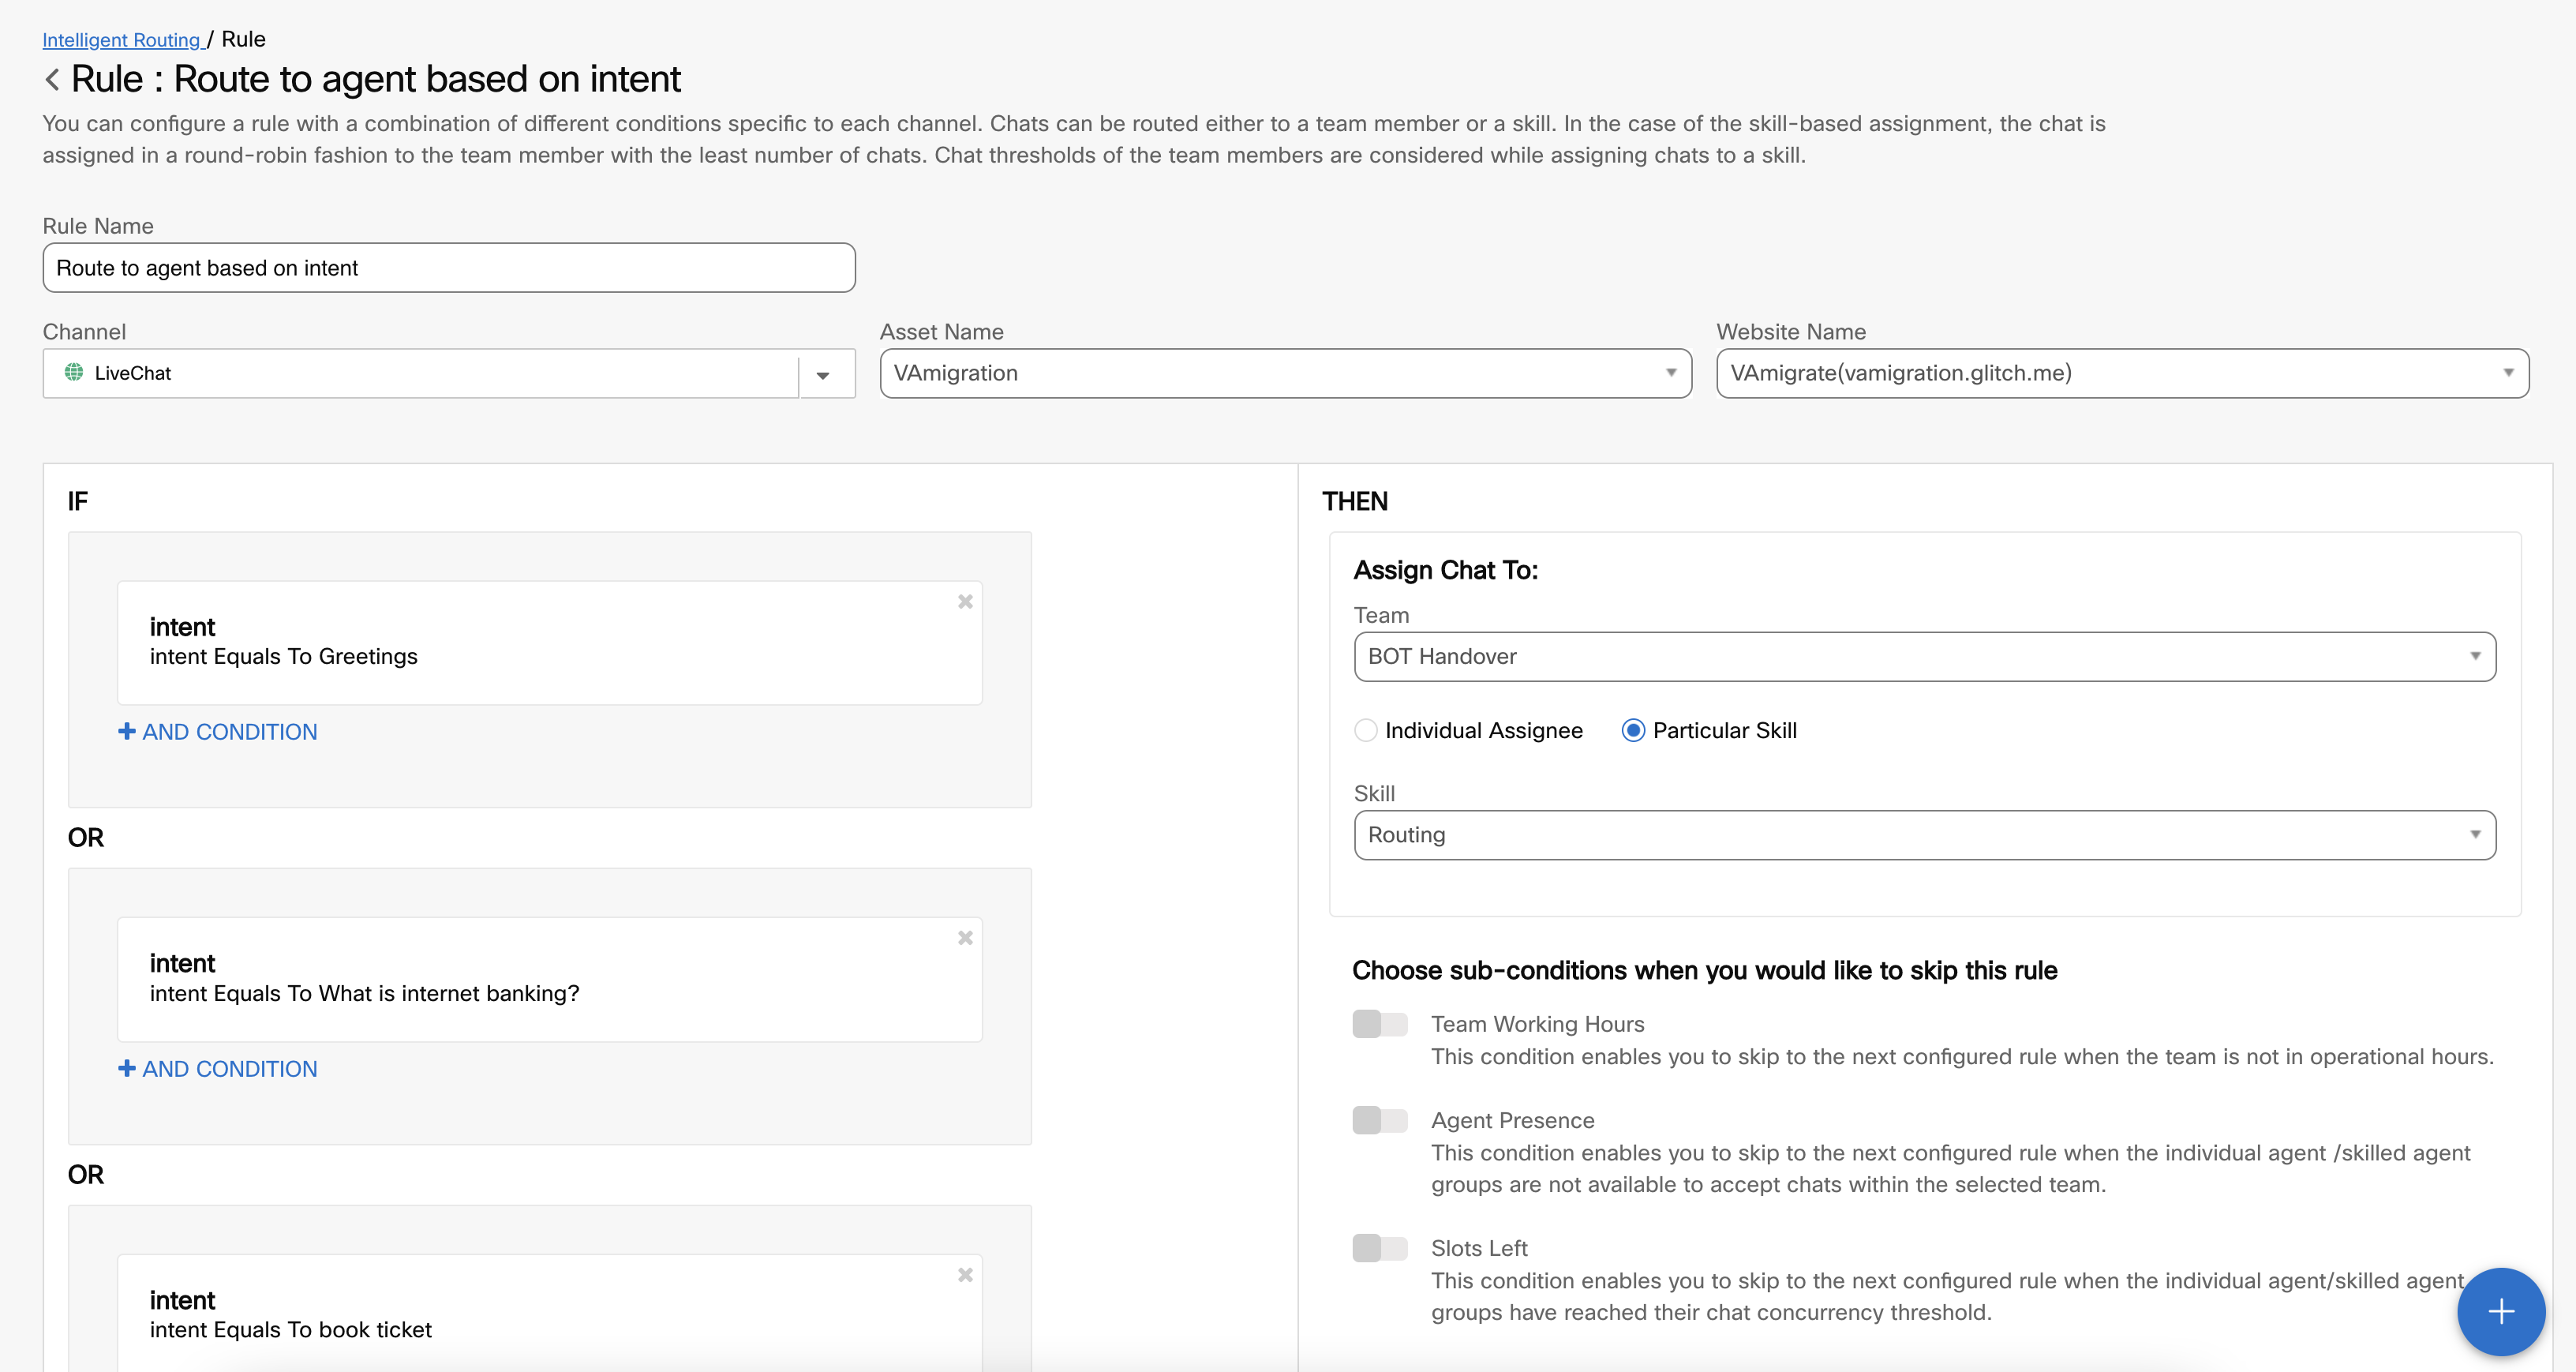
- Route to agent based on intent: This rule is invoked when the conversation is handed over to a human agent from the VA. In this rule a check is performed to evaluate if the user's intent before agent handover was one that should be handed over to a particular agent or agents with a particular skill. For example, here we check if the user's intent was 'Greetings', 'What is internet banking?' or 'book ticket' - we hand them over to agents with the 'Routing' skill.
Handover based on different intents
To hand users over to different teams and agents based on different intents, individual Intelligent Routing rules need to be configured.
-
Route for other intents: This rule is invoked when the user's intent before agent handover doesn't match with any intents in the first rule. Here you can configure a particular team that such users should be handed over to.
-
Route to VA: This rules is invoked to forward incoming user messages to the virtual agent as long their chat is not handed over to a human agent
Bot builder setup
Configuring a bot as virtual agent
- Select a specific Q&A or task bot whose chat conversations must be directed to the virtual agent team from the dashboard screen of the Bot builder. The Bot Configuration screen appears.
- Click the Integrations tab. The following screen appears.
- Enable the Webex Engage VA toggle. Enabling this toggle displays the following fields.
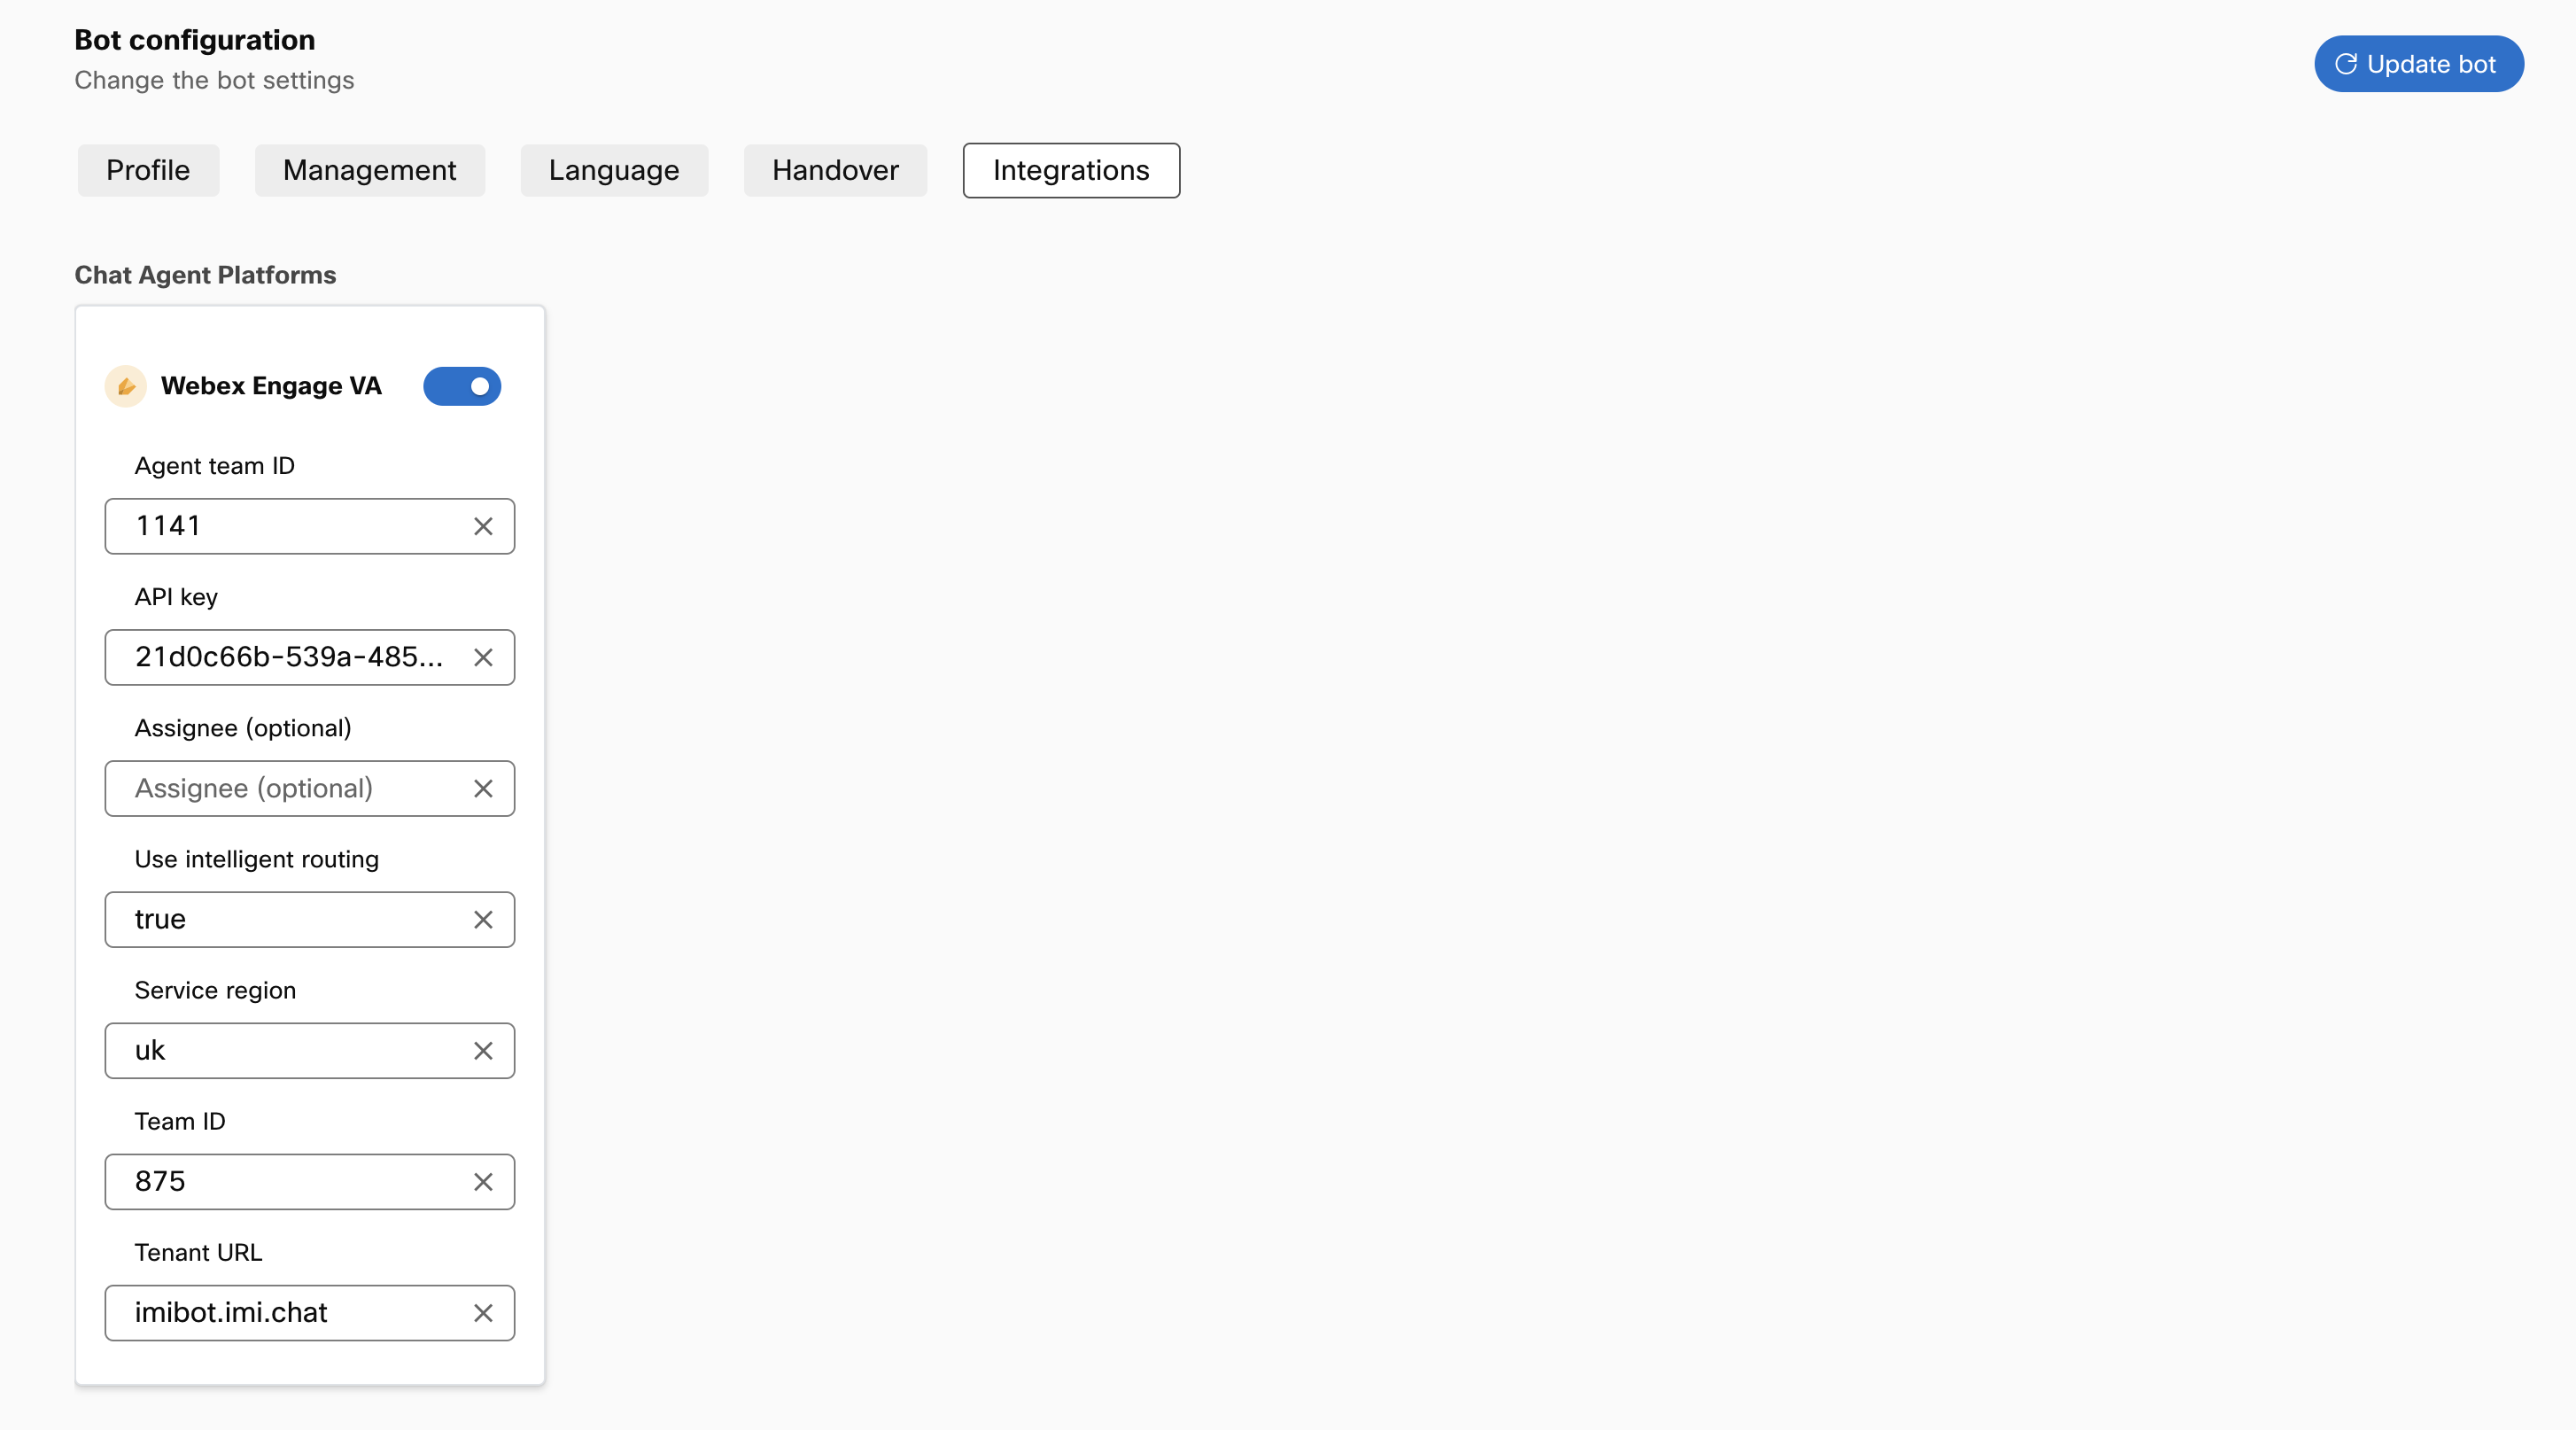
- Specify this information:
Agent team ID
The team ID of the live agent in imichat for handover. The ID is obtained from imichat.
API key
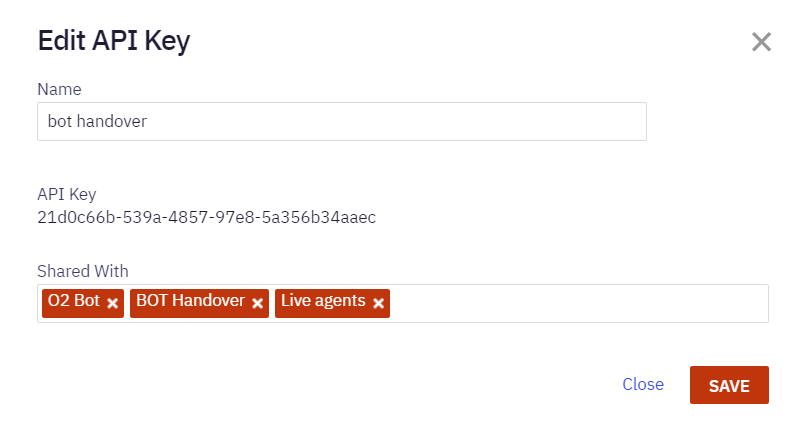
The API key has both the live and virtual agent teams. It is obtained from imichat. See how to find an API key
Assignee (optional)
The assignee who takes over the chat conversation from the bot. This ID is obtained from the live agent team.
Service region
UK or USA based on the deployment.
Team ID
The virtual agent's team id in imichat.
Tenant URL
The URL of the tenant, which can be like imibot.imi.chat.
Use intelligent routing
Set this is True if you want to use intent based routing - Click Update bot.
Finding an API key
- Switch to client admin in imichat and navigate to Assets tab from the left navigation bar.
- Click API keys on the left.

- Click Add API key. The Add API key window appears.
- Provide the name and select the virtual agent team and the live agent team to which handover should happen from the list if the bot could not respond to the consumer queries.
Note: The API key is auto-generated.
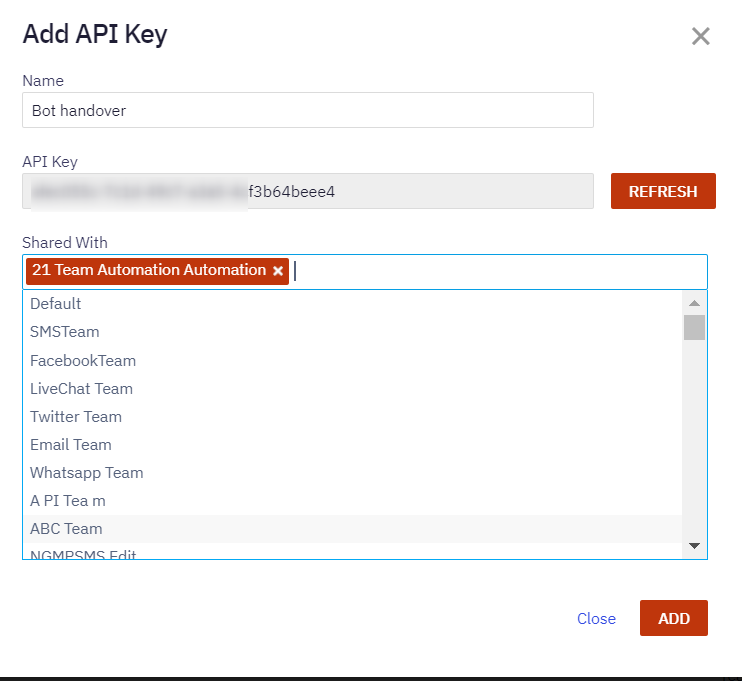
- Click Add. You can copy the API key and add in the API key field on the integrations tab of bot builder. This API key field is displayed when you turn on the IMIchat VA toggle.
Now, the bot works as a virtual agent in WebEx Engage.
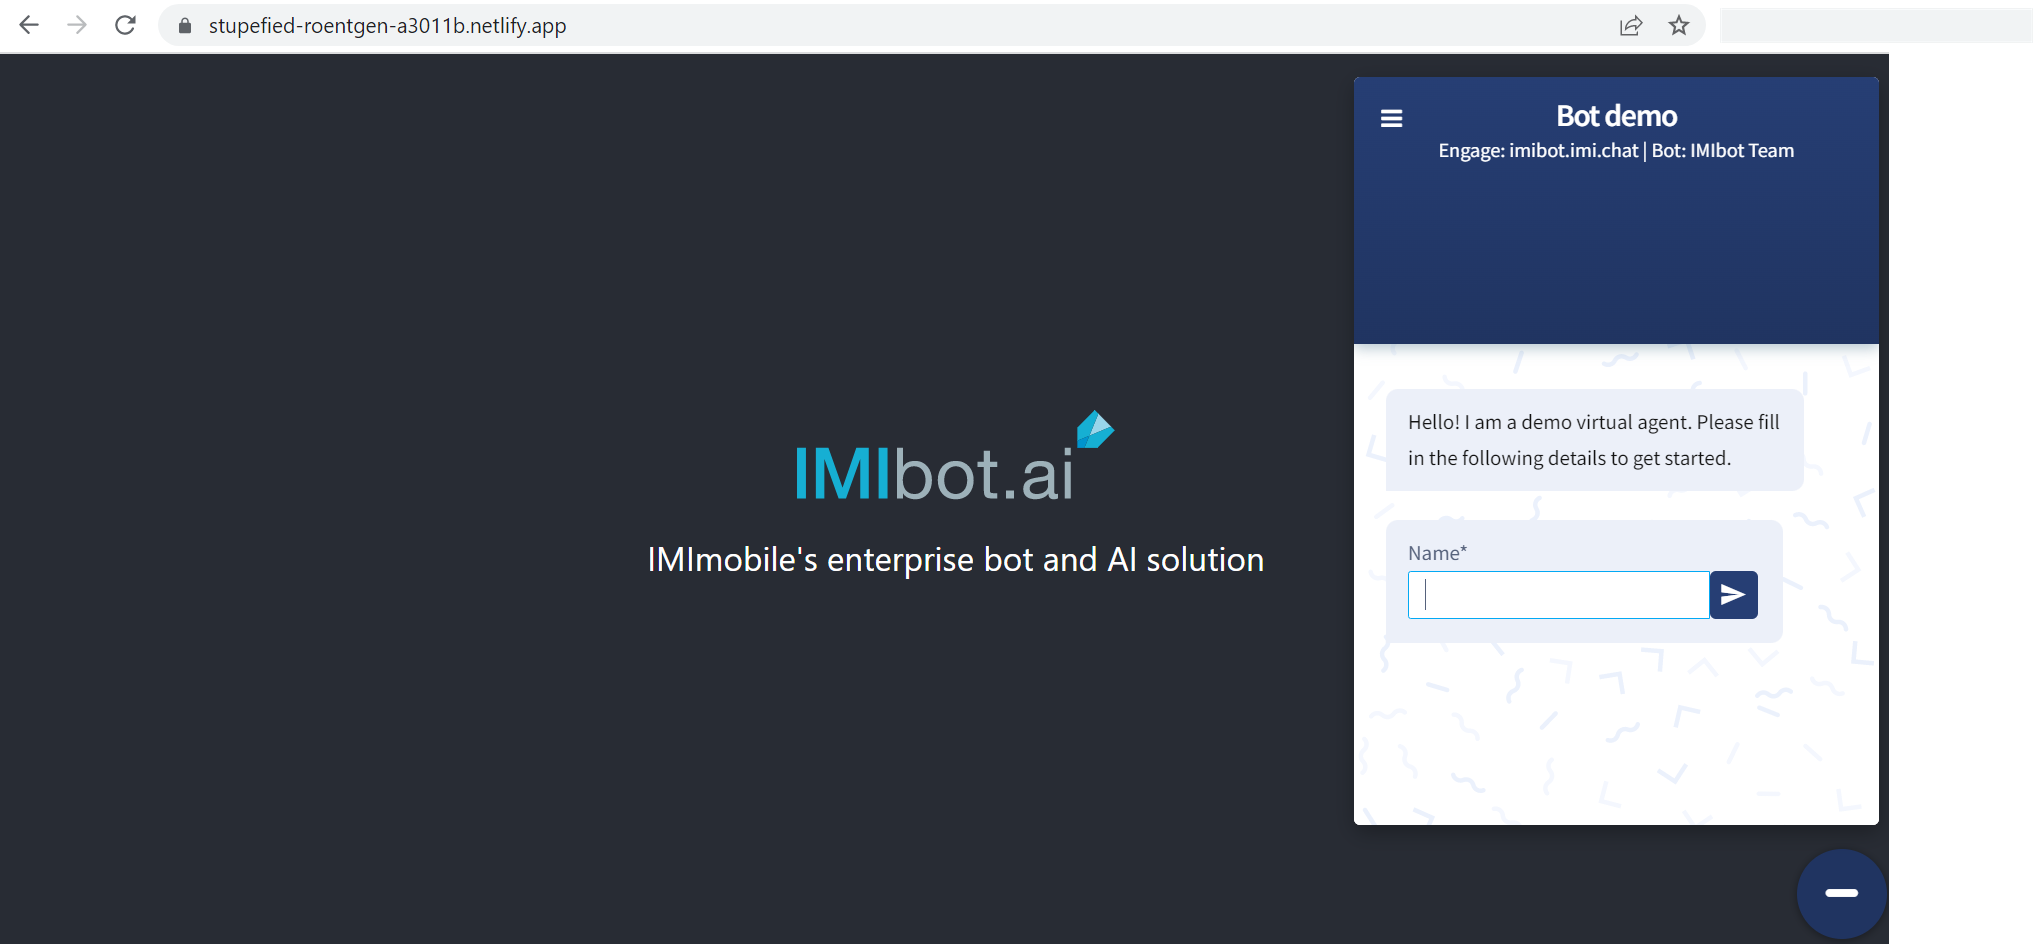
Using pre-chat form attributes in bot responses
You can use pre-chat attributes that are collected from consumers at the start of the conversation to personalize bot responses. By typing ${ in the text area of the response designer, the syntax of variables appears as a list.
For instance, you can configure the pre-chat attributes in the responses using this syntax, ${consumerData.extra_params.prechat_form_attributes.attributename)}. The attribute name can be anything such as name, email address and phone number. Ensure to use the attribute name as-is on the pre-widget form in the syntax.
Note: You can add the pre-chat form fields that appear before initiating the conversation based on the information you want to gather from consumers. For more information, see Adding pre-chat form attributes
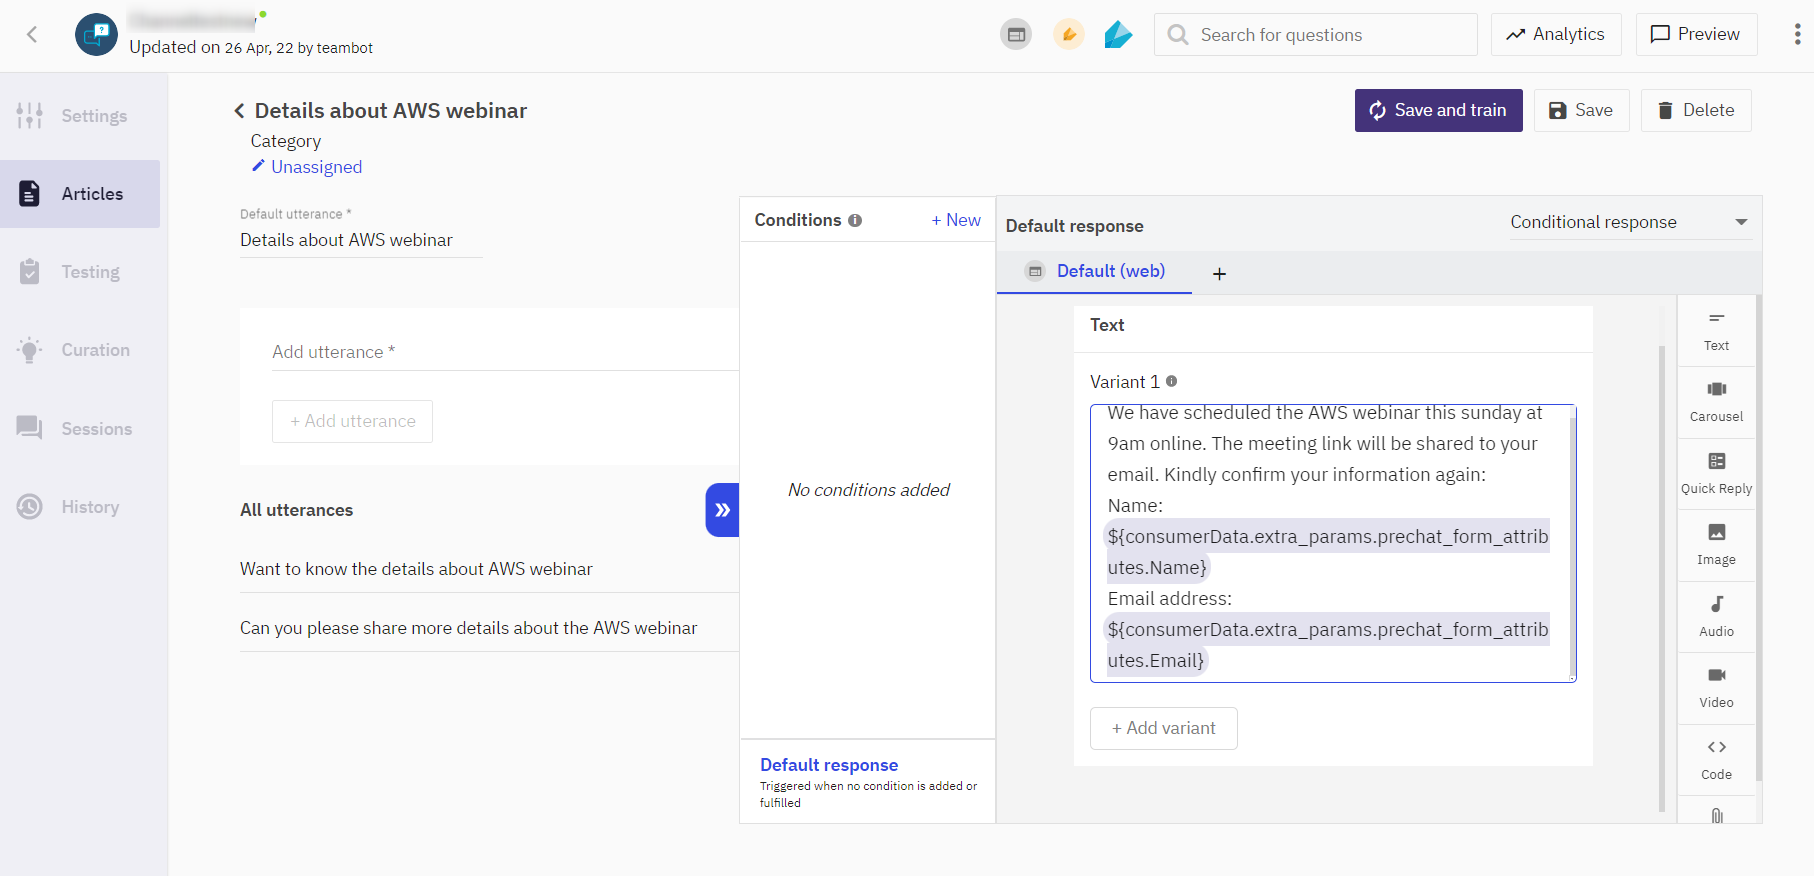
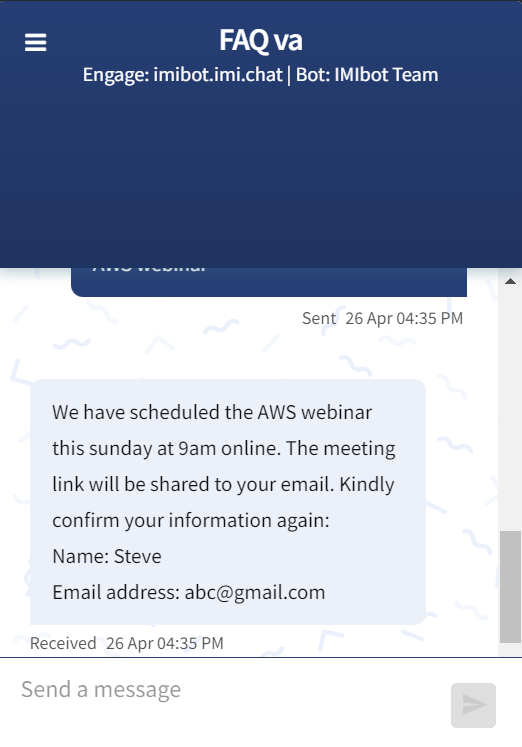
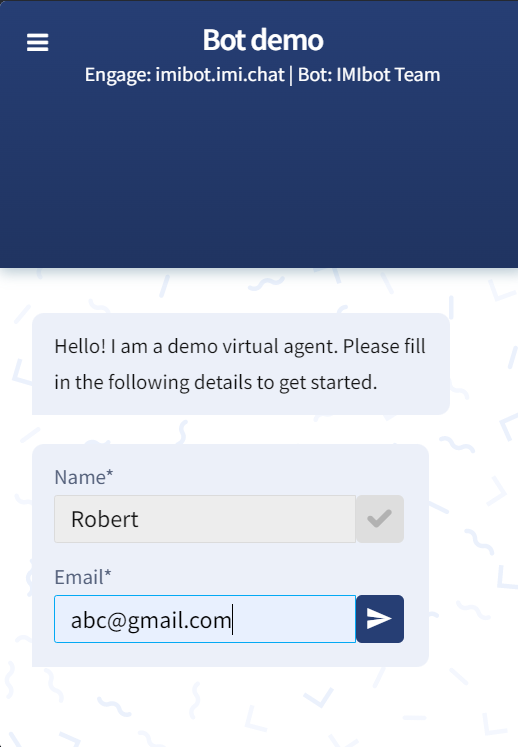
Consumer details that are captured in the pre-chat form will be rendered in the bot responses as in the following screenshots:
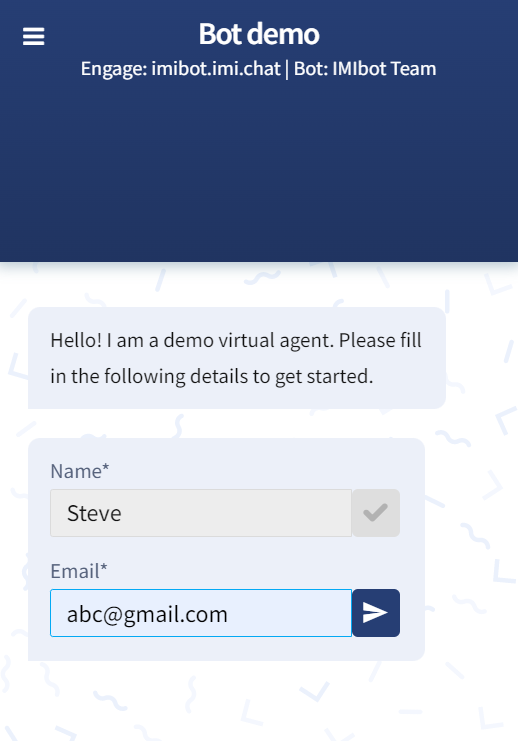
Pre-chat form on the chat widget
Enabling agent handover
The intelligence of a chatbot is based on how it is programmed. There are key scenarios where the bot stumbles or fails to respond to consumer inputs. When this happens, the chatbot allows consumers to talk to an agent. When the agent handover happens, the conversation is taken over by a live agent.
Agent handover can only happen when the Agent handover toggle for a bot is enabled.

To handover the conversation to a human agent, any of the following requirements must be met:
- A number of consecutive fallback messages in a session can trigger an agent handover. This number is configurable.
- A number of consecutive partial matches in a session can trigger handover. This number is configurable.
- Consecutive repeated messages in a session can trigger agent handover. The number of repetitions needed for this trigger is configurable.
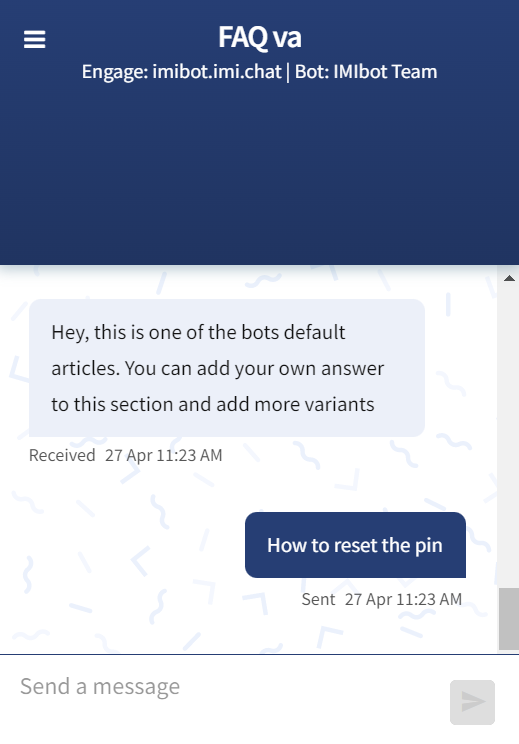
Chat is handed over to a human agent after three consecutive repeated messages
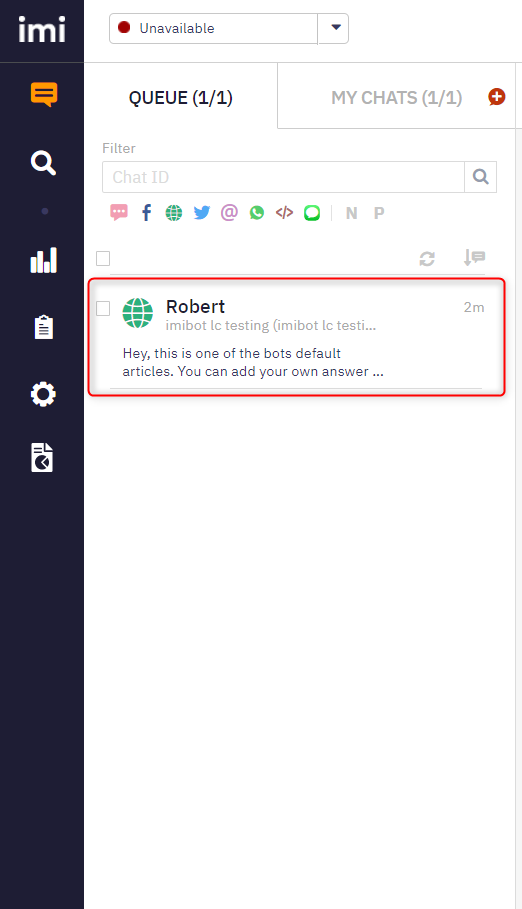
When the chat is transferred to an agent, the chat with the conversation thread is sent to the chat list on the WebEx engage customer console. The chat is queued to be manually picked up by the agent or is assigned to an agent by the team manager.
Updated 6 months ago
