
Apple Messages for Business
Cisco Webex Contact Center users who want to use Apple Messages for Business as a channel of customer support with Webex Contact Center can easily register their Messages for Business account on Webex Connect by following the procedures on this page.
Create an Apple Messages for Business Application
A Messages for Business application is automatically created within Webex Connect when you register on the Apple Business Register to create a Messages for Business account and choose Webex Connect as your messaging service provider (MSP).
Registering on Apple Messages for Business Register
Before you can offer Messages for Business to your customers, you must register with Apple. You will then need to select an approved Messaging Service Provider (MSP) during registration to use Messages for Business.
To register for a new business account, follow these guides by Apple
Once your business account is approved, choose Webex Connect as your MSP platform

Customer Service Platform Configuration on Apple Business Register
You need an Webex Connect account to complete the linking process. Once successfully linked, you will find your business account under Apps in your Webex Connect account.
Note
If you do not have an Webex Connect account, register for a free trial on our website and wait for the approval which takes about 2 hours on a business day.
Using the channel
User Identity
To message users on Apple Messages for Business (AMB), you will need the abcId of the users. You will receive this when the customer messages the business account for the first time.
abcId is the Opaque ID unique to the relationship between the customer's Apple ID and the business's business ID.
Message Types
Apple Messages for Business on Webex Connect supports the following message types:
- Text
- Attachments
- Rich Links
- List Pickers
- Time Pickers
- Text with Attachment
- Form Message
- iMessage App
- Agent Typing Indicators
- Payment Message
- New Authentication Message
- Classical Authentication Message (Please note that this message type has been deprecated by Apple and is no longer supported. Use New Authentication Message type instead).
- Quick Replies
Apple Payment Configuration(Optional)
Apple Messages for Business enables you to provide customers with the option to buy products and services using Apple Pay without leaving the conversation. Customers can respond to the payment request using their preferred Apple Pay payment methods.
Prerequisites
- You must have an APPLE MESSAGES FOR BUSINESS account
- You must have an Apple Developer account in order to create an Apple Pay Merchant account. If you do not have an Apple Developer account, please set one up at Apple Developers. The approval time may take several days. You will need to get your Merchant ID and Certificate from here.
- Payment processing endpoint
Register your Merchant ID on Apple Business Register
Use the following steps to verify that your Merchant ID is registered with Apple Business Register:
- Go to register.apple.com and sign in with your Apple ID as the administrator or technical contact for the business that owns your Apple Pay credentials.
- Go to your company’s Business Chat Accounts and find the appropriate business account. If your company has multiple accounts, ensure that you enter the merchant information into the Business Chat account corresponding to your company’s Apple Pay capability.
- Edit the Apple Pay section of your Business Chat Account and update your merchant ID.
Generate the PEM File required by the payment session
Use the following steps to generate the PEM file required by the payment session:
- Download the Merchant Identity Certificate from your Apple Pay developer account to your local file system.
- In the Applications folder on Mac, open the Utilities folder and launch Keychain Access.
- Add the Merchant Identity Certificate to Keychain Access by opening the certificate file.
- In the Keychain Access, find the certificate, and then expand it. You should see a private key.
- Hold down the command key and select both the certificate and the private key.
- From the Mac Menu select File > Export Items.
- Select “Personal Information Exchange (.p12)” as File Format and save the .p12 file.
- Convert the .p12 file to a .pem file using the following command:
openssl pkcs12 -in <CERT_FROM_KEYCHAIN_EXPORT.p12> -out OUTPUT.pem / -nodes -clcerts
Configure the App on Webex Connect Platform
Use the following steps to configure the App on Webex Connect Platform:
-
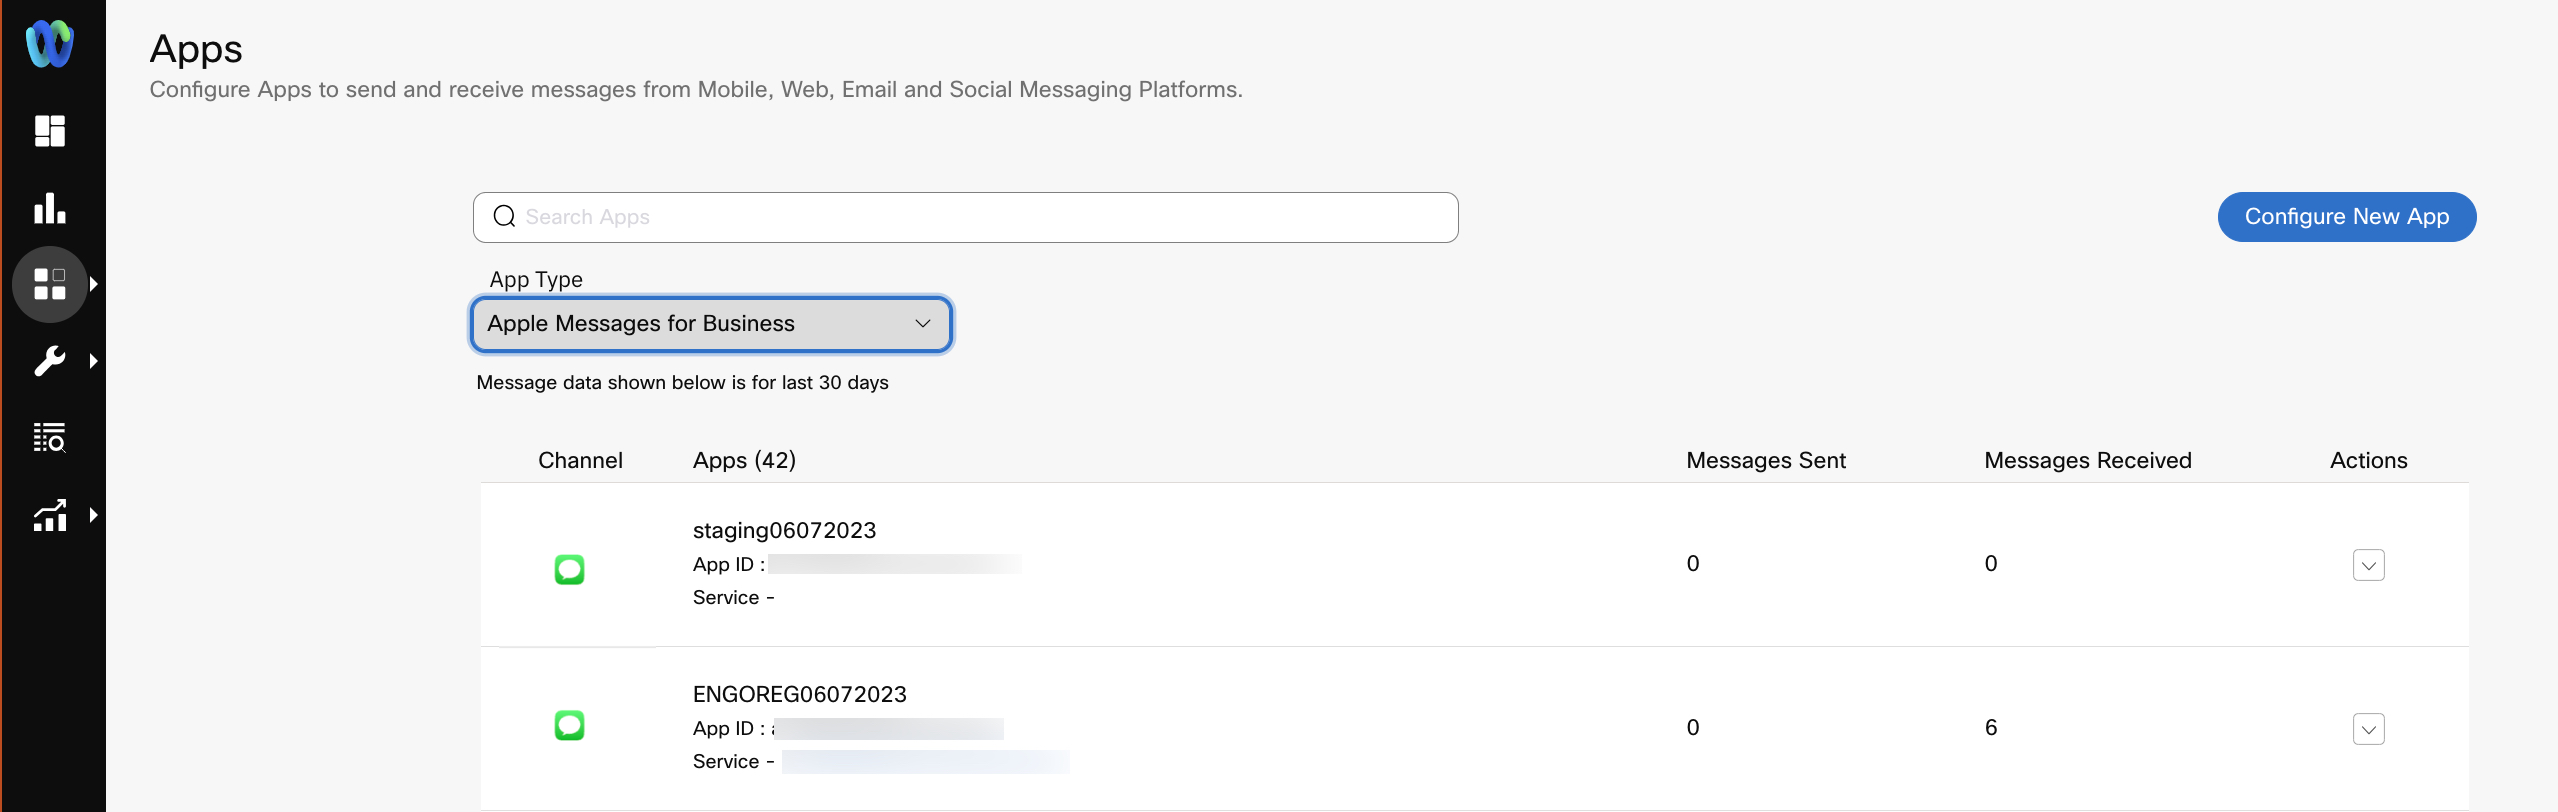
Go to the Assets>Apps page.
-
Select Apple Messages for Business from the App Type dropdown.
-
Select the required app and click Manage under Actions.
-
Enable Payment toggle and provide the following details that you have obtained here: Merchant ID, Merchant Name, Domain Name as shown below
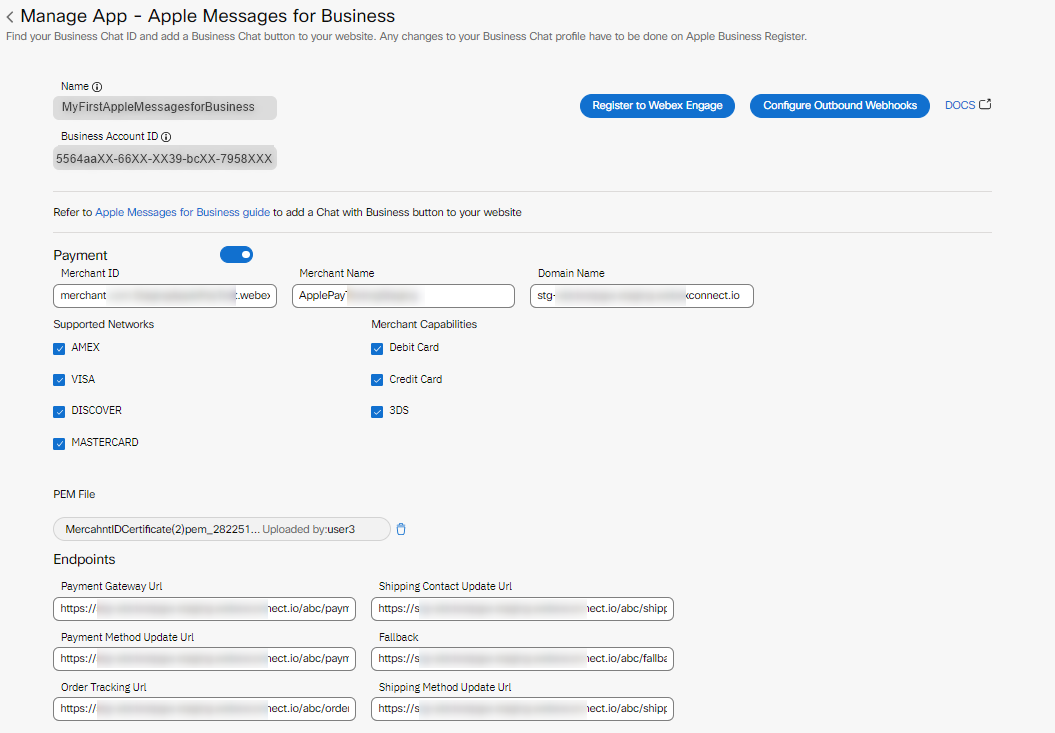
Enable Payment
-
Choose the payment networks allowed by the business in Supported Networks. Selection of at least one network is mandatory.
-
Upload the PEM File that you downloaded. This is the certificate for your business.
-
The Payment Gateway URL directs the money to your account.
Optionally, provide values for the following Endpoints. These are a set of URLs used in the payment process.
- Shipping Contact Update URL - URL for the customer to update any changes in the shipping address
- Payment Method Update URL – URL to change the payment method
- Fallback URL – a URL to complete the purchase transaction in case of a failed payment
- Order Tracking URL – URL to update the order information after completing the order
- Shipping Method Update URL – URL to change or update the shipping method
Once the above steps are configured, you can start using flow nodes to send Apple Pay requests and wait for payment responses to configure your customer journeys. Click here for more information on configuring Apple payment.
Apple Authentication Configuration (Optional)
Enterprises can send an authentication type message on Apple Messages for Business to prompt the user to login with their credentials right within the message window. This level of authentication opens up a whole new set of sensitive customer support use-cases seamlessly possible.

Apple Business Register
Prerequisites
-
You must have an Apple Messages for Business account
-
OAuth authorization endpoint, OAuth token endpoint, OAuth client ID - These details need to be entered in your Apple Messages for Business account within Apple Business Register. These details will be provided by your OAuth provider. The example below demonstrates the setup using LinkedIn’s OAuth service.
-
OAuth client secret - This needs to be entered on the ‘Manage App’ section of Apple Messages for Business app on Webex Connect UI.

Enable Authentication
Once your authentication configuration is setup on both Apple Business Register and Webex Connect, you can start using it in a flow. Click here for more information on configuring authentication.
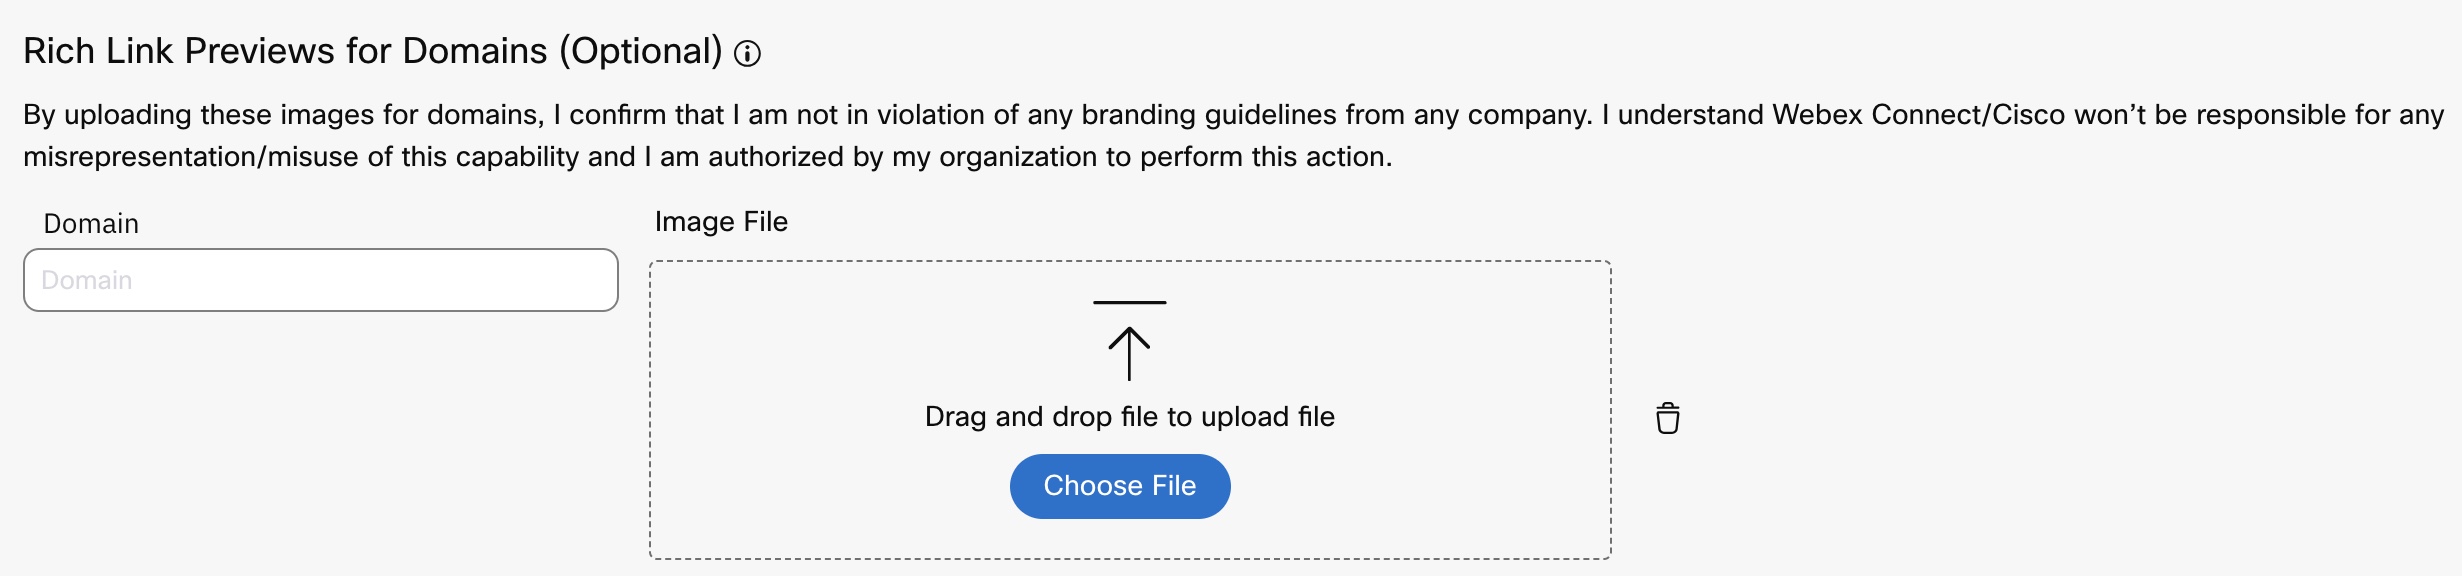
Rich Link Previews for Domains (Optional)
When converting hyperlinks in text messages to rich links, if a webpage doesn’t have a preview-quality image, the platform uses the default preview image. You can control what preview image should be used by default for such web pages, by using this feature. You can add one default preview image per domain for up to 25 domains. You should use this feature only if the hyperlinks you want to send to customers do not have preview-quality images. You can figure out whether a particular webpage has a preview-quality image by sending yourself the hyperlink as an iMessage from any Apple device. If the webpage has a preview-quality image, it’ll show up on the iMessages console.
To upload preview images:
- Click Add Preview For Domain.

Add Preview For Domain
- Enter a valid Domain name.
Domain Name
- Click Choose File to upload the image for the domain.
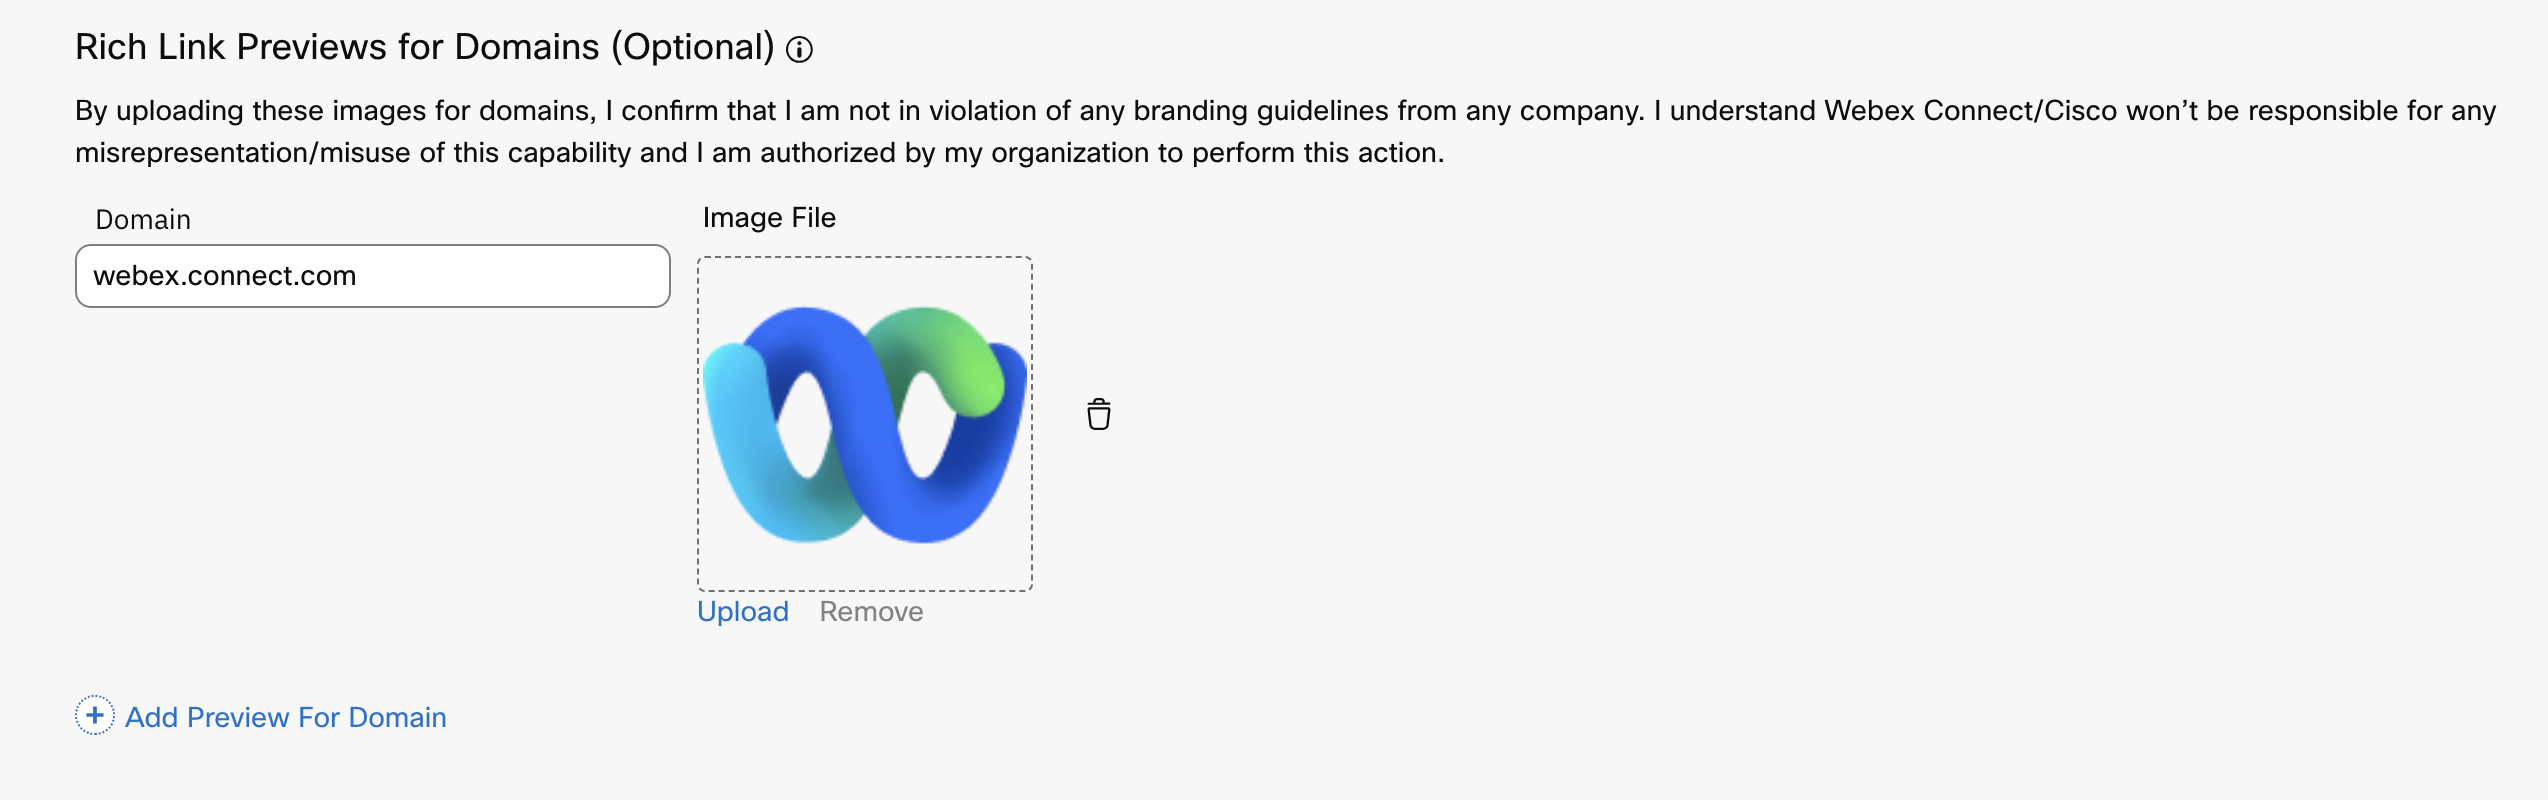
Choose File to upload the image
Note:
- You can add up to only 25 domains per asset. Once you reach the limit, the “Add Preview for Domain” button will be disabled.
- You can upload only .jpeg, .jpg, and .png images.
- Images must not exceed 5MB and must be of at least 50 pixels in height and width.
- Make sure to provide only domains, not URLs. i.e., avoid entering https or http.
- Domains with sub-category or sub-domains are allowed.
- If you enter www. at the beginning of a domain, it is ignored and the rest of the domain is considered.
Registering on Webex Engage
-
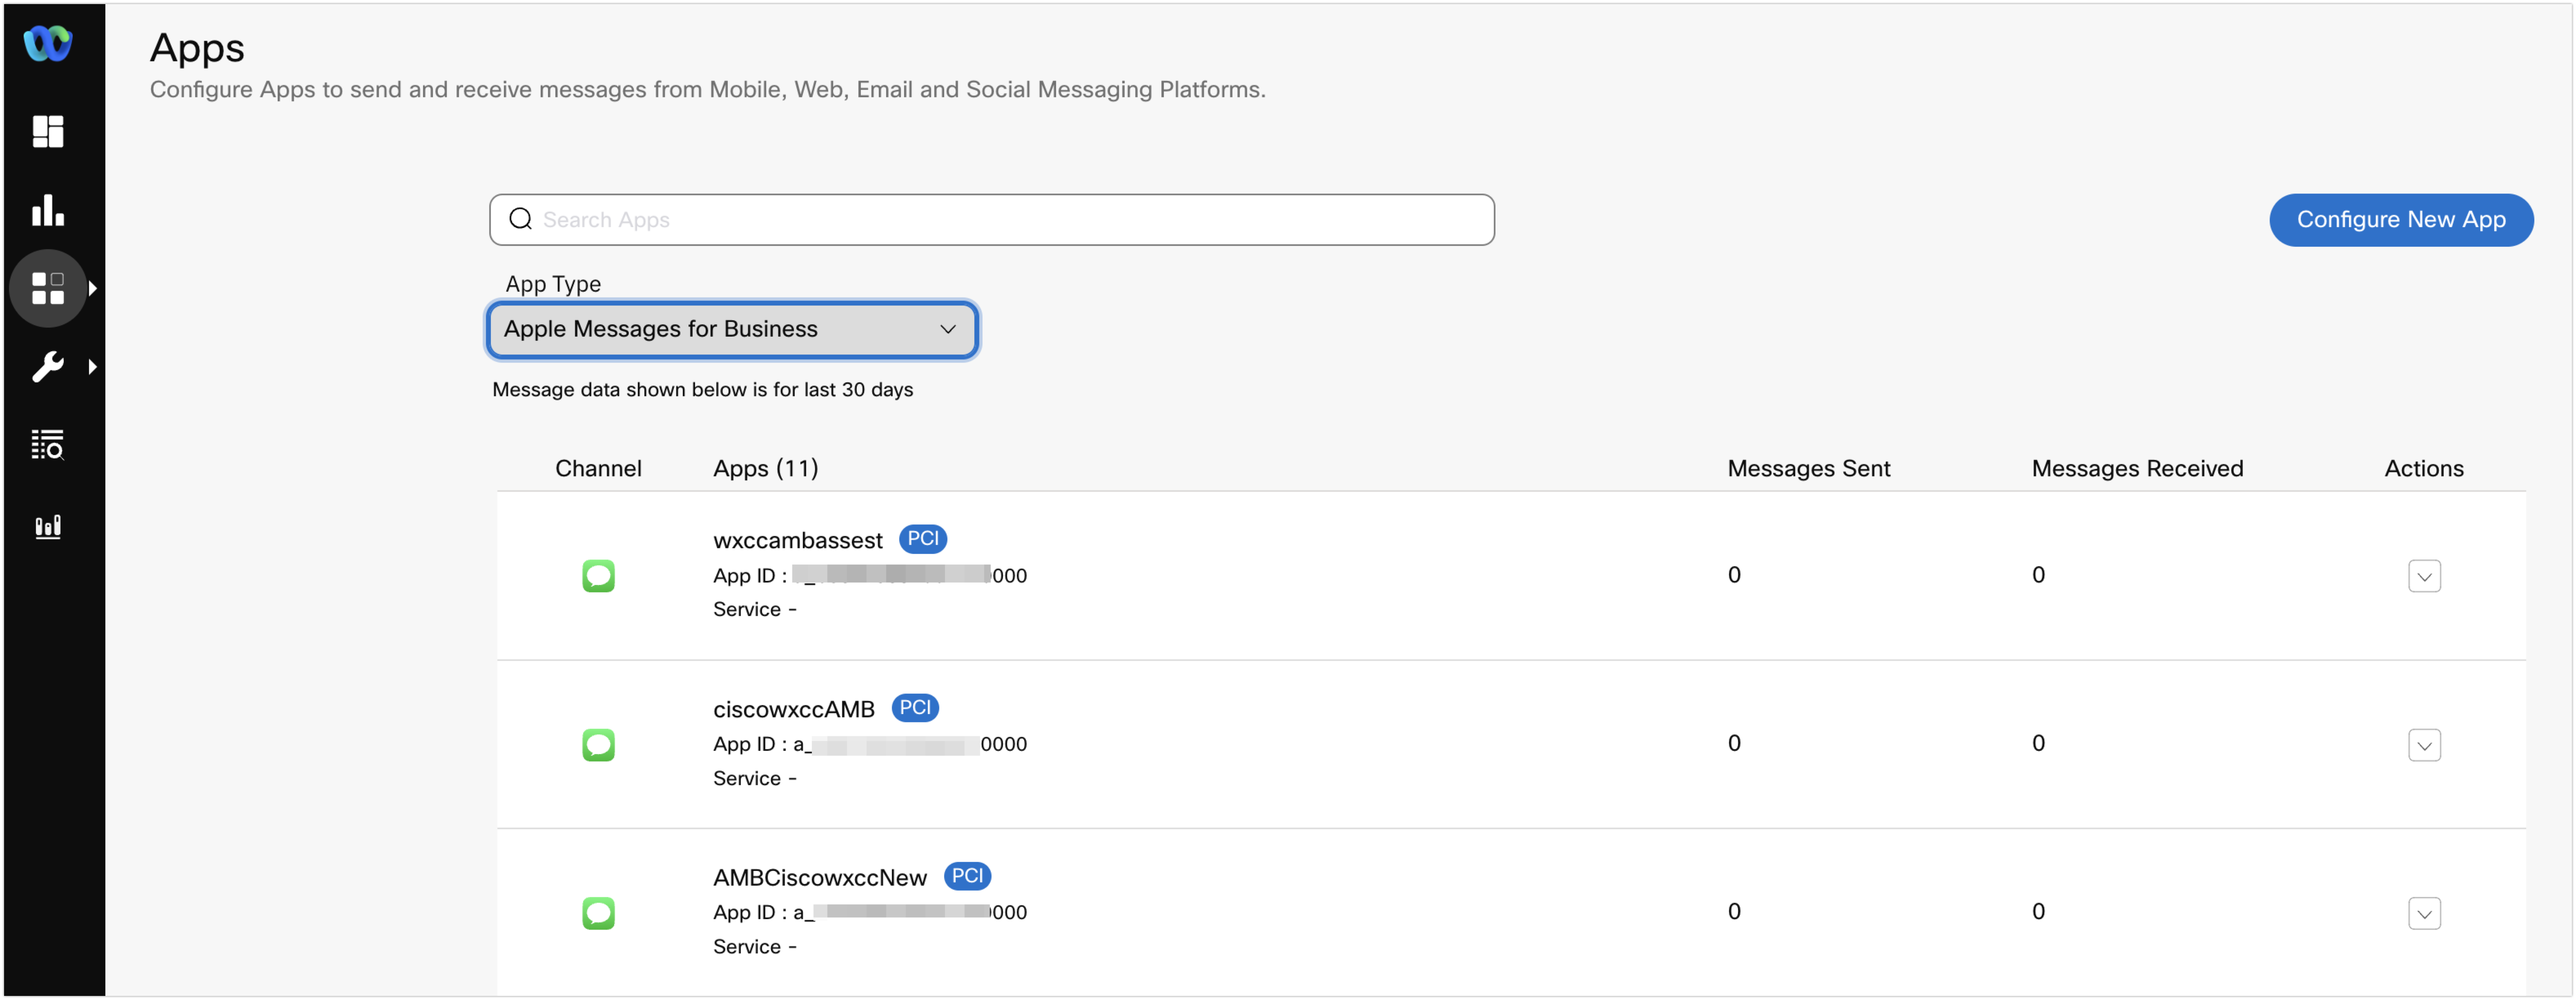
Go to Assets -> Apps.
-
Select Apple Messages for Business from the App Type dropdown.
-
Select the required Apple Messages for Business channel for which you want to register with Webex Engage.
Apple Messages for Business
-
In Manage App - Apple Messages for Business page, click Register to Webex Engage.
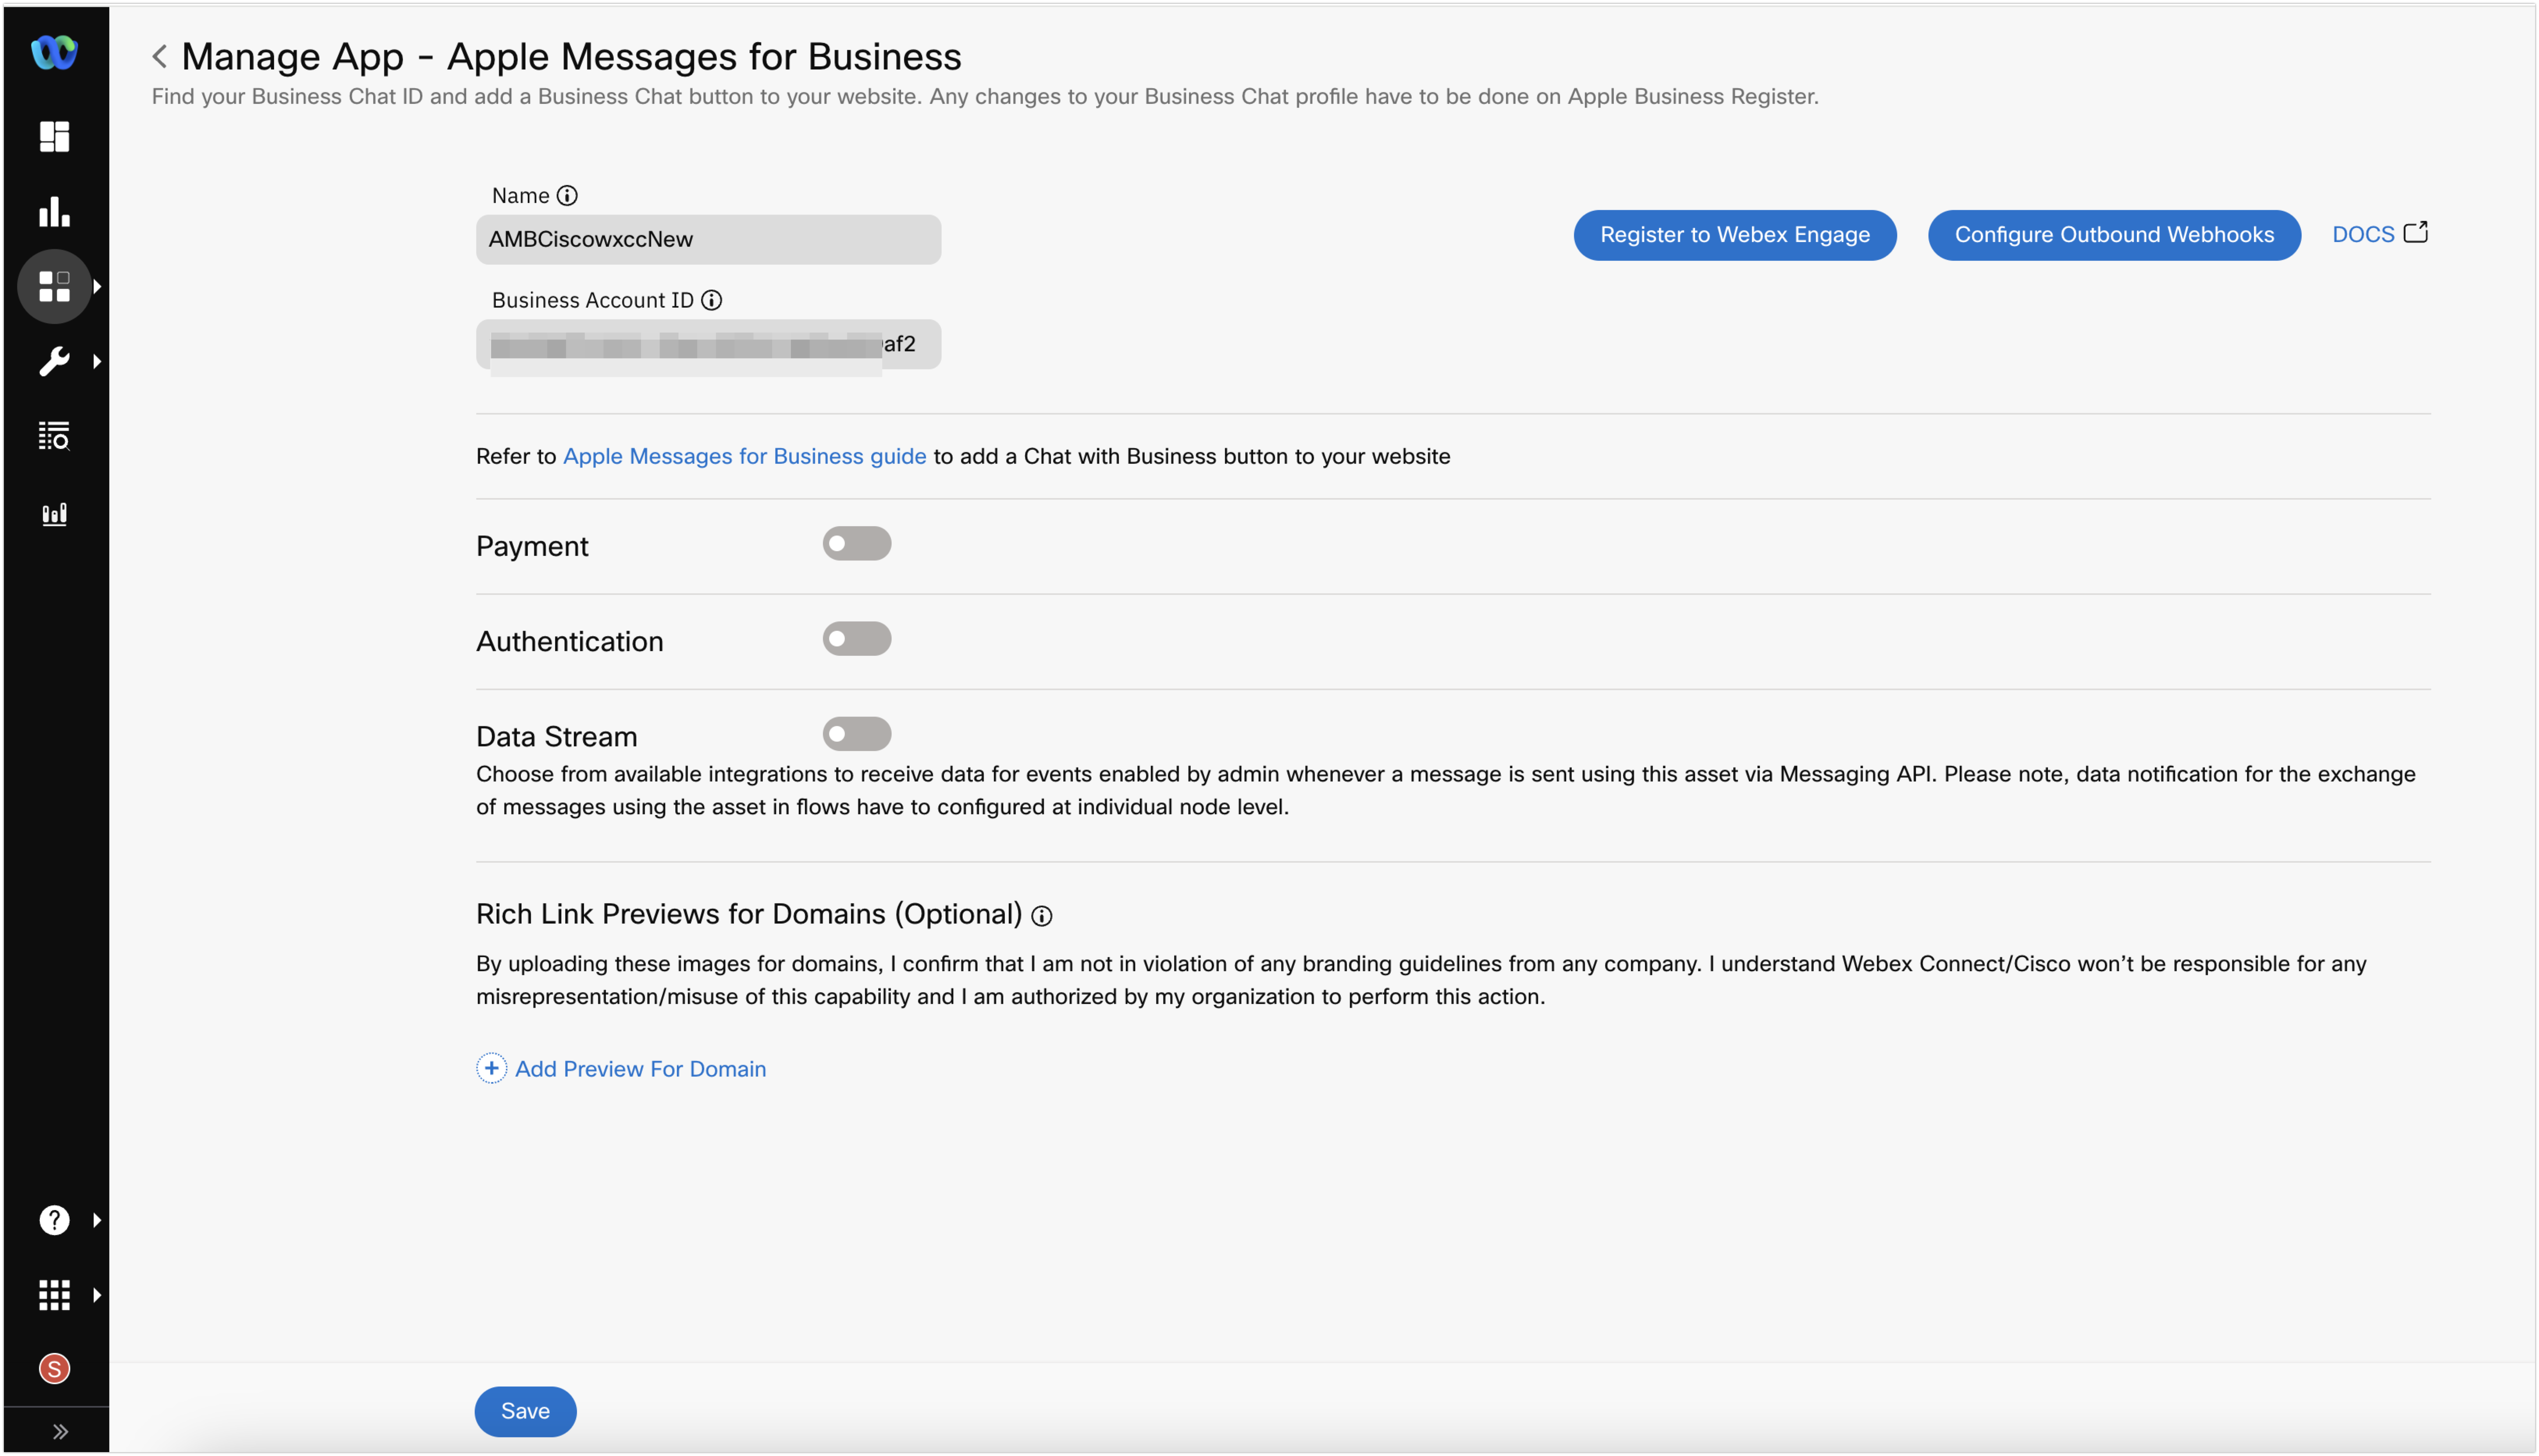
Register to Webex Engage
The Register to Webex Engage pop-up appears.
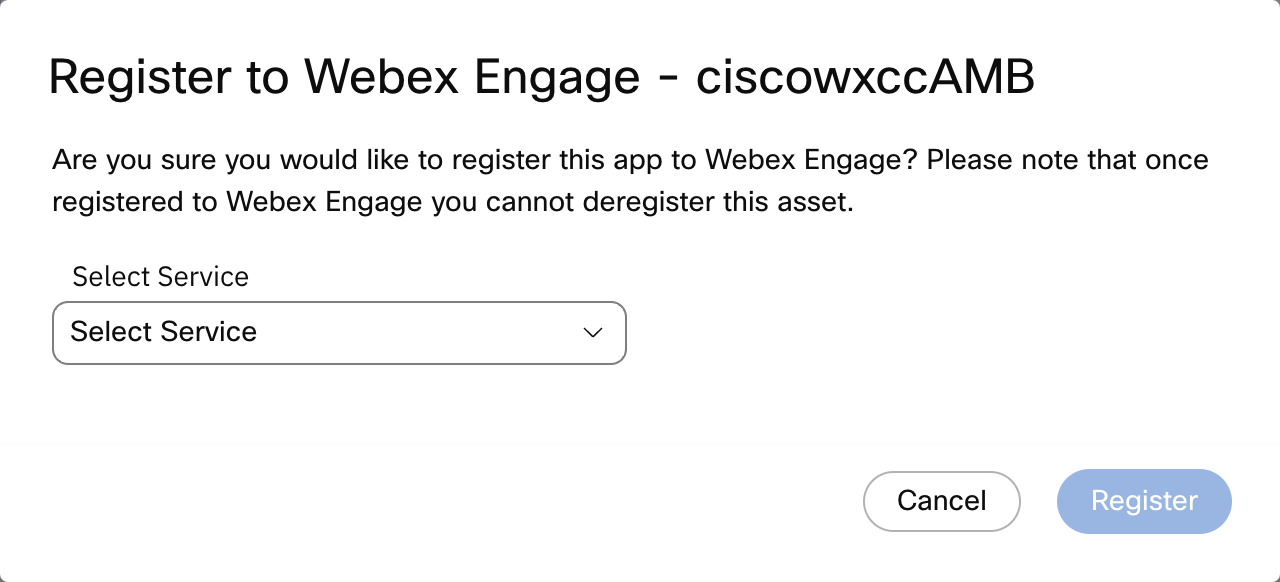
Register to Webex Engage pop-up
- Select the required service (this should be the Webex Connect service that would be used for configuring Apple Messages for Business flows for Webex Contact Center) and click Register.
The message "Asset registered successfully" is displayed.
As shown above, you will see a Webex Engage icon and a PCI check-enabled flag next to the App name once it's been successfully mapped with Cisco Webex Contact Center.
Webex Engage icon and PCI icon
API
Here is a Postman collection to test our APIs. Make sure you change the key in the header to your service key.
Latest Collection: 
Archived Collection: Refer Postman Collection
Webhooks
You can configure Outbound Webhooks by choosing the Apple Messages for Business app from the entity dropdown to receive incoming messages and events from your customers.
Once you have registered and configured on the Apple Messages for Business and selected Webex Connect as your preferred service provider.
FAQs
You can refer to the Apple Messages for Business channel FAQs for contextual information.
Updated about 1 month ago