
Migration from On-premise API to Cloud API
Migration from On-Premise API to Cloud API
Reach out to your Support contact to get the migration enabled. Once it is enabled, you can migrate your phone number from On-Premise to Cloud API within a few minutes.
Make sure to initiate the migration process during the maintenance window, when the traffic is low or turned off. The downtime is generally around 5 minutes and you do not need to re-verify the phone number.
Once the migration is completed, the traffic will resume.
The Support team will monitor the migration at the back-end. If you see any issues with the traffic, reach out to the Support contact.
Media Limitation with Cloud APIs
The following media codes are not supported with Cloud APIs. Please re-upload the media files with a supported codec before initiating migration.
- audio/x-hx-aac-adts and audio/mp4 for audio messages.
To initiate migration of WhatsApp number/app from On-Premise API to Cloud API:
- Navigate to Assets → Apps
- Select the required account you want to migrate. You can only migrate if the WhatsApp is On-Premise.
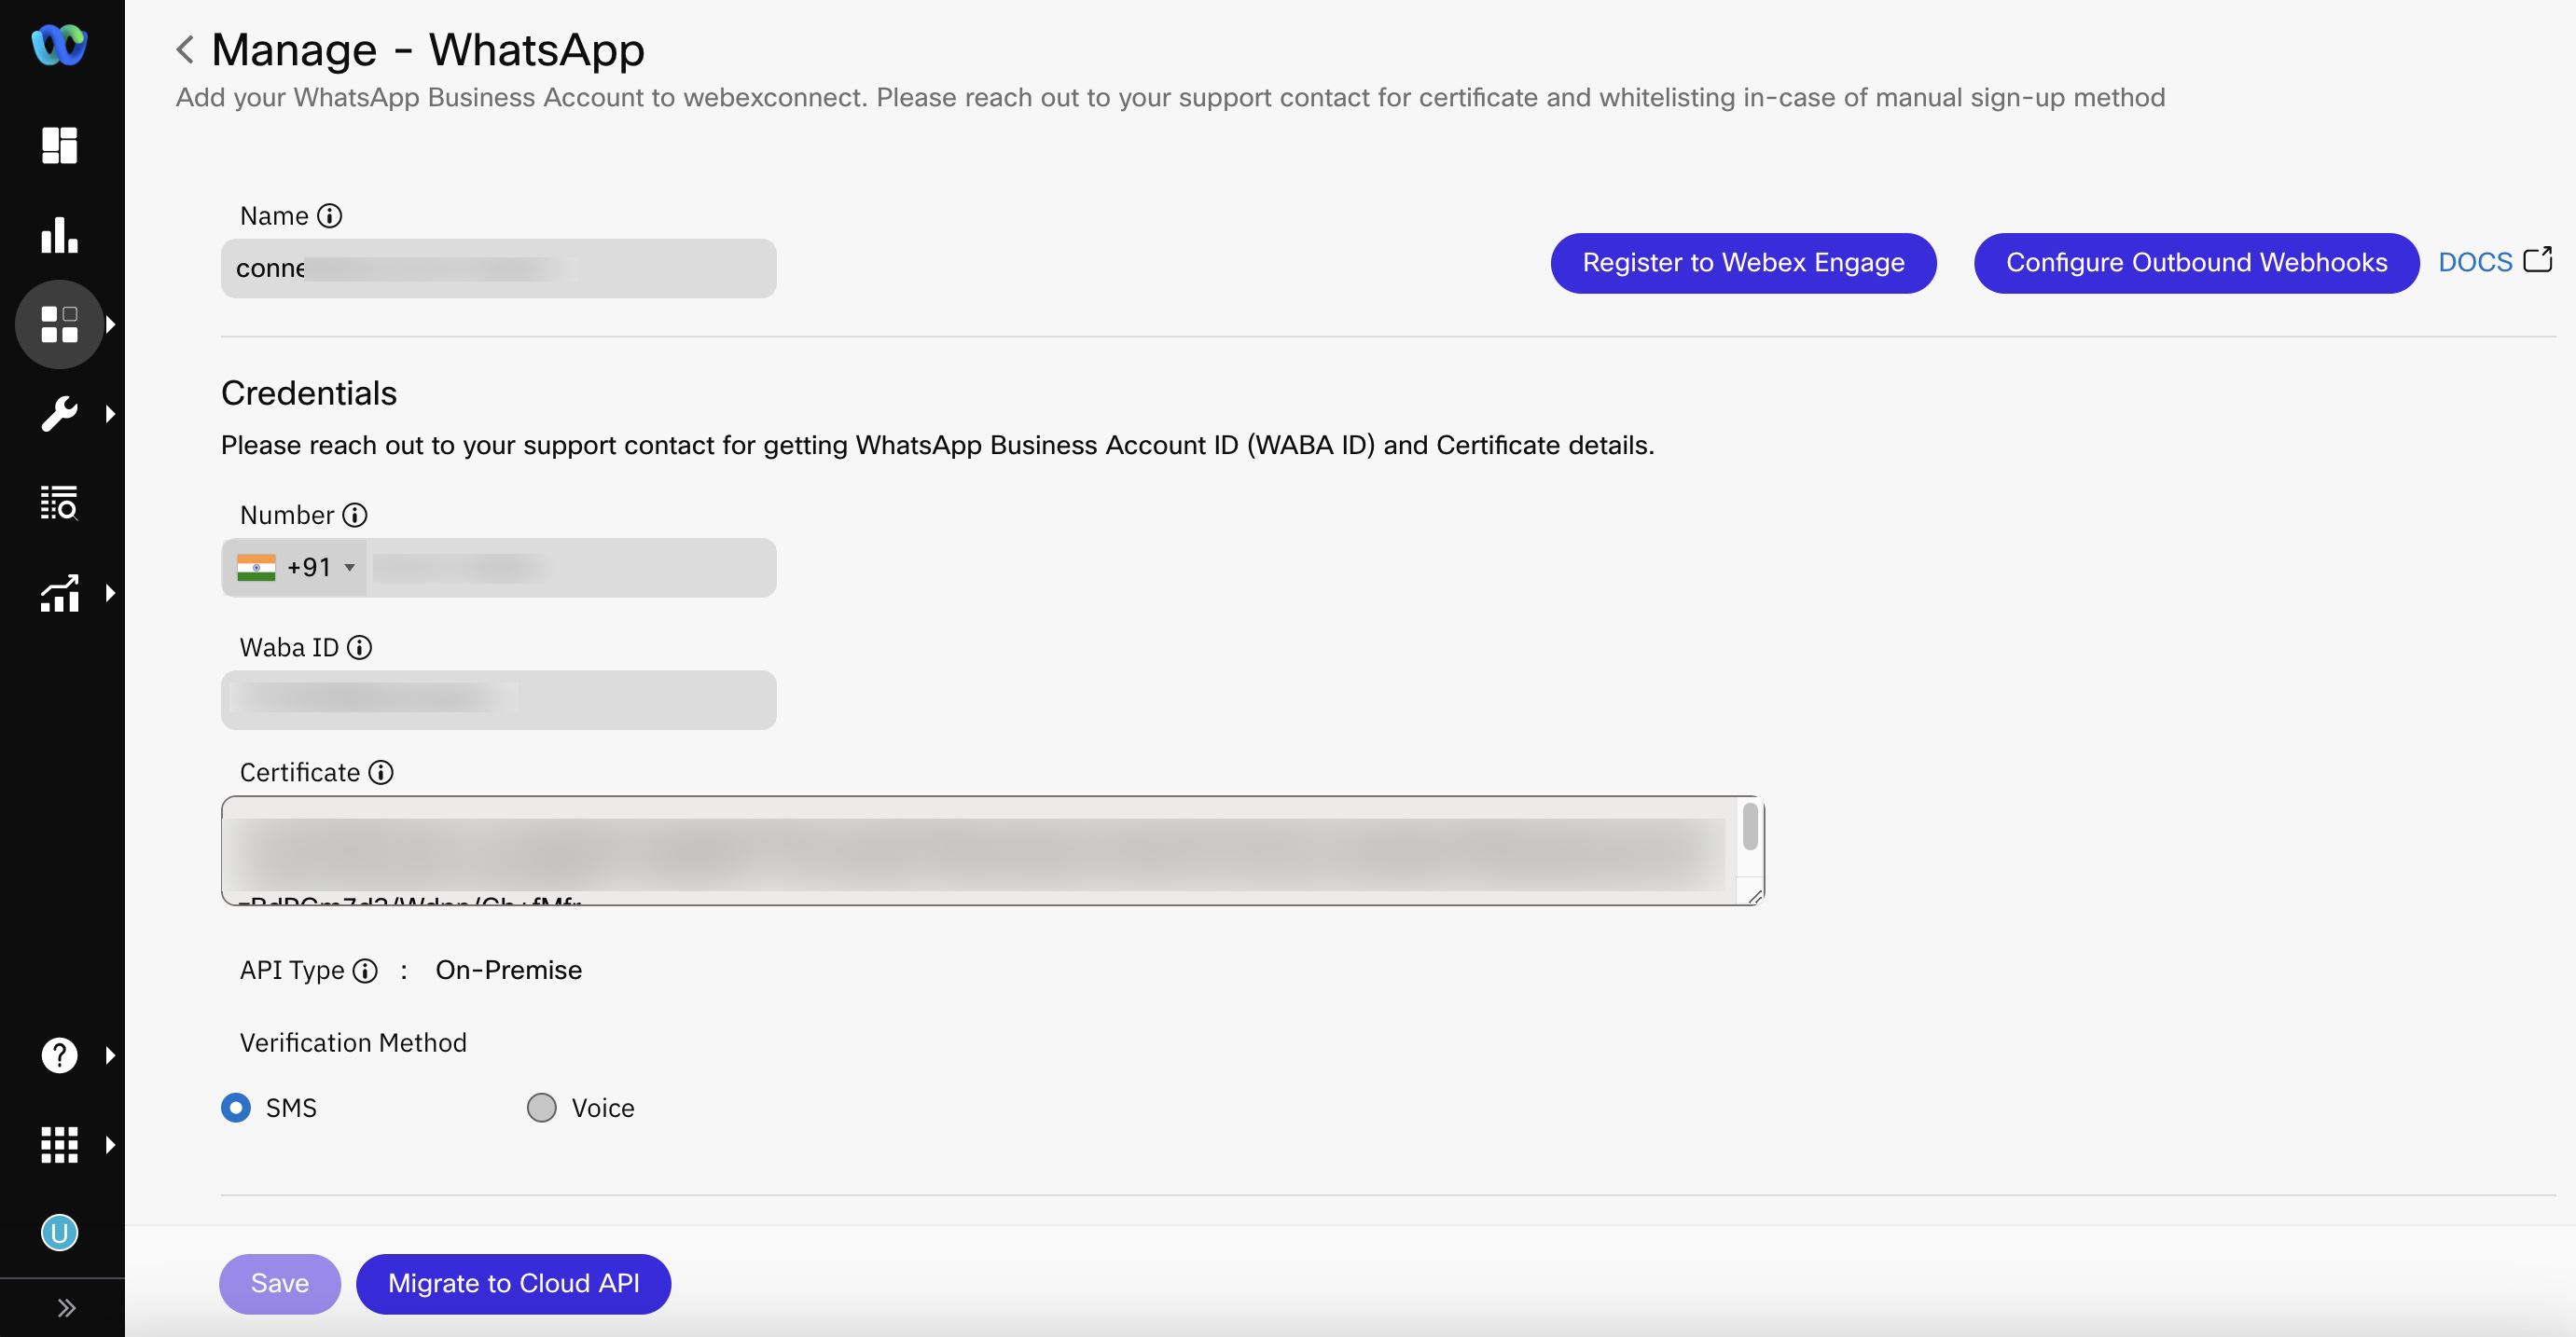
- Select the Verification Method by which you want to confirm.
- Click Migrate to Cloud API.
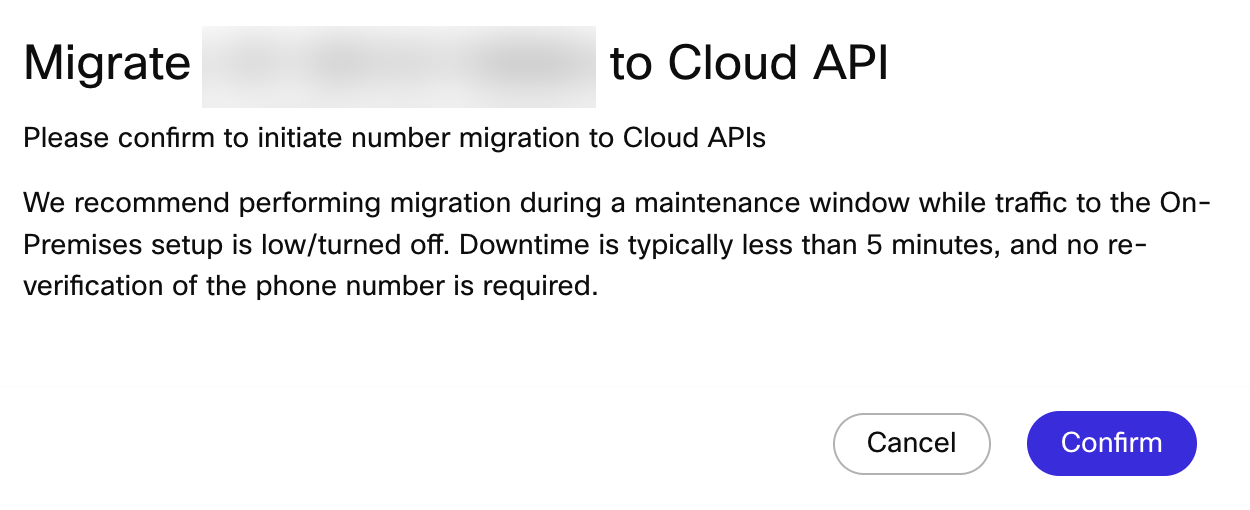
- Click Confirm. A confirmation message is displayed.
Advantages of Cloud API
- Higher throughput: By default, Cloud API supports up to 80 messages per second (mps), including sending and receiving of text and media messages. This can be increased up to 500 mps upon request. If you want to update a phone number to 500 mps, reach out to your Support contact. During the update, you will experience the following downtime, until the update is complete:
- Phone numbers new to the WhatsApp Business Platform: No downtime
- Phone numbers already in use with the On-Premises API: 5 minutes
- Phone numbers already in use with the Cloud API: Up to 24 hours
- Scaling: Cloud API automatically scales and adjusts to handle your workload, within your rate limit (messaging volume and number of WhatsApp business accounts).
- Reduced time to go live
- Support for future messaging capabilities.
Disabling 2FA Authentication Pin
Your support contact might reach out to you to reset your 2FA authentication pin manually. This can happen if there is a migration failure or messaging traffic has not resumed due to an unforeseen scenario. Follow these steps to reset the pin in WhatsApp Manager:
- Go to settings, log into your Facebook Business, and click the business you are using to manage your WABA (WhatsApp Business Account)
- In the settings screen, click WhatApp Accounts and find the WABA you want to reset the verification code for. Click on the WABA and a panel with its respective info will come up on the right-side of the page.
- In the WABA information module, click Settings.
- In the new tab, click WhatsApp Manager.
- In WhatsApp Manager, find your phone number and click Settings.
- Click Two-step verification.
- In the Two-step verification tab, click Turn off two-step verification. A message with instructions will be sent to your email address.
Updated 5 months ago