
Messenger
Learn how you can create and manage Messenger message templates.
Please note that Messenger templates configured using this feature an be used only with Messaging API v1 at the moment.
Configuring Messenger Templates
Messenger Template Configuration
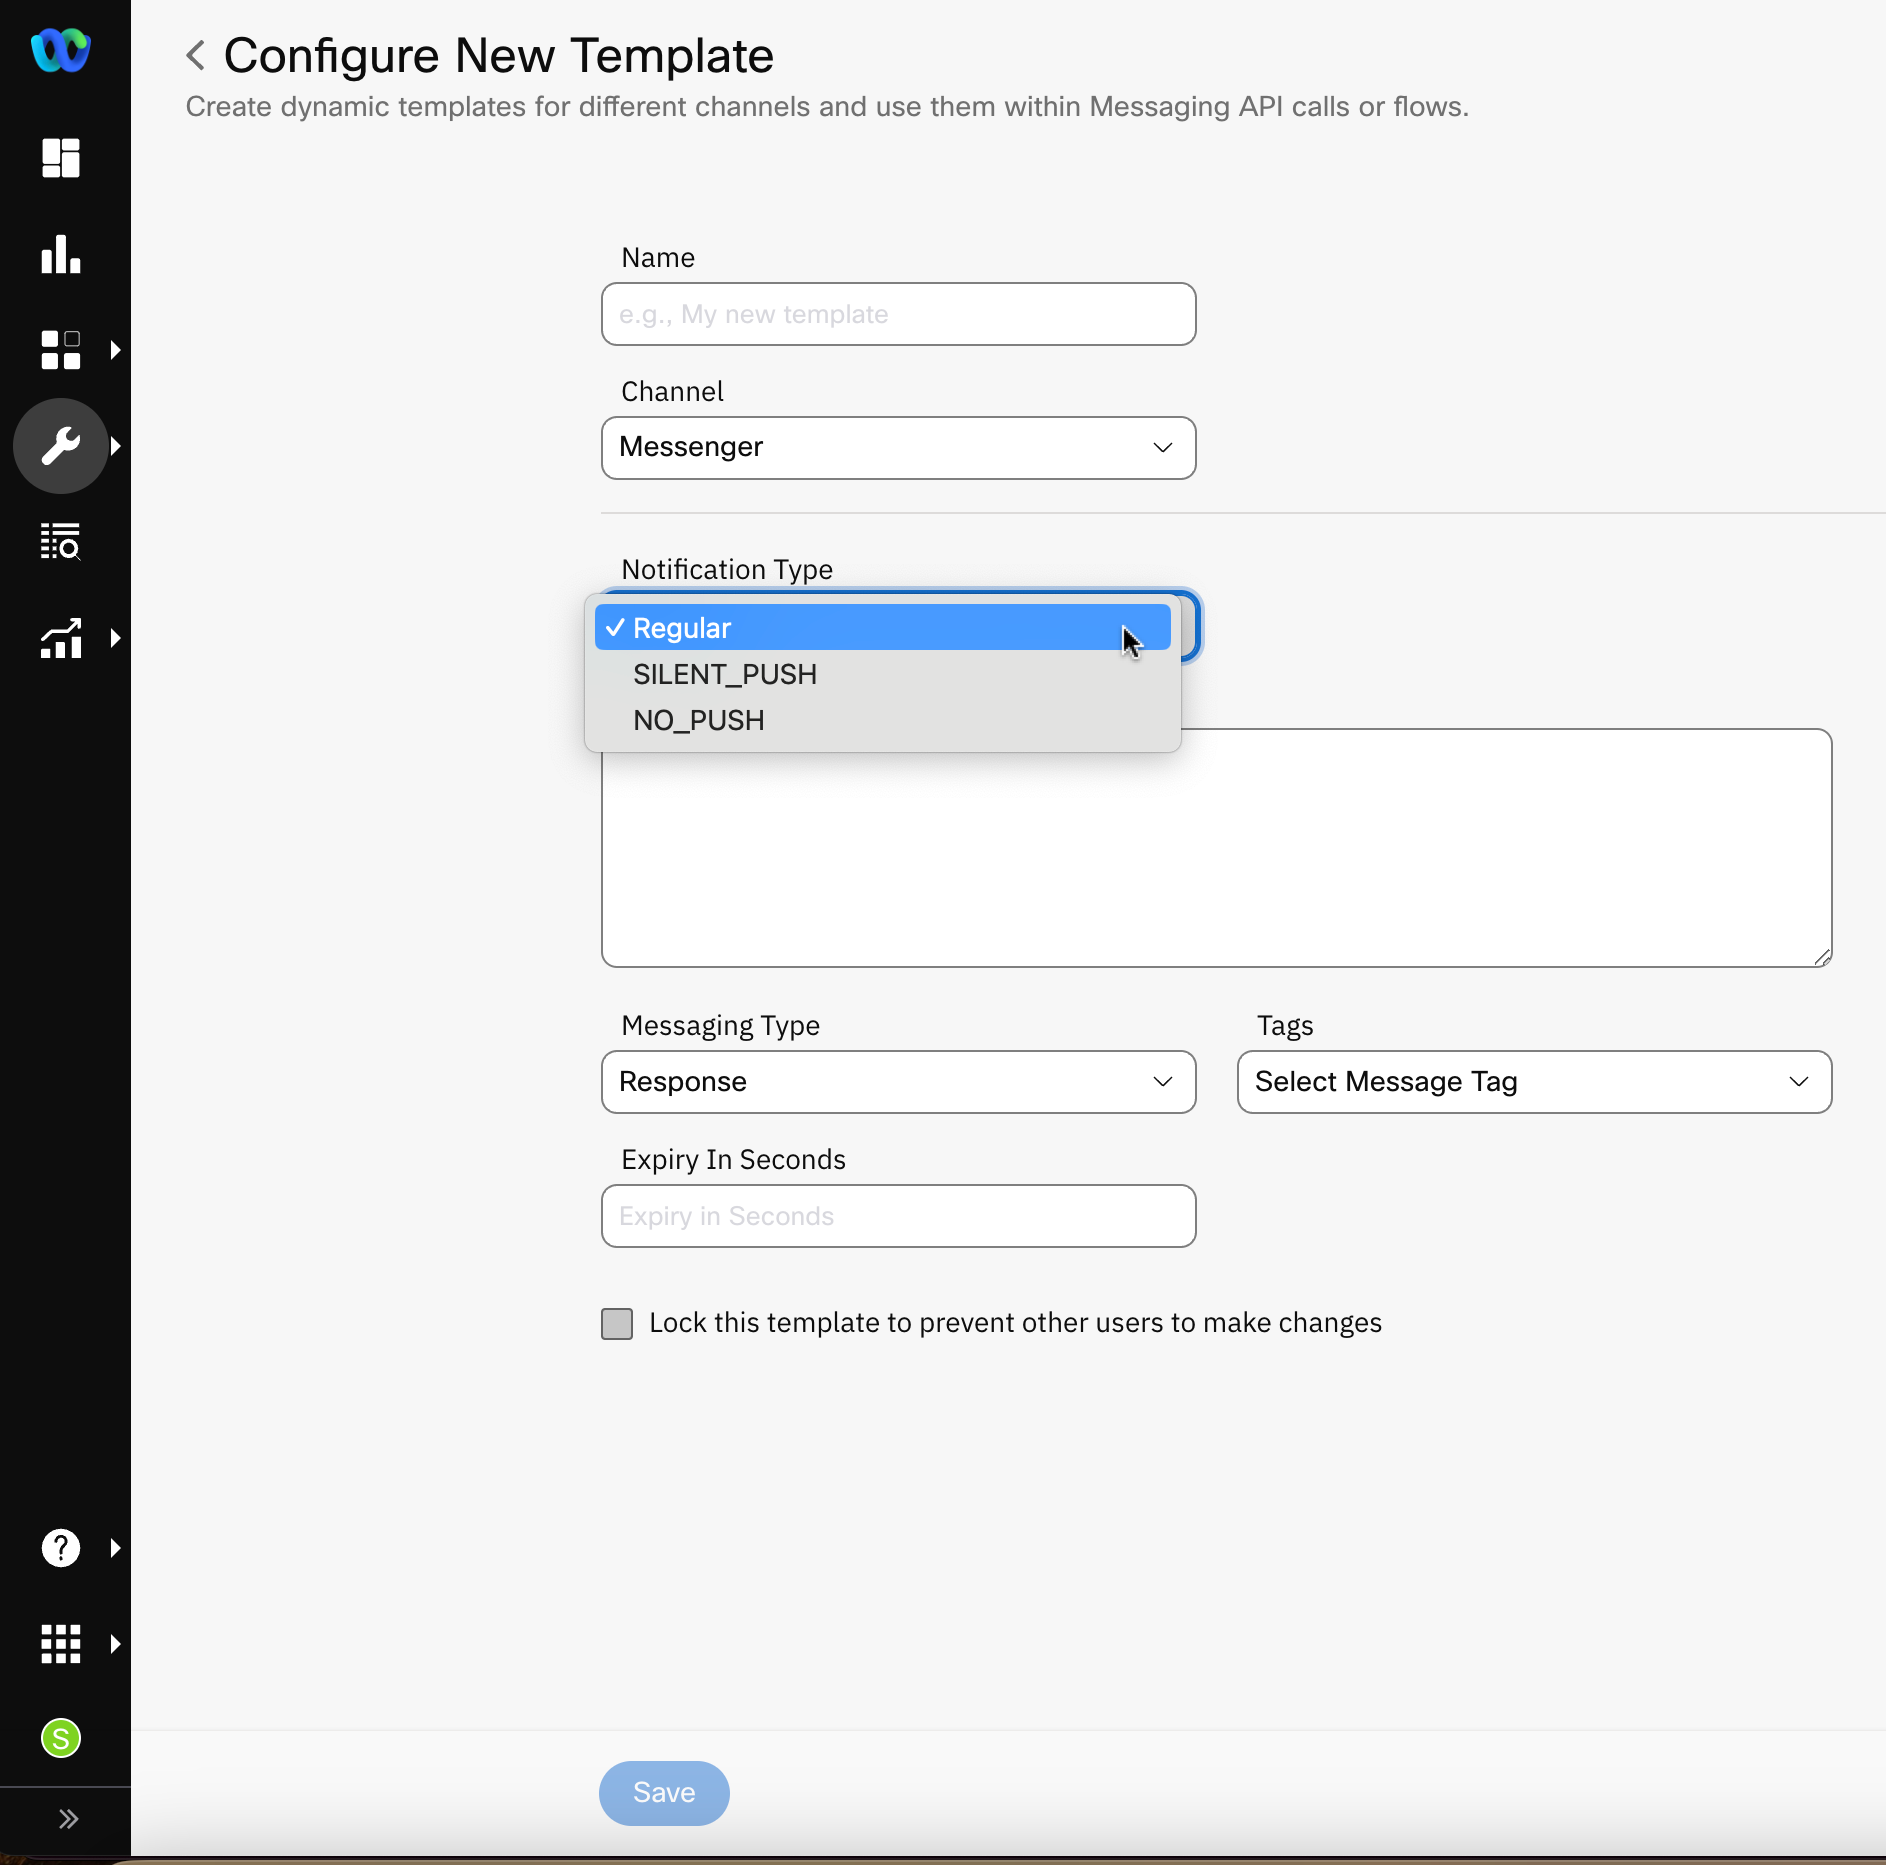
To configure a new Messenger template:
- Go to Tools > Templates.
- Click Add New Template.
- Enter a Name for the template. Only lower case letters and underscores are allowed in this field. Do not use spaces in the template name.
- Select the Channel as Messenger.
- Select one of the following options for Notification Type:
- Select_Push
- No_Push
- In the Message field, add a message that should be displayed on the user’s device.
- In the Notification Type drop-down, select one of the following:
- Update
- Message Tag
- In the Tags drop-down, select one of the following options:
- Account_Update
- Non_Promotional_Subscription
- Confirmed_Event_Update
- Post_Purchase_Update
- Human_Agent
- Enter the detail for Expiry In Seconds field.
- Select Lock this template to prevent other users to make changes if you want the template to remain inaccessible for other users to make changes.
- Click Save. The template is created.
Updated 23 days ago