RCS Message Node
RCS (Rich Communication Service) is an enriched messaging service that works on nearly 800,000,000 Android devices globally. It is an exciting way for brands to connect to their customers. Its app-like functionalities drive more engagement between brands and their customers.
In the US, and UK, and Canada - RCS will work on most android devices that were released with Android OS v.8 or later. Check with your client team for support in other countries.
The RCS message node allows you to bring in rich messaging capabilities into your flows enabling you to interact with your customers in an efficient manner.
Use the RCS Capability Node as a predecessor to this node to know if the user's mobile device has RCS capability.

RCS Message Node
Prerequisites
Make sure that you have created and configured an RCS App before you can start using the RCS message node in any of the flows.
Node Configuration
Double-click the node to enter/specify various parameters to complete the node configuration. Perform the following steps to configure the node:
- Select a Destination Type.
- Customer Id - the profile ID of the user
- MSISDN - the mobile number of the user.
- Enter a value/variable name that contains the customer ID or the mobile number for the selected Destination type.
Note
If +E.164 format is enabled for your tenant - all the numbers in the To field should follow the "+E.164" format.
This format displays the number with a "+" followed by the country code and the phone number.
+E.164 format is not applicable to the numbers in the From field.
- Enter an integer in the Carrier field if you already know the carrier that the customer uses. Leave it blank if unsure.
It is useful when sending messages to users on a single mobile operator and increases the message throughput significantly when provided. See the list of carrier IDs. - Select an appropriate Message Type. Webex Connect supports the following message types for RCS:
- Text - allows you to send a simple text message.
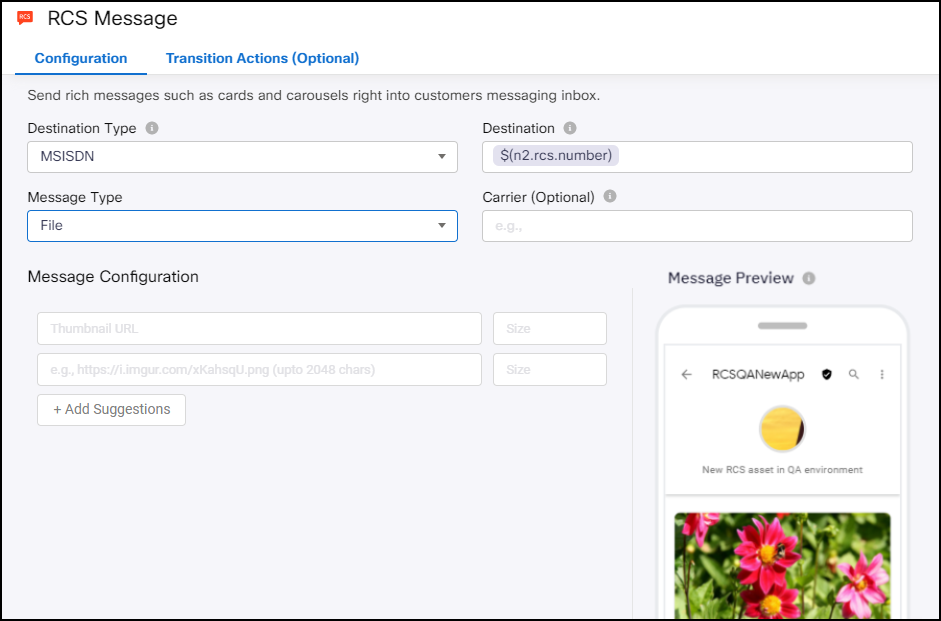
- File - allows you to include a file in the message. When you select this type, you can also include the size of the media file along with its location. Provide the size in bytes. File size is recommended and shall be greater than zero.
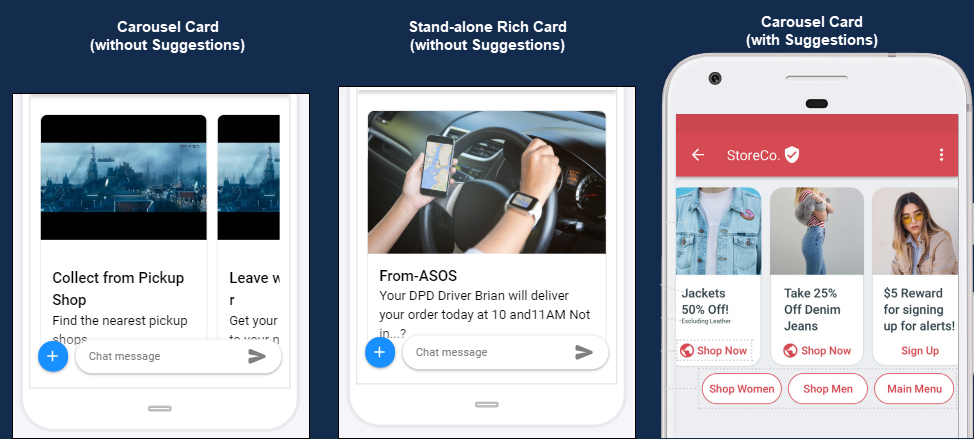
- Rich Card - allows you to send information to a user in a more visual format than plain text. Rich cards can contain image/video, the title of the message, a description, list of suggested replies/actions.
- Carousel Card - allows you to send multiple rich cards as a single message. You can include 2-10 rich cards in a carousel. The RCS messaging app renders the carousels such that the fields within all contained cards are aligned. All media within the cards must be of the same height. Along with the media details, you can also specify the size of each media file in bytes. File size is recommended and shall be greater than zero.
- Typing Indicator - indicates that the user is typing in the message window.

RCS Message Configuration Window
- Do the Message Configuration by completing the following steps:
- Enter a message of up to 3072 characters for the message type Text.
- Enter a URL of the file that you want to include in the RCS message for the message type File. The permitted URL length is 2048 characters. Audio, Image and Video files are supported.
- Select/configure the following fields for Rich Card. Refer to supported media for recommended formats and resolutions:
(a) Select the Card Orientation - Vertical or Horizontal.
(b) Select the Media height - Short, Medium, or Tall.
(c) Enter a Media URL - the URL that points to the media. The character limit of the URL is 2048 characters.
(d) Enter a Thumbnail URL - the URL that points to the thumbnail of the media. The character limit of the URL is 2048 characters.
(e) Provide a suitable Title for the rich card. The character limit is 200 characters.
(f) Provide an appropriate Description for the rich card message. We recommend keeping descriptions as short as possible to avoid truncation.
(g) Click Add Suggestions to add buttons within the message. You can add up to 4 suggestions within the message. For example, on an order delivery notification rich card, you can add a Reschedule or Leave with neighbor suggestion to suggest a different time/place for the order delivery. - Select/configure the following fields for Carousel Card. Refer to supported media for recommended formats and resolutions:
(a) Select the Card Width - Small or Medium.
6 (b) Select the Media Height - Short, Medium, or Tall.
(c) Enter a Media URL - the URL that points to the media. The character limit of the URL is 2048 characters.
(d) Enter a Thumbnail URL - the URL that points to the thumbnail of the media. The character limit of the URL is 2048 characters.
(e) Provide a suitable Title for the rich card. The character limit is 200 characters.
(f) Provide an appropriate Description for the rich card message. We recommend keeping descriptions as short as possible to avoid truncation.
(g) Click Add Suggestions and select one of the available suggestion types to add buttons within the message. You can add up to 4 suggestions within the message.
(h) Use the arrow buttons on the carousel card to move between the rich cards in the carousel. You can also use the switch controls located at the bottom of the carousel card for easy navigation. You can add rich cards to the carousel using the add icon. Use the add/delete icons located at the upper-left corner of the carousel card to delete any rich card.
Carousel Card
A carousel card must contain at least 2 rich cards. You can include a maximum of 10 rich cards within a carousel card.
- Click Add Suggestions and select one of the available suggestion types to add suggestions/quick replies outside the message. You can add up to 4 suggestions.
- Correlation ID - You can assign a unique ID of your choice to each RCS message. This ID is returned to the platform with the delivery report and can be used to identify the message.
- Callback Data - In case there is additional data to be sent along with the delivery reports to the URL, you must specify that here.
Validations for Callback Data & Correlation ID:- Callback Data, Correlation Id fields are optional for all the channels. Send node can be saved without providing these fields.
- All characters, Alphabets, Numbers, and special characters are accepted.
- Variables can be added.
- Hard coded values are accepted.
- On Platform side, there is no Max or Min length validation for these fields.
- Notify URL - You can choose to notify a URL with the delivery report for RCS message. This field accepts only a valid URL or a variable. If an invalid URL is passed in API request or via a variable, then such request will not be considered eligible for retries.
Validations for Notify URL:- It is an optional field optional for all the channels. Send node can be saved without providing these fields.
- Notify URL should be filled with proper URL format. Otherwise, error message ‘Invalid URL, field accepts only valid URL or variable’ will be displayed.
- When space is provided in front of the URL, Invalid URL, field accepts only valid URL or variable’ will be displayed.
- When space is provided at the end of the URL, space gets trimmed and ignored and DRs are received to the URL.
- No Max length validation.
- Variables can be added to this field.
- Select Advanced Options. This is optional.
- Wait for - you can configure the RCS message node to wait for Gateway Submit/Delivery Report/Read receipts. The Time out period is in seconds.
- Expiry - you can configure the RCS message to expire using either the UTC (date and time) or the number of Seconds.
You can see a preview of the RCS message under the Message Preview pane. This preview is based on how the message appears on Android Messages on a Google Pixel device.

RCS Message Preview
Input Variables
You can see a list of all the flow variables available for use within this node under the Input Variables pane. You can also search for a variable using the Search field.
You can see the list of variables that you explicitly create and configure for this node under the Custom Variables pane. You can also add a custom variable to the flow using the Add New Custom Variable button. For more information, see Custom Variables.
Output Variables
You can see the data that this node generates as output variables. These variables are available for use in subsequent nodes. The standard output variables for this node are:
- sendDateTime - contains the date and time at which the message was sent from the node
- gatewayTid - contains the gateway transaction id of the message
- deliveryStatusDescription - contains the delivery status - success or failure
- deliveryStatusCode - contains the delivery status code. See this section for the status codes
- response_data - contains the response received
- response_interactive - contains the interactive response received.
Node Outcomes
You can see the list of possible node outcomes for this node under this pane.
| Node Edge | Node Event/Outcome |
|---|---|
| Success (green) Note: You can see this node edge only when you complete the node configuration. | > onSuccess - the flow exits through this node when it is a success > onSubmit - the flow exits through this node when a wait for gateway submit condition is configured and is a success. >* onDeliveryReportSuccess - the flow exits through this node when a wait for delivery report condition is configured and is a success. |
| Timeout (yellow/amber) | >* onTimeout - the flow exits through this node when a timeout occurs |
| Error (red) | > onError - the flow exits through this node outcome when there is an error > onPolicyFail - the flow exits through this node outcome when the expiry condition cannot be met >* onDeliveryReportFail - the flow exits through this node when a wait for delivery report condition is configured and is a failure. |
Transition Actions
Use this tab to configure the transition actions for On-enter/On-leave events. However, configuring transition actions is optional. For detailed instructions about configuring the transition actions, see Node Transition Actions.
Supported Suggestions
Suggestions include quick replies and suggested actions that enable users to reply quickly or take actions directly from within the message. The supported suggestions are:
- Simple Reply - a simple pre-configured text message
- View Location - coordinates of the location that you want to view
- Dial Phone - telephone number that you want to dial
- Share Location - the name of the location that you want to share
- Open URL - a website link that you want to send
- Calendar Event - the details of the event that you want to add to the calendar.
Supported Media
This section provides detailed information about the size, resolution, and format for the images. imiconnect supports the following media in RCS messages:
| Media Type | Format | Size | Resolution |
|---|---|---|---|
| Image | BMP GIF JPEG (highly recommended) PNG | 500 kb or less | Stand-alone Rich Card > Short: 1085x310 pixels (3.5:1 ratio) > Medium: 1080x720 pixels (1.5:1 ratio) Rich Card in Carousel 1080x787 pixels (1.37:1) is the recommended resolution |
| Video | MPEG-4 | ||
| Audio | MP4 M4A MP3 WAV |
Dynamic Carousels
Dynamic carousels allow you to send and configure carousel messages without prior configuration of fixed number of cards.
For example, you start node trigger Inbound Webhooks or HTTP Request Node may return a dynamic array response as a part of customer journey.

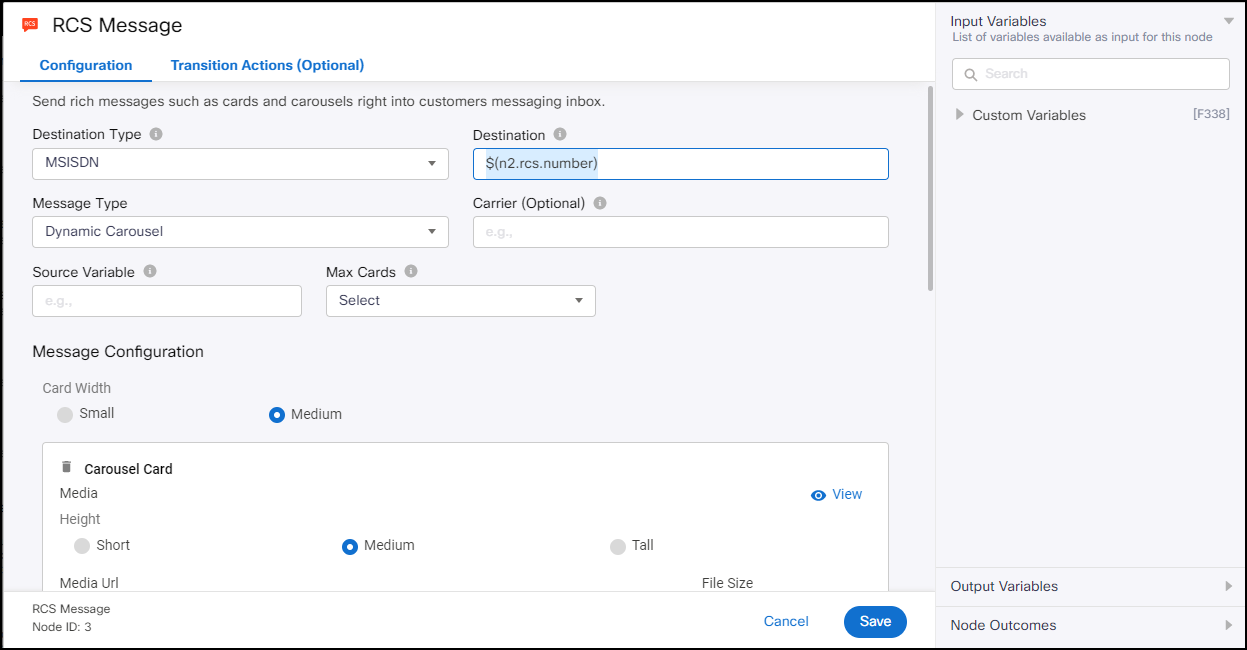
Dynamic Carousel in RCS Send Node
Dynamic carousel node can loop over an array and configure cards as a part of a flow run time.
Let's take the below example of recommendations of cars for an imaginary John
{
   "name":"John",
   "age":30,
   "cars":[
      {
         "name":"Ford",
         "description":"This is a good car 1",
         "image":"https://images.com/ford.jpg"
      },
      {
         "name":"BMW",
         "description":"This is a good car 2",
         "image":"https://images.com/ford.jpg"

      },
      {
         "name":"Fiat",
         "description":"This is a good car 3",
         "image":"https://images.com/ford.jpg"
      }
   ]
}
To send this is a dynamic carousel to the user -
- Source Variable - Enter the source input variable here. For example if this JSON is expected as a response to earlier HTTP API call then it will be available in http.response variable from the input variable list
All the variables that you intend to loop in the carousel should point to the first array variable. So in this particular case, let's say we want to send cards to the customer with each car in each carousel card. In that case, the variables will be configured as following -
- Title - $.cars[0].name
- Description - $.cars[0].description
- Media Url - $.cars[0].image
These variables are JSON path representations of individual key value pairs from the source variable
Incomplete Arrays
Any incomplete arrays will fail the dynamic carousel send node. The node will only loop on completed arrays up-to 10 cards or the value of max cards set in the send node.
Dynamic carousel loops only run for variables within the carousel card. Suggestions outside the carousel card will NOT be looped.
Loops will only be run on the first level of array nesting.
Updated 5 months ago
