
Introduction
Webex Connect contains a growing list of prebuilt integrations created, tested, and maintained by expert teams for out of box functionality. Prebuilt integrations are available as nodes and events in the low-code-builder and include support for popular systems like CRM, payment service providers, etc.,
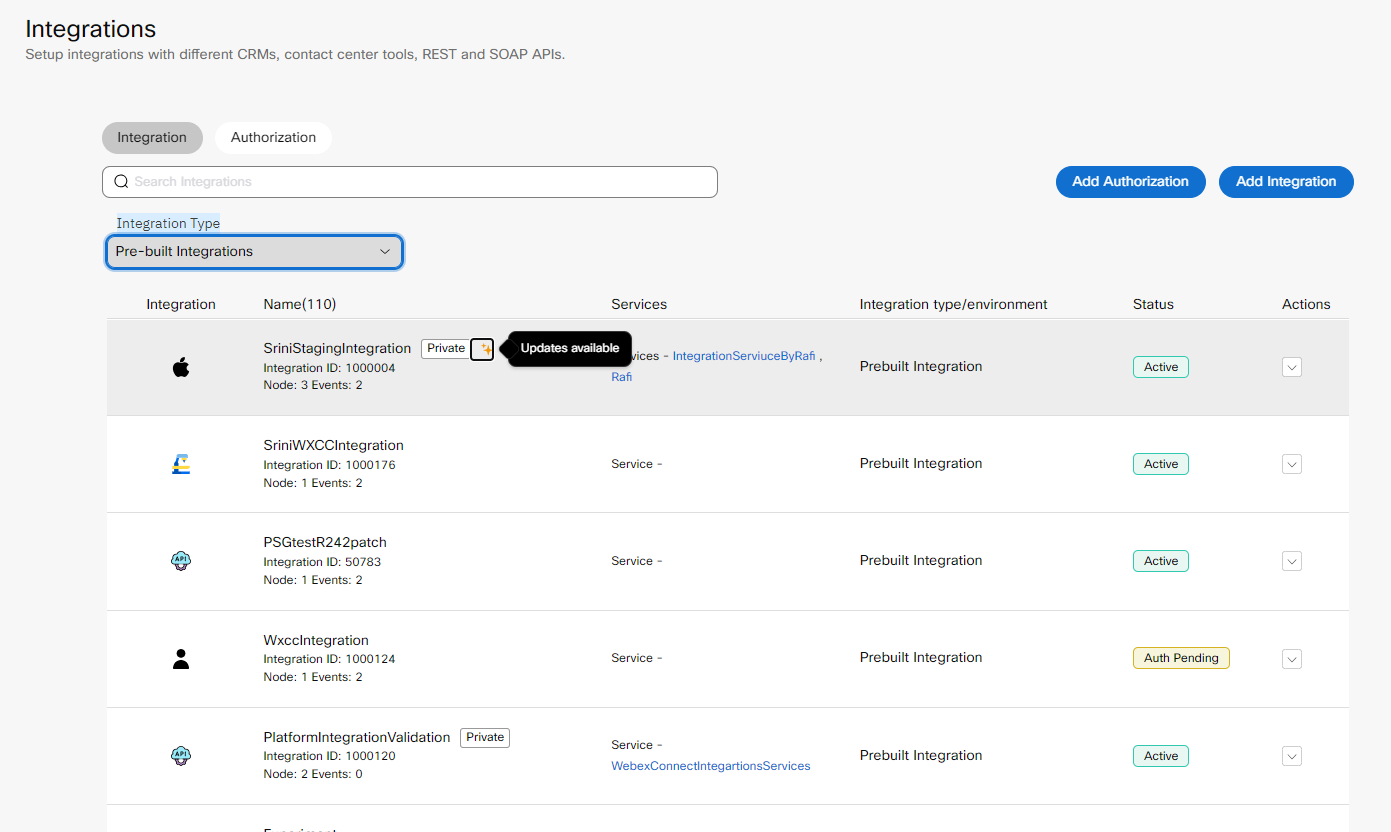
When a pre-built integration is enabled for your tenant, you can view it along with other pre-built integrations enabled for your tenant in the Webex Connect portal. These integrations will be listed in the Integrations section of the portal. You can also view all the events and nodes associated with the available pre-built integrations.
Types of Integration
Getting Started
These integrations need to be enabled for your account and are not available by default. Please contact your account manager in case you wish to enable it for your account.
Upon enabling them, below are the steps to start using them:
To view a pre-built integration:
- Login to the Webex Connect portal.
- Navigate to Assets → Integrations.
- Use the filter to select Pre-built Integrations as Integration Type.
The list of all the pre-built integrations available for your tenant are displayed. - Select Manage/View under Actions for the integration you want to view.
Authorization
To authorize a pre-built integration:
- Navigate to Assets → Integrations.
- Select Pre-built Integrations under Integration Type, to display the list of all pre-built integrations.
The integrations which are not yet authorized show the status as Pending Authorization.
- Click Actions → Manage associated with the integration you want to authorize.
- On the Manage Integrations page, scroll down to the Node Authorizations section. This section lists all the authorizations mapped to this integration.
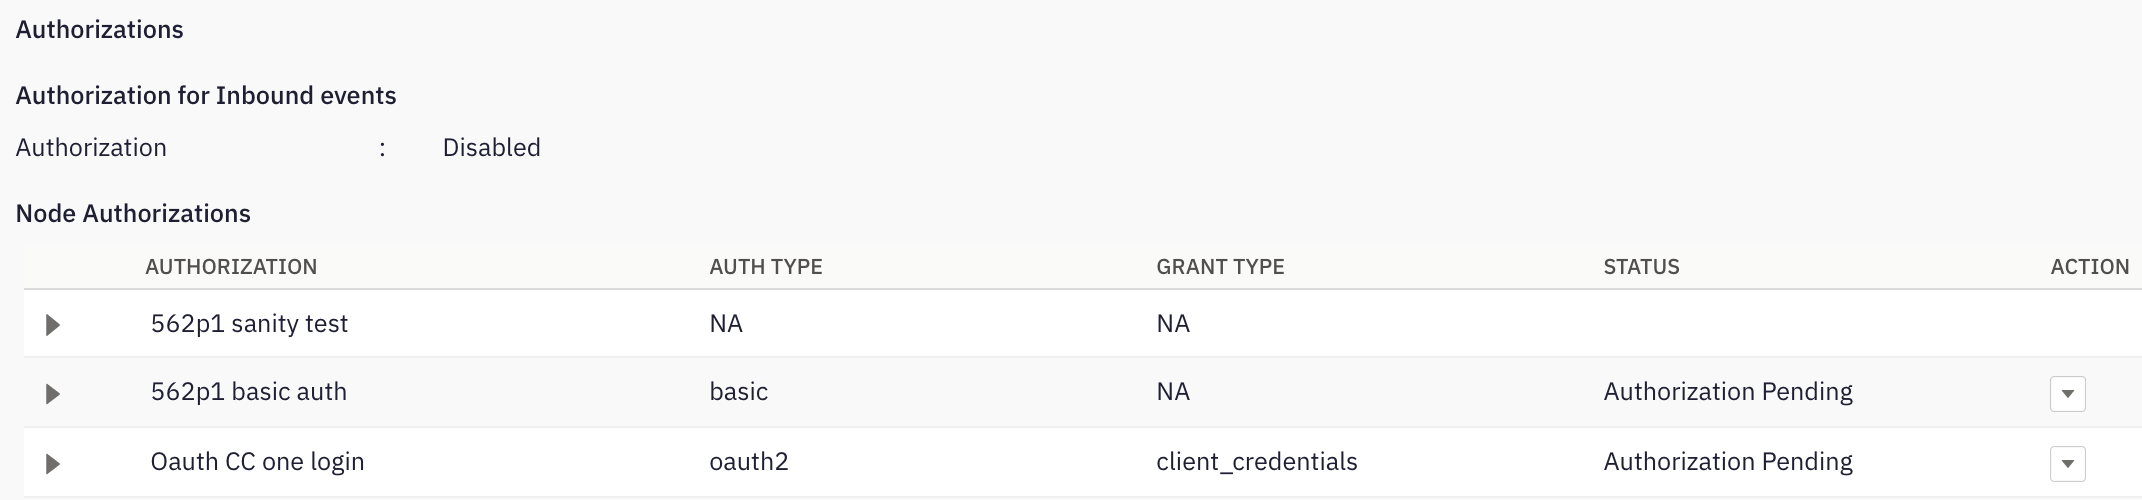
- Click Action → Add Authorization associated with the authorization, where Auth Type is oauth2 and Status is Authorization Pending.

-
Enter all the required fields. The authorization configuration and the parameters/variables depend on the type of authorization.
-
Click Authorize.
The status of the authorization will change to Authorized and all the nodes under this authorization are authorized and ready for use.
Once authorized, you can perform the following actions on the authorization.
- View - allows you to view the authorization.
- Update - allows you to update the authorization details.
- Make it as default - allows you to make a particular authorization default for that node.
- Remove - allows you to delete the authorization.
Note
If an OAuth 2.0 type authorization is edited in the Admin portal, you will be prompted to re-authorize the authorization.
You are not allowed to delete the authorization if it is mapped/used in flow assets.
Manage Integration
Integration Details
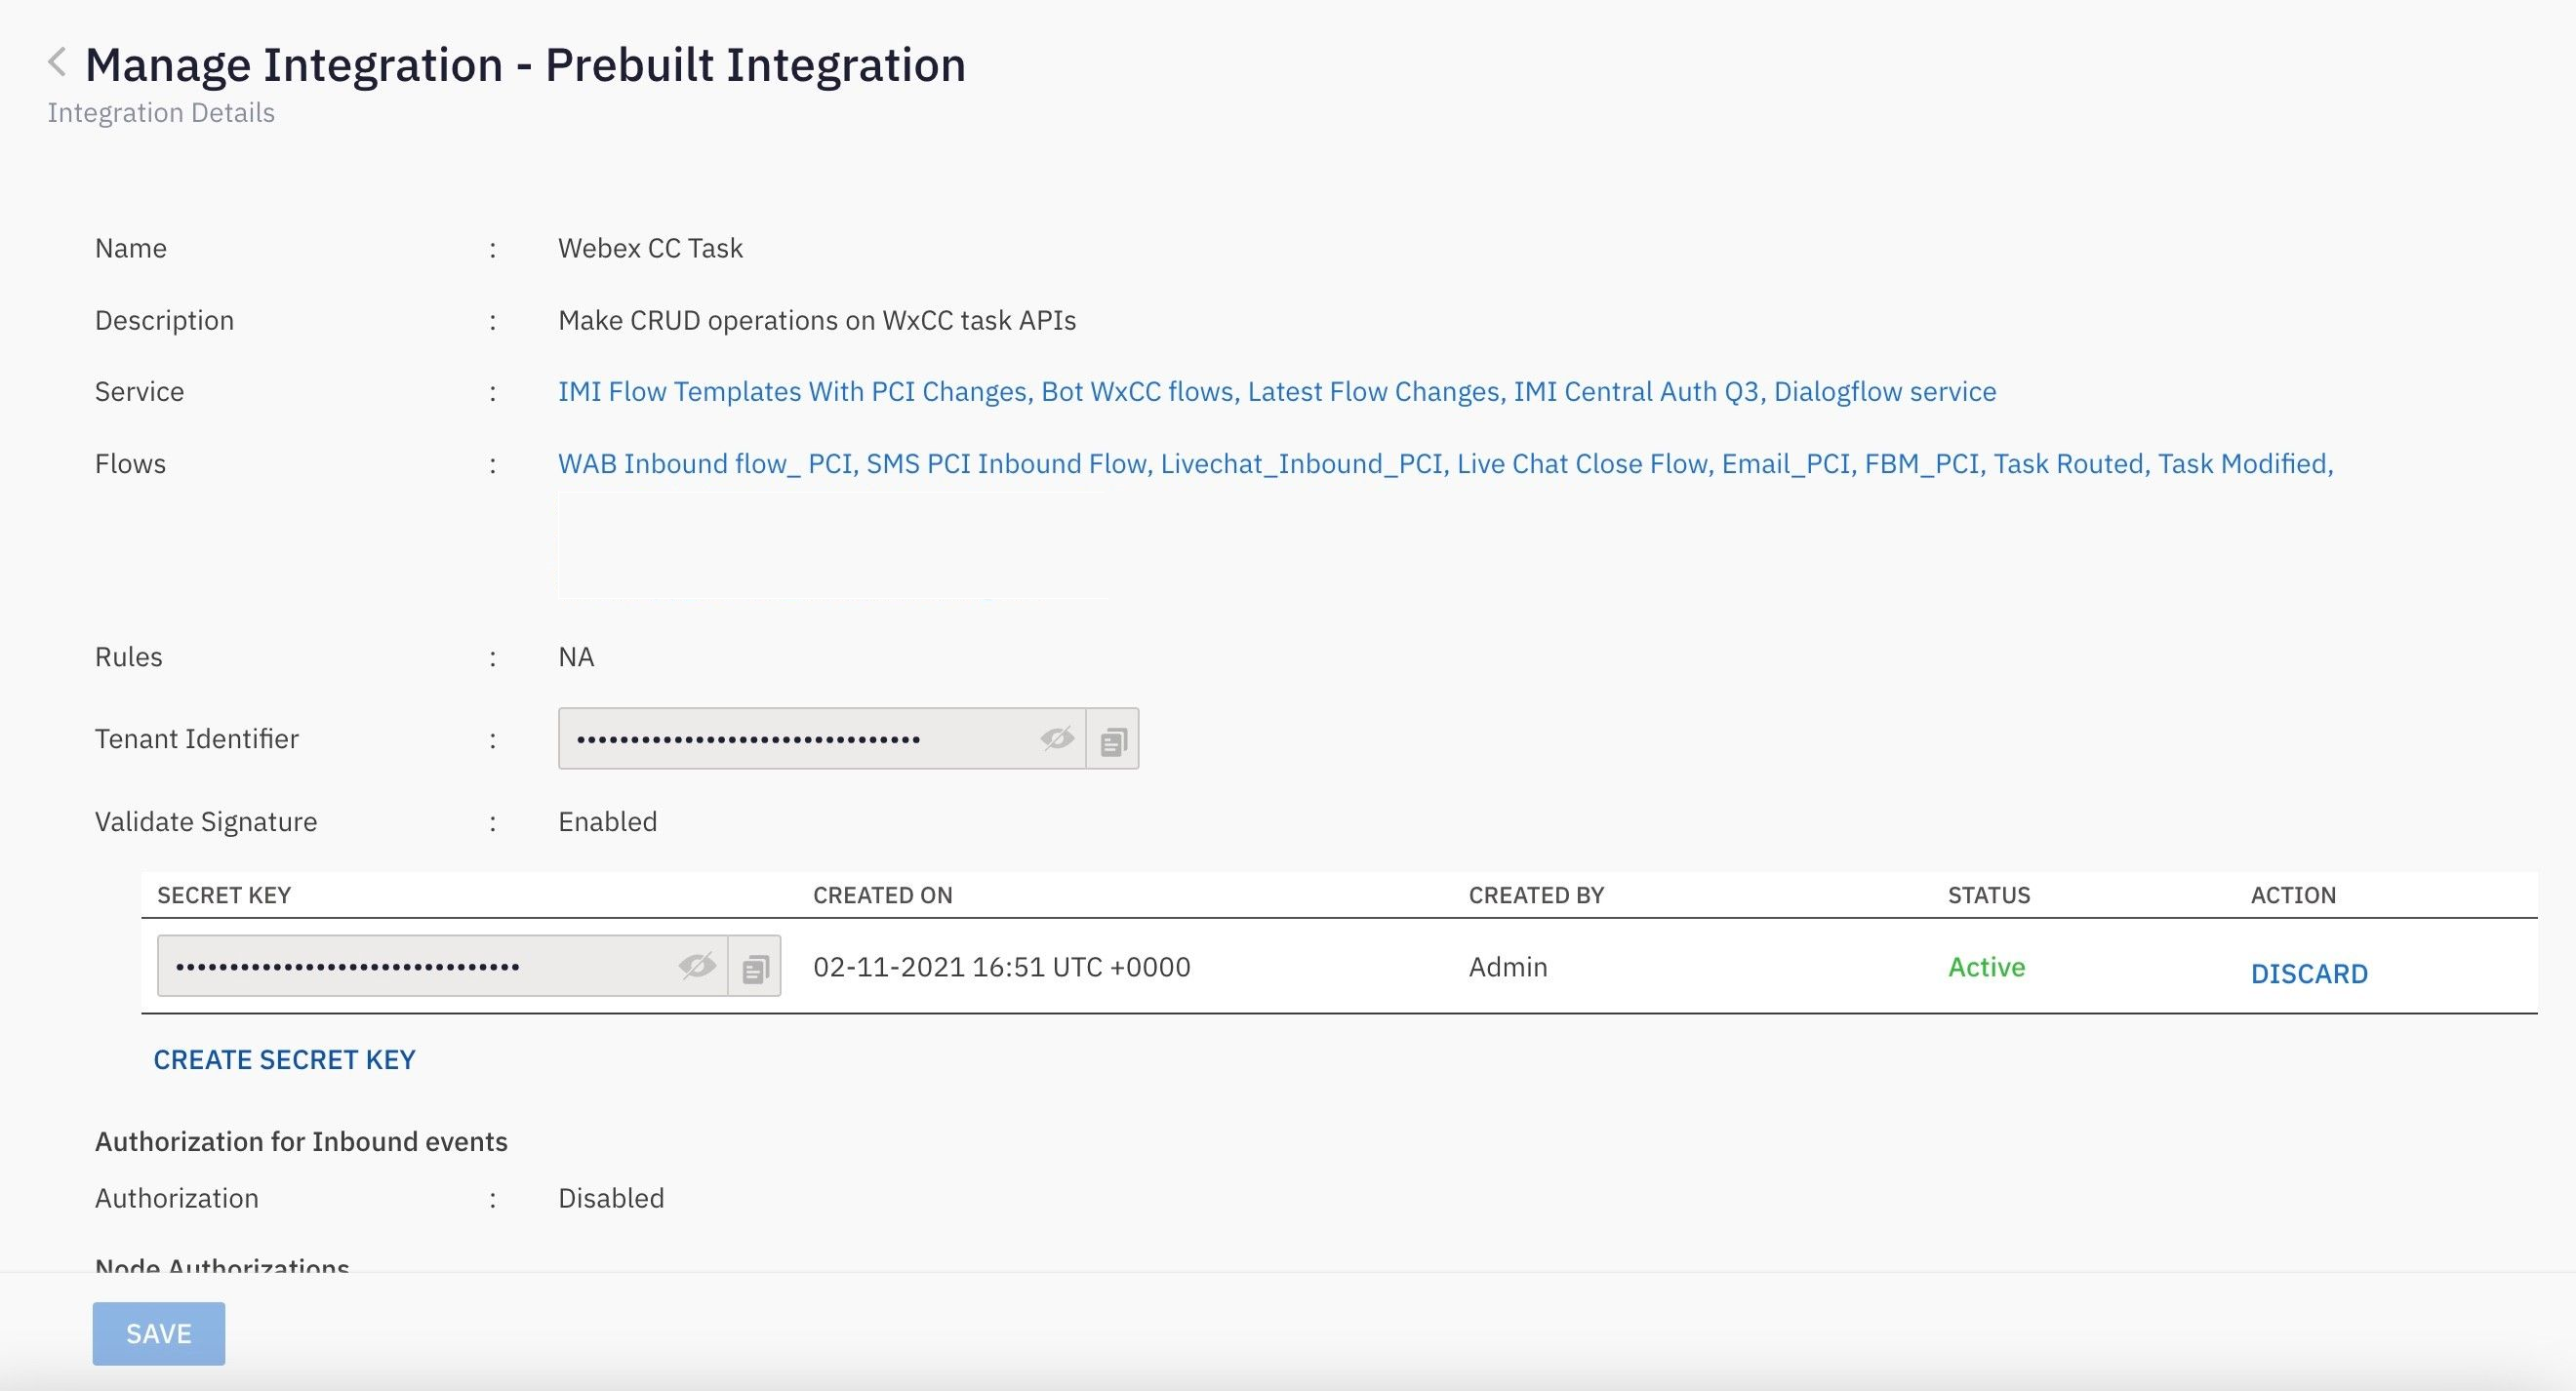
You can view the integration's information, which includes the integration's Name, Description, Service, Flows, Rules, Tenant Identifier, and Validate Signature.
Nodes
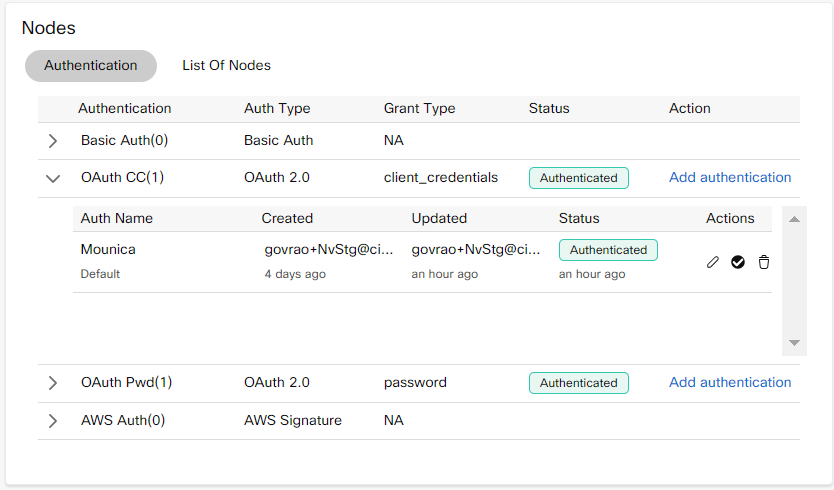
Node Authorisation
If an integration supports nodes, then the node authentication details can be accessed from this section. Please find the example mentioned below:

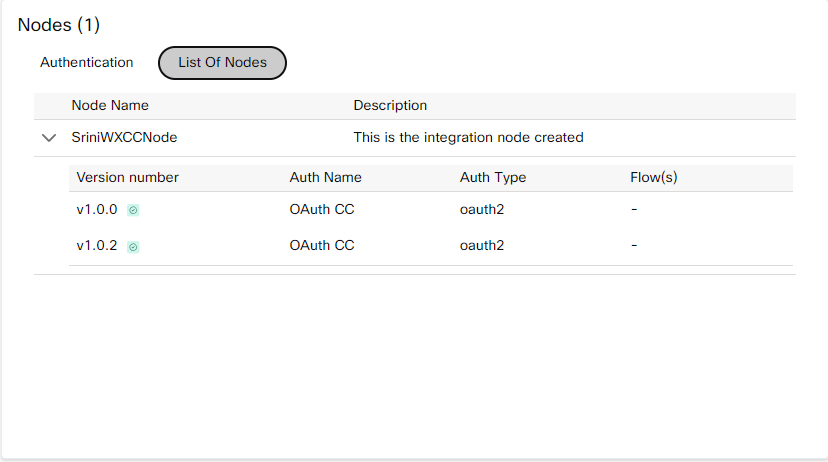
View Node List
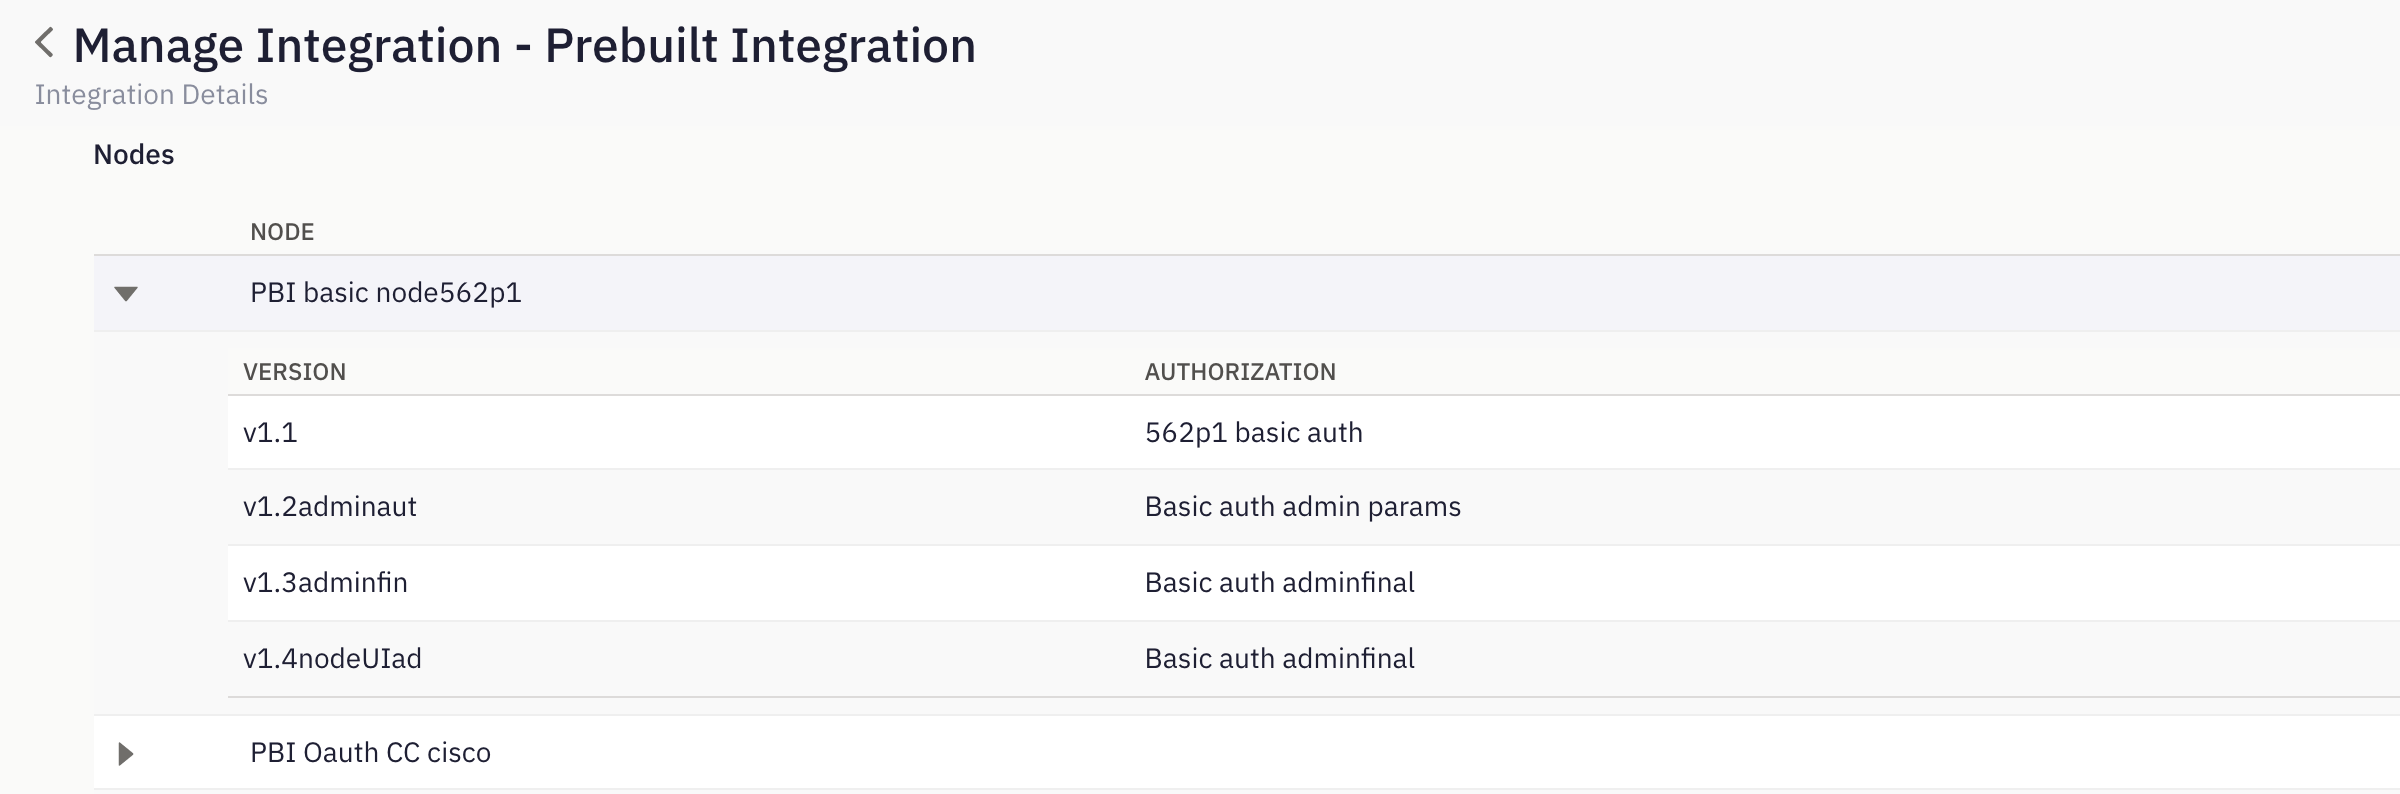
If an integration supports nodes, you can view the node versions of a particular node by expanding the node.
Note
Different node versions can have different authorizations configured. If multiple auth mechanism are added by admin for a node and the latest version of the node only requires one of the auth mechanisms, then even if you have authorized the latest auth, the status of the old auth mechanism will show as pending.
Persisting the field values for pre-built integration nodes
When the Authorization is changed, you will have to add a new Authorization. The previous relevant Authorization details will be retained in the new Authorization.
If the node UI is directly calling an API for rendering the field values, the authorization details will not be retained.
Inbound Events
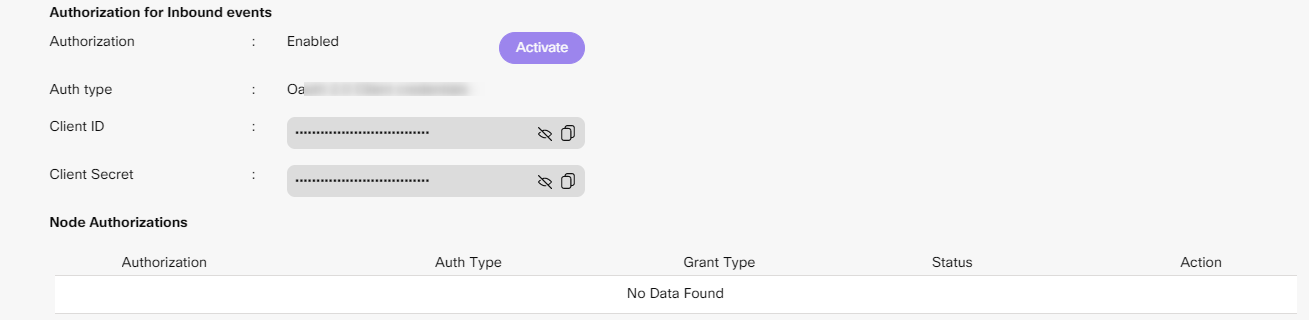
Event Authorisation
If an integration supports events and has event authorisation enabled, then the authentication details can be accessed from this section. Please find the example mentioned below:
View Event List
If an integration supports events, then you can view the event versions of a particular node.

Validating Signature while regenerating a Secret key for Prebuilt Integration
When signature validation is enabled for pre-built integration the platform user will be able to view that in enable state on manage integrations page. Creating and discarding a Secret Key is only allowed to the tenant owner and restricted for all other user roles.

Note
We have launched a new Integrations Studio i.e., a portal for our partners to build & publish pre-built integrations for the Webex Connect platform. For the integrations built and published on the studio, the manage integrations page layout would be different. On the Node UI for the integrations, additional info would be provided.
The layout would be different for the following sections:
Manage Integrations: The change Logs section is newly introduced. It shows for integration enablement and subsequent version releases alongside the existing information on the Manage Integrations page.

Manage Integrations
Node Authorization and Node List
Node Authorization
Node List
Event Authorization and Event List
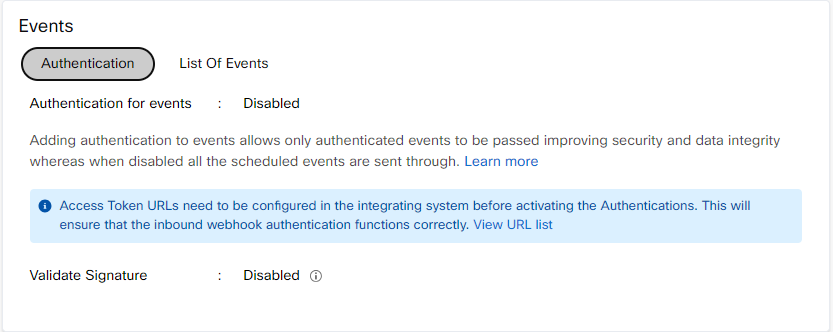
Event Authorization
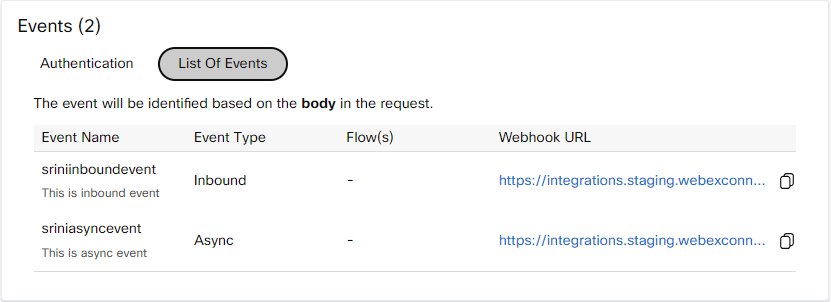
Event List
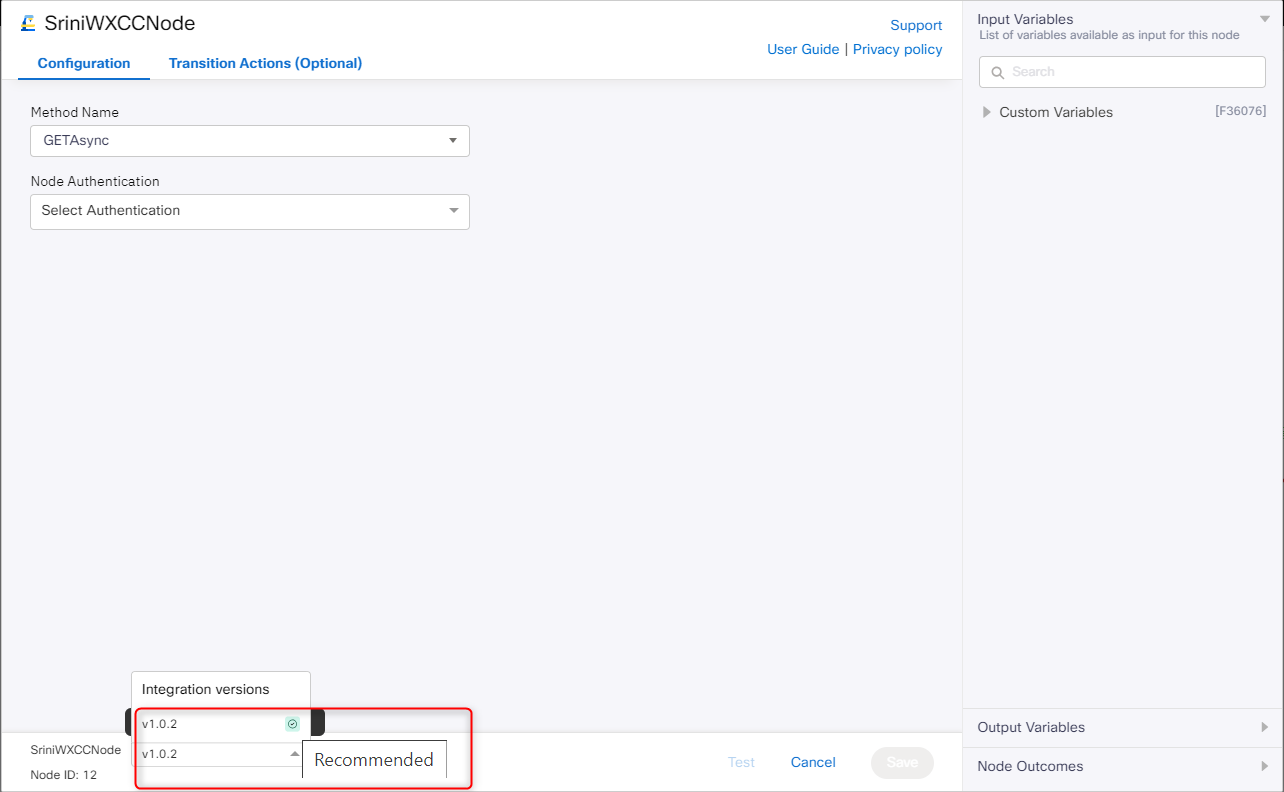
The additional information on Node UI includes change logs in manage integrations, support, a user guide, a privacy policy, the recommended version on the node configuration window, and a link to configure authentication from the flow builder.
Node Configuration
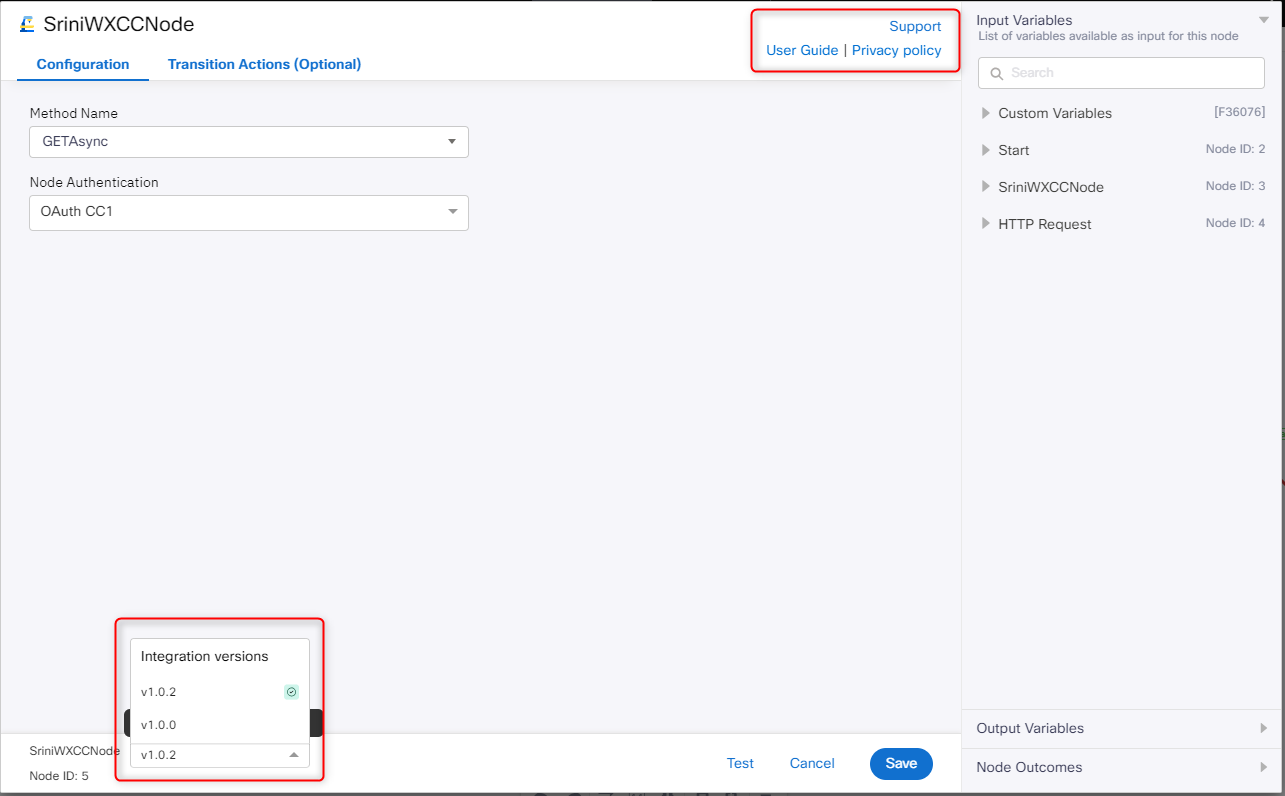
Node Configuration
Recommended Version
This is the node's latest version, and we suggest using this node for building flows.
Recommended Version
Live Integrations
Live integrations include the following:
Updated 3 months ago