
Manage Consent Groups
View, modify, and delete Groups, and manage customer data.
Using the Action menu on the Consent Group page you can manage your groups. This includes viewing consumer records, modifying certain fields and uploading consumer records. From the Consent Group page, you can also disable or re-enable status reporting. Status can also be changed under Settings.
View and Modify a Group
To access, view and modify a group, or to upload a .csv file use the directions below.
- On the Consent Group page, find the group you want to modify. You can use the Search field at the top of the page to find the specific group. The most recently created Consent Groups are listed at the top.
- Under the Action column, click the down–arrow and select Manage.
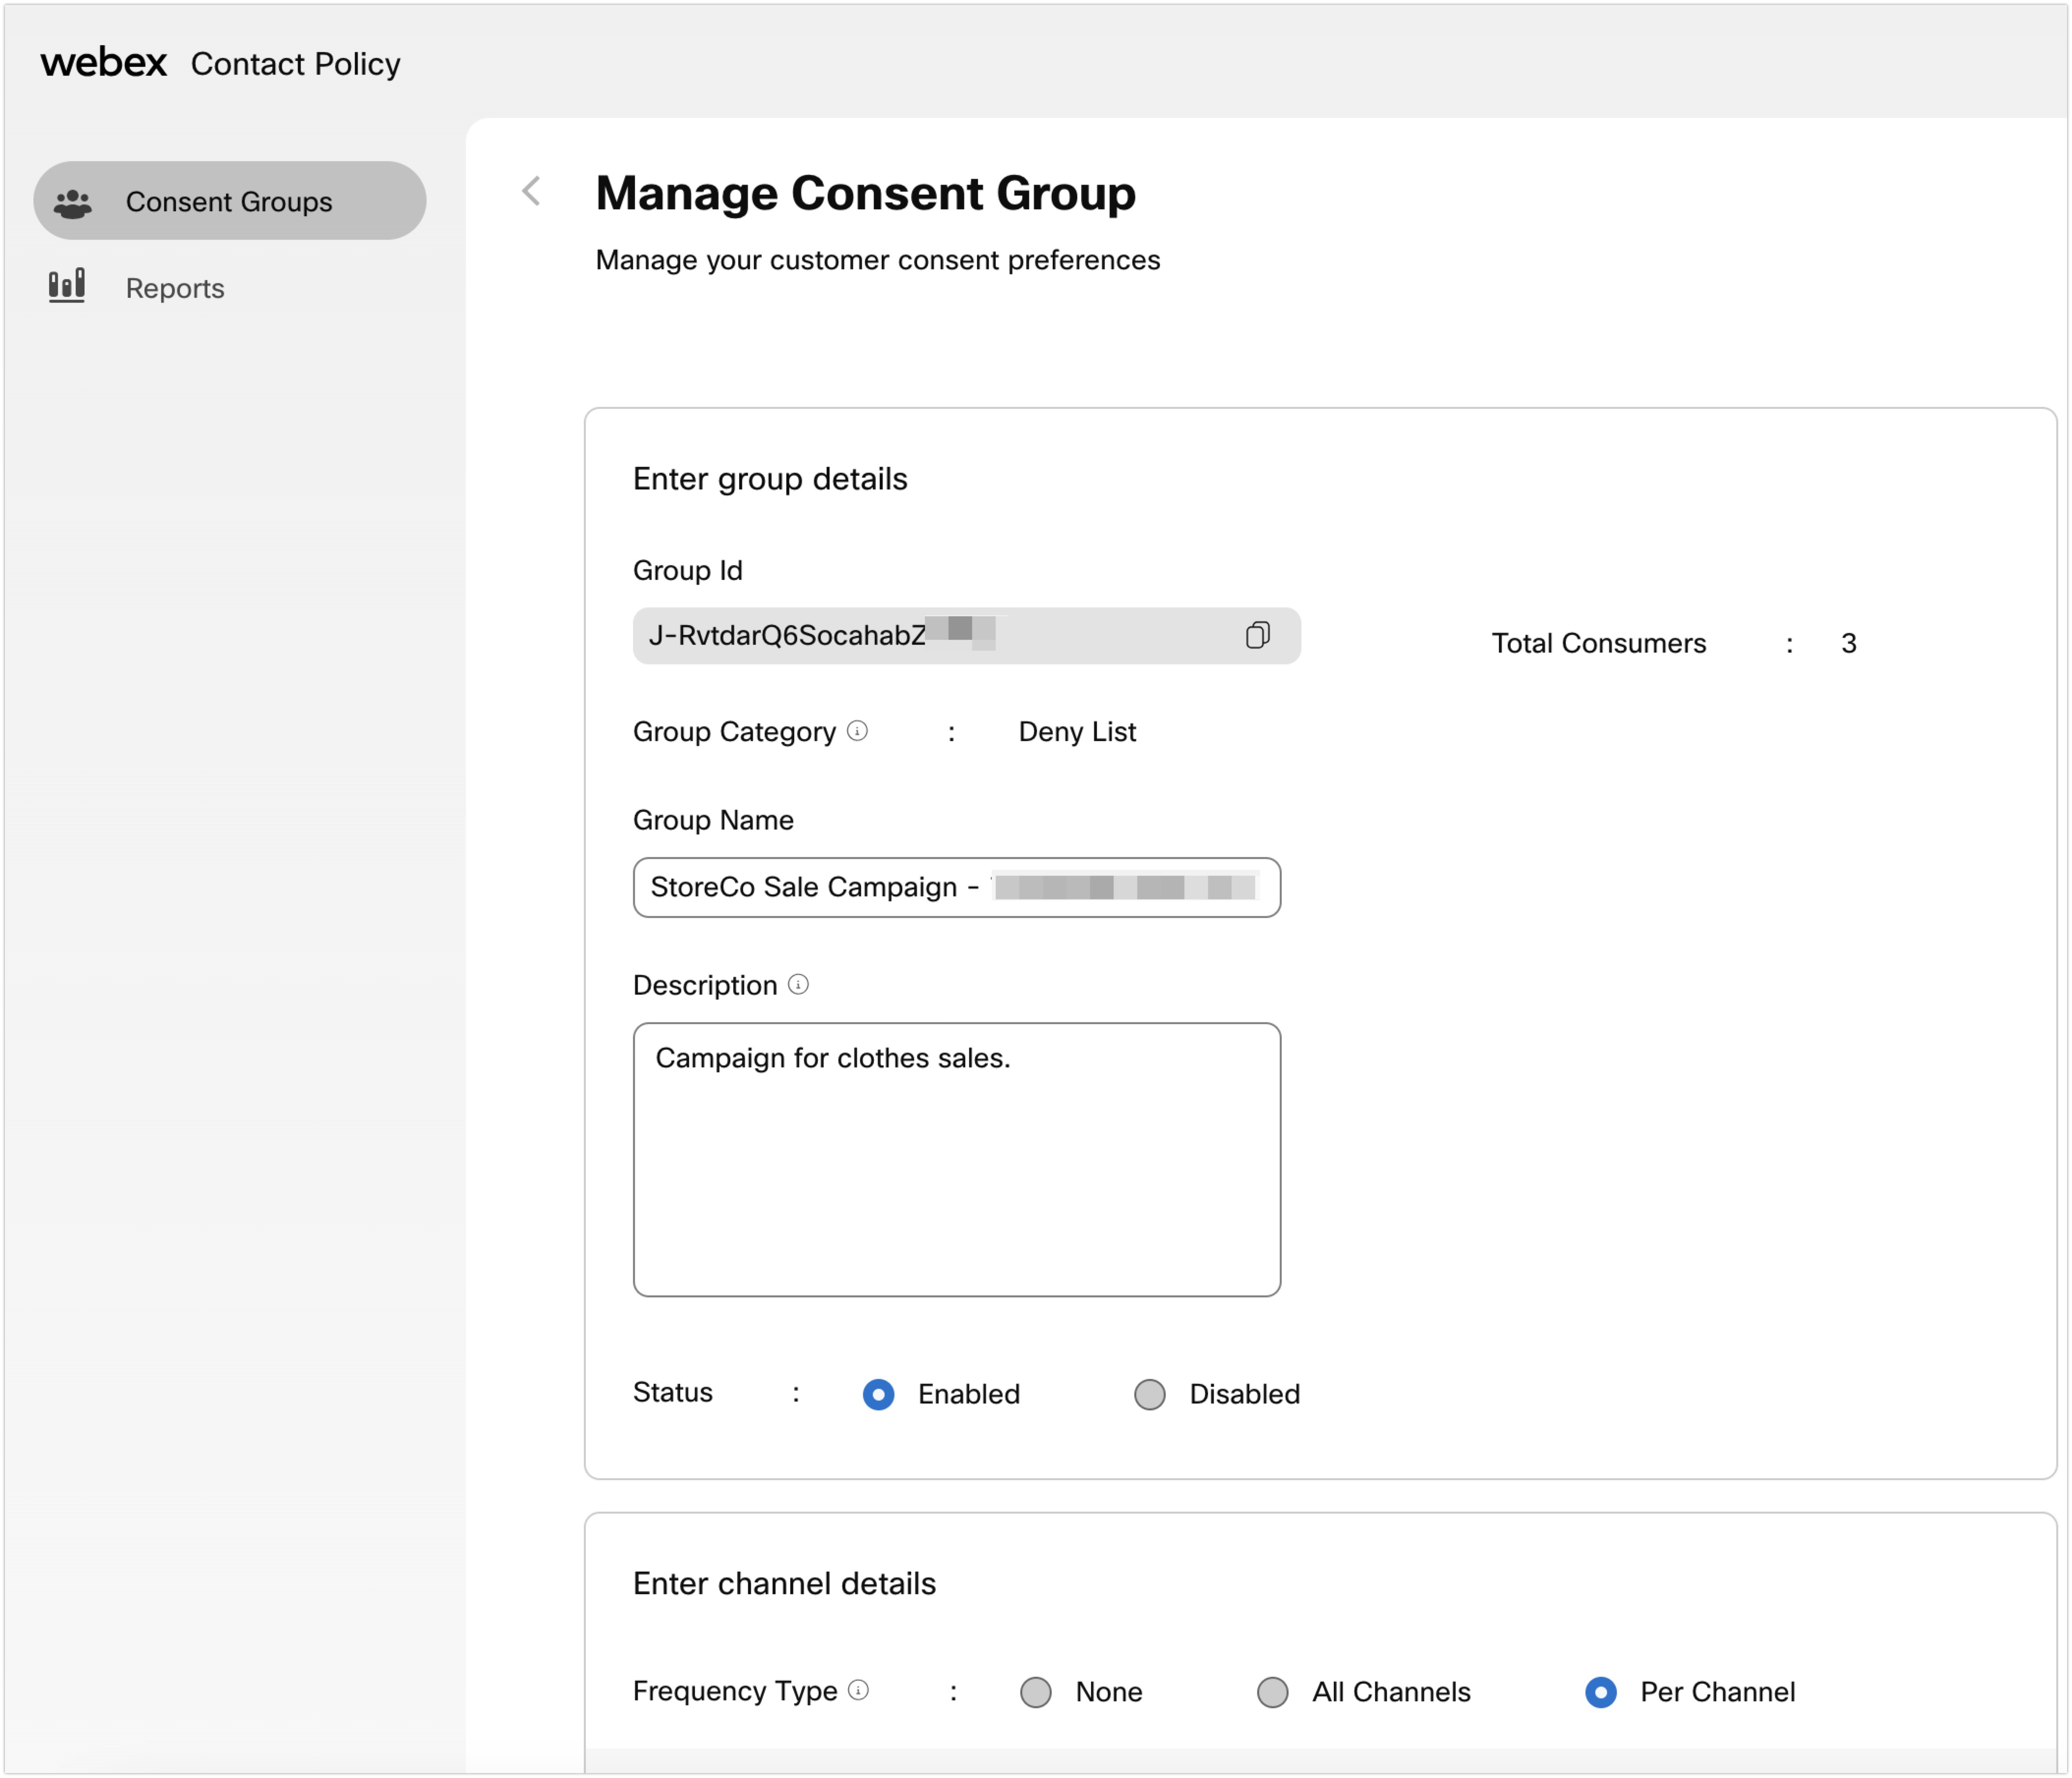
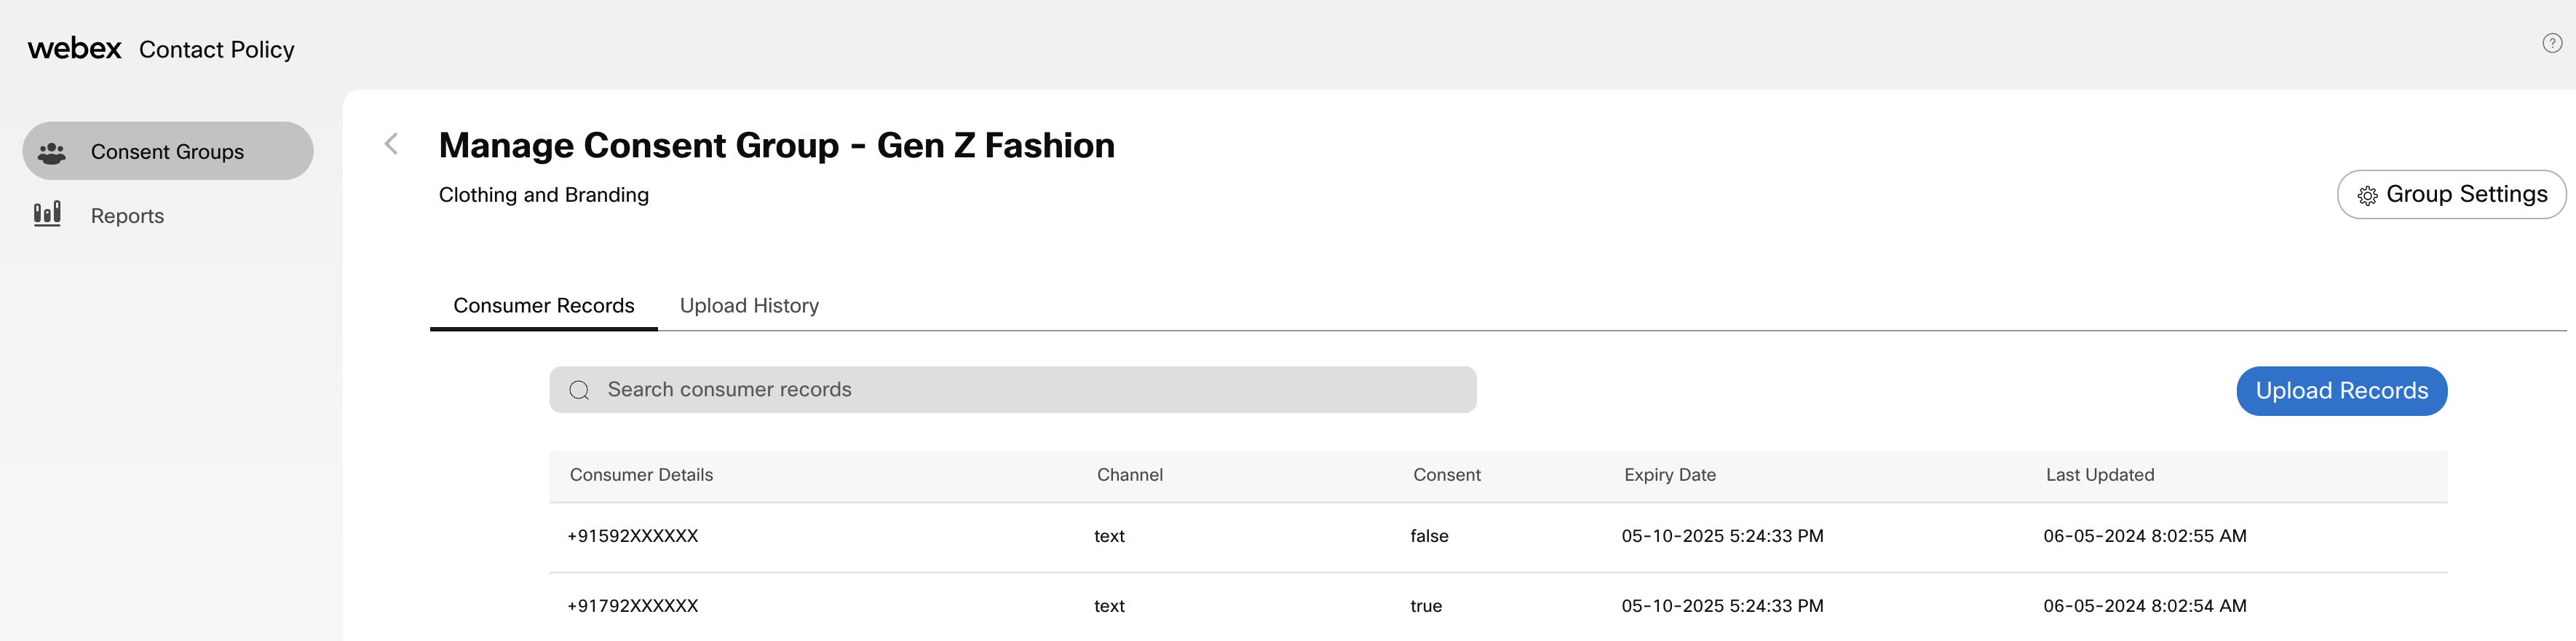
The Consent Group page for the selected group appears listing all the consumer details and when they were last updated. The columns displayed in the Consumer Records tab are:- Consumer Details
- Channel
- Consent
- Expiry Date
- Last Updated
- Click Settings, the Consent Group details appear. The fields listed below can be modified for a consent group.
- Group Name
- Description
- Status
- Frequency Type
- Frequency Cap
- Sender ID
- Make the appropriate changes.
- Click Save.
Upload Consumer Records
A .csv file up to 25 MB can be uploaded to a group. The .csv file contains the consumer records for the group. The.csv file must be in the format: address, channel, consent, expires, keyword, campaign, source and while uploading the CSV file, the headers must be specified for the mandatory columns.

Sample CSV file
Note
Only address, channel,and consent are required and the following is the sample record :
For Text
- +15558501816,text,TRUE,2025-03-20T15:00:00Z,START,promotion,website
For Voice
- +15558501816,voice,TRUE,2025-03-20T15:00:00Z,START,promotion,website
For WhatsApp
- +15558501816,whatsapp,TRUE,2025-03-20T15:00:00Z,START,promotion,website
For email
- [email protected],email,FALSE,2050-08-01T15:00:00Z,keyword,ConsentGroup,eventscheduler
There are two ways you can upload a file:
- Method 1 – Use the Action menu for a specific group on the Consent Group page.
- Method 2 – Use the Upload Records button on the Manage Consent Group page for the selected group.
Method 1
Use the directions below to upload a file from the Action menu.
- On the Consent Group page, find the group to which you want to upload a file. You can use the Search field at the top of the page to find the specific group.
- Click the associated Action menu and select Upload.
- In the Upload Records window, you can click Choose File and navigate to the file location, or you can drag and drop the file to the indicated area.
You can click View CSV Sample to ensure your .csv file is formatted correctly. The mandatory columns in the .csv file are address, channel, consent. The optional columns in the file are expires, keyword, campaign, source. Any entries in the file that are incorrectly formatted will be shown as a failure in the Status column on the Uploaded History page.
- In the Reason field, type the reason for uploading the file.
- Select the Update existing policy for documents check box to update any existing records that are already in the group.
If you do not select this option, any new information pertaining to existing consumer records will be ignored. For example, if an older file marked the consent for a certain consumer record as “true”, and that of the latest file marked the same consumer record as “false”, and the new file is uploaded, the whole record will be ignored. It is recommended to select this option if a newer version of the same file contains updated consumer information.
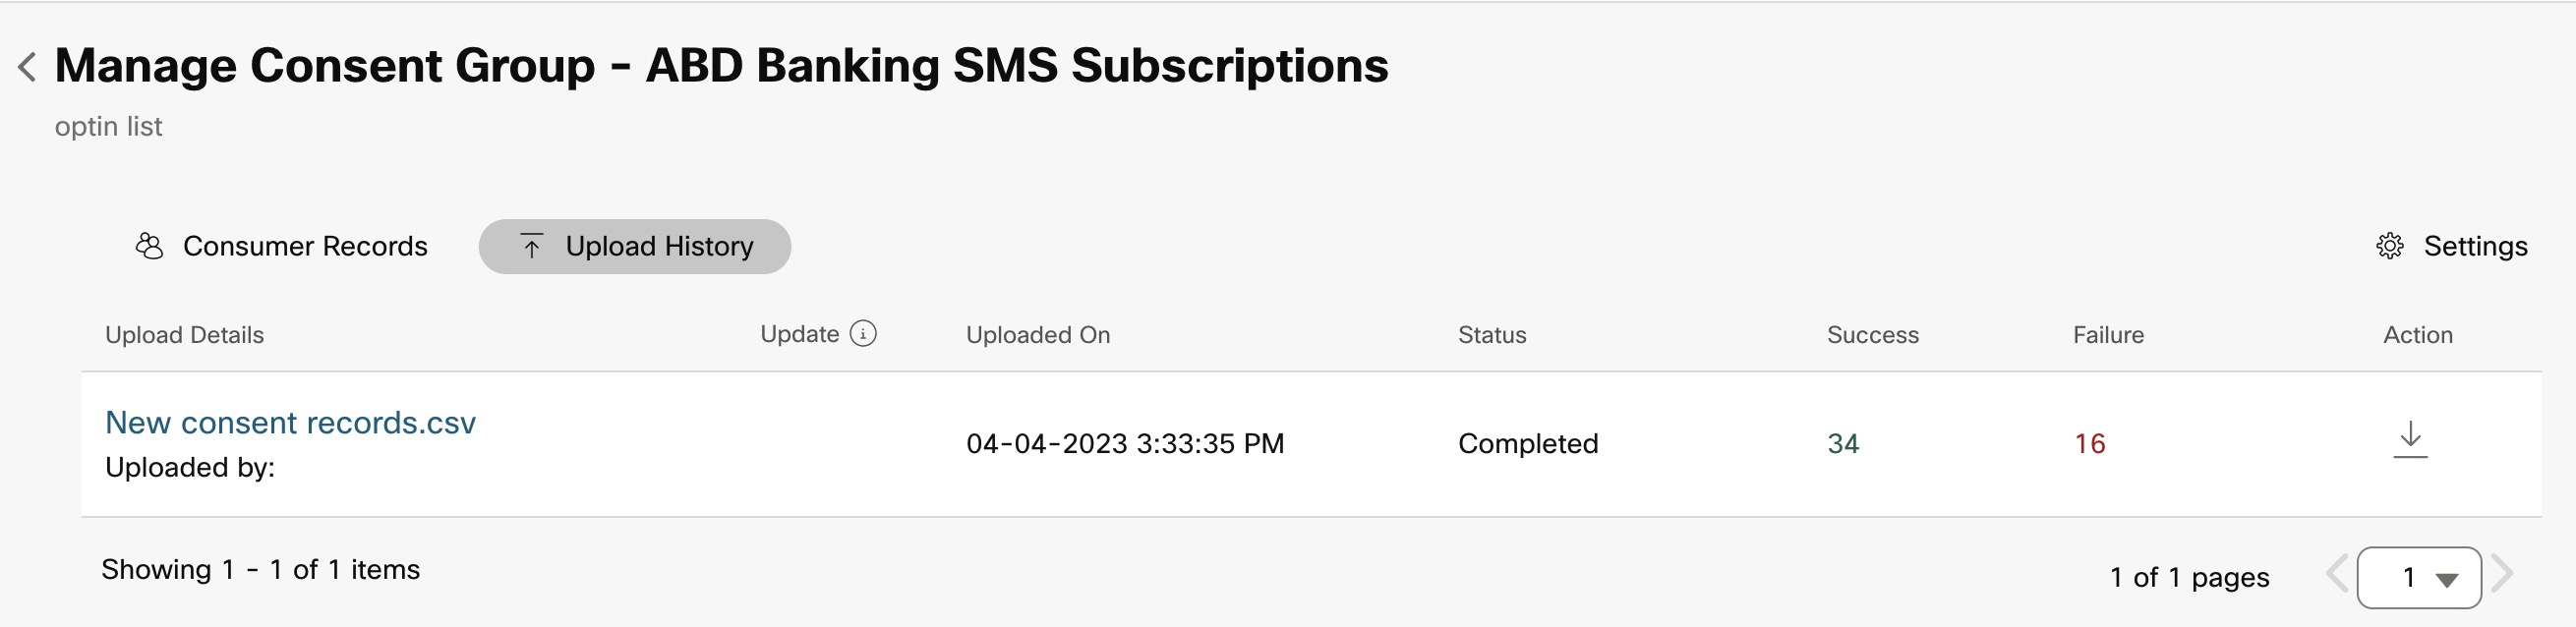
- Click Upload. The newly imported file appears in the Management Consent Group page for the specific group under the Upload History tab.
Opening a CSV with some spreadsheet programs (eg. Excel, Numbers) may alter E.164 phone number formatting."
The records contained in the file appear in the Management Consent Group page for the specific group under the Consumer Records tab.
Method 2
Use the directions below to upload a file from the Manage Consent Group page for the selected group.
- On the Consent Group page, find the group to which you want to upload a file. You can use the Search field at the top of the page to find the specific group.
- Click the associated Action menu and select Manage.
- In the Management Consent Group page for the specific group, click Upload Records.
- In the Upload Records window, you can click Choose File and navigate to the file location, or you can drag and drop the file to the indicated area.
You can click View CSV Sample to ensure your .csv file is formatted correctly. Any entries in the file that are incorrectly formatted will be shown as a failure in the Status column on the Uploaded History page. - In the Reason field, type the reason for uploading the file.
- Select the Update existing policy for documents check box to update any existing files that are already in the group. If you do not select this check box, any new information will be ignored.
- Click Upload. The newly imported file appears in the Management Consent Group page for the specific group under the Upload History tab.
The records contained in the file appear in the Management Consent Group page for the specific group under the Consumer Records tab.
Upload Status
The status of an uploaded file can be found on a group’s Manage Consent Group page under the Upload History tab.
To view the failed entries, click the file name and the Upload Outcome window appears. Only the first 50 entries can be viewed. To view details of the entries or to view additional entries and their details, click the Download Details (.CSV) button.
In the Download Details file, under the Outcome column you can view the reason for the failure. You can also correct the entries in the file, save it, and upload it again.
Opening a CSV with some spreadsheet programs (eg. Excel, Numbers) may alter E.164 phone number formatting."
Click OK to close the Upload Outcome window.
Reasons for upload failure
The following error messages are displayed on the success or failure after uploading the file. For entries that list the “File Upload Status' as ‘Failure’, you can review the .CSV file for any incorrect information related to these error messages and try uploading the file again for a successful upload.
| Error Message | Description | File Upload Status |
|---|---|---|
| Mandatory field missing | A required field has not been set | Failure |
| Address invalid for channel type | Validation on the address for the specified channel did not pass (E.164 standard for phone number or email) | Failure |
| Invalid format for a field | Different possible errors, mainly if the group does not support the provided channel or invalid date, etc | Failure |
| Duplicate record ignored | The record already exists for the address and 'Update existing policy' option was not selected | Failure |
| Unknown error saving row | Unable to save to the database. Try uploading the file once again after some time. | Failure |
| Row can not be parsed | Unable to read the record from the .csv file. Try uploading the file once again after some time. | Failure |
| Created successfully | Successfully added the record to the group | Success |
| Updated successfully | Successfully updated an existing record for the group | Success |
Delete a Group
To access and delete a group, use the directions below.
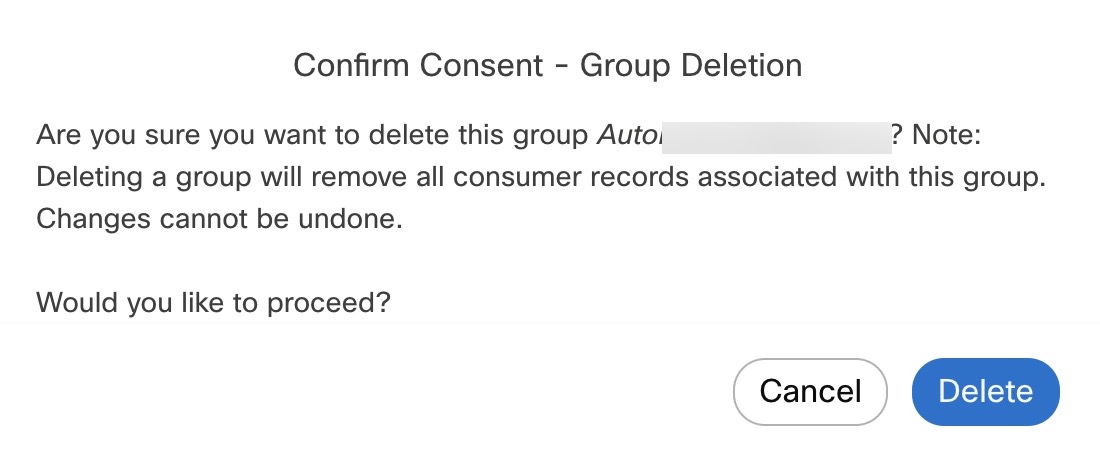
- On the Consent Group page, find the group you want to delete. You can use the Search field at the top of the page to find the specific group.
- Under the Actions column, click the down–arrow and select Delete.
- In the Confirmation message, click Delete . The group is removed from the Consent Group List.
Deleting a Consumer Consent
To delete a Consumer Consent, follow the below steps:
- Search for the specified consumer consent using the consumer details (MSISDN or Email address).
- Select and click the required Consent record from the list.
- Click Delete icon under Actions. A pop-up appears.
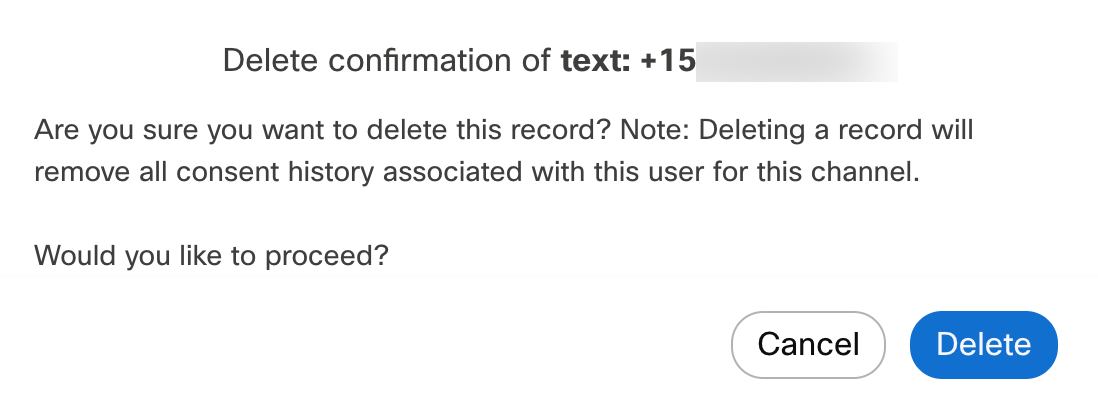
- Click Delete. A Message appears as ” Consent record is deleted successfully”.
Note
All the deleted consumer consent records are stored within the database for 6 months. To access the record, contact our support team for assistance.
Updated 16 days ago