
Flow Configuration using Sample Templates
While you can always configure your own flows for handling incoming inquiries over digital messaging channels (such as SMS, Live Chat, etc.) supported by Webex Connect and Cisco Webex Contact Center in combination, we have provided some representative flows to provide you with a reference on how to configure such flows.
These flows are available for download here.
There are a total of 7 representative flows as listed below:
| Flow Name | Description | Additional context |
|---|---|---|
| FBM Inbound Message | Handling incoming messages from end customers over Facebook Messenger | This flow needs to be configured separately for each Facebook Messenger asset. |
| Email Inbound | Handling incoming messages from end customers over Email | This flow needs to be configured separately for each Email asset. |
| Livechat Inbound message | Handling incoming messages from end customers over Live Chat | This flow needs to be configured separately for each Live Chat asset. |
| Livechat Close thread | Handles closing messages from end customers over Live Chat and informs the Agent that the chat is closed | This flow needs to be configured separately for each Live Chat asset. |
| SMS Inbound Message | Handling incoming messages from end customers over SMS | This flow needs to be configured separately for each SMS number/Sender ID. |
| Task Routed | Adding an agent participant to a conversation once Webex Connect receives the Task Routed event from Cisco Webex Contact Center | This needs to be updated only once per Webex CC org and is applicable for all channels and channel assets. |
| Task Modified | Adding an agent to or removing an agent from an ongoing conversation once Webex Connect receives the Task Modified event from Cisco Webex Contact Center (e.g., for chat transfer or conference) | This needs to be updated only once per Webex CC org and is applicable for all channels and channel assets. |
| Close Task | Close the conversation in imiengage and the task in Cisco Webex Contact Center once a close task request is received from Cisco Webex Contact Center | This needs to be updated only once per Webex CC org and is applicable for all channels and channel assets. |
You can use these flows to create flows in your Webex Connect account by using the 'Create Flow -> Upload a Flow' method under Flows Tab within a service.
To create a flow using upload a flow option:
- Create a Service (it should be the same as the service that you mapped with Cisco Webex Contact Center for the Messenger asset) and create a flow by importing the representative flow named FBM Inbound Message.
- Click the service and navigate to Service Dashboard.
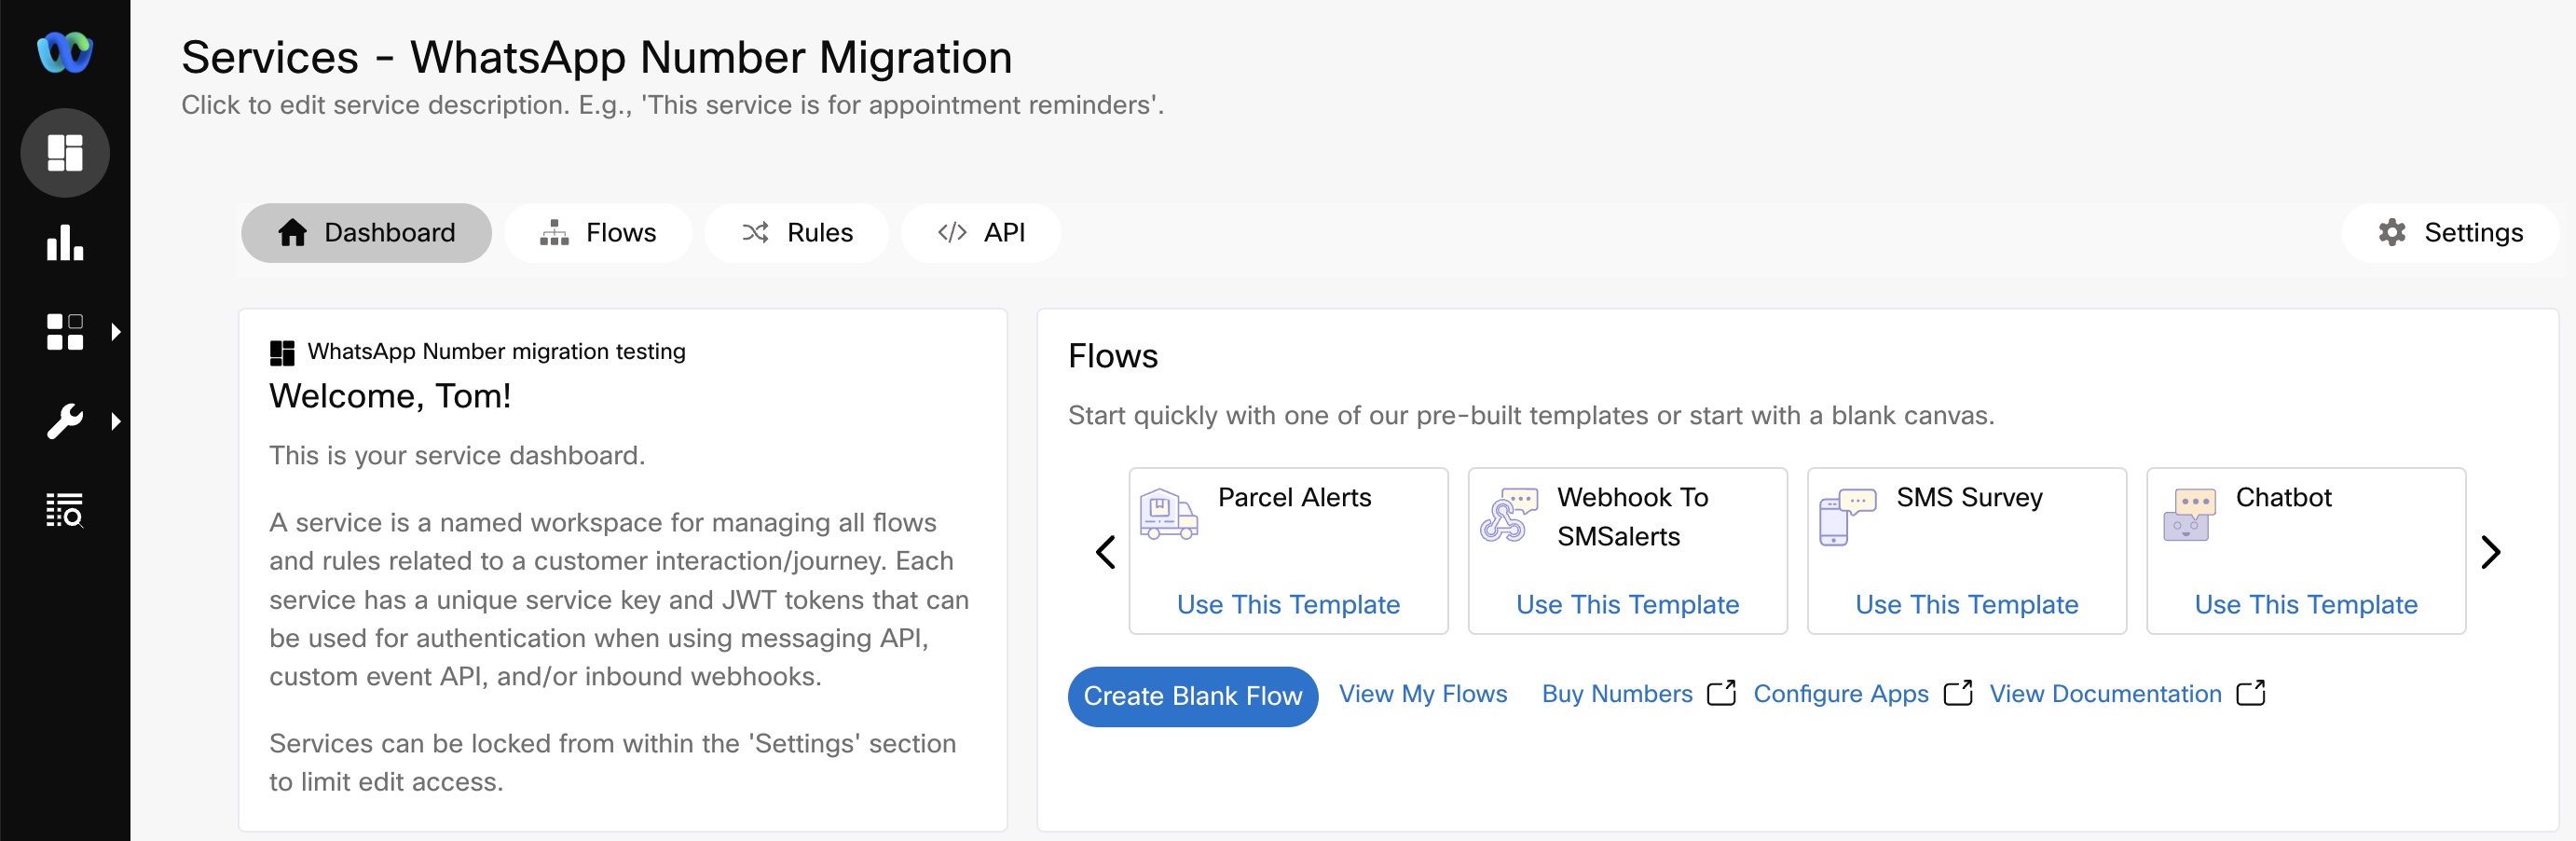
- Go to the Flows tab.
- Click Create Flow.
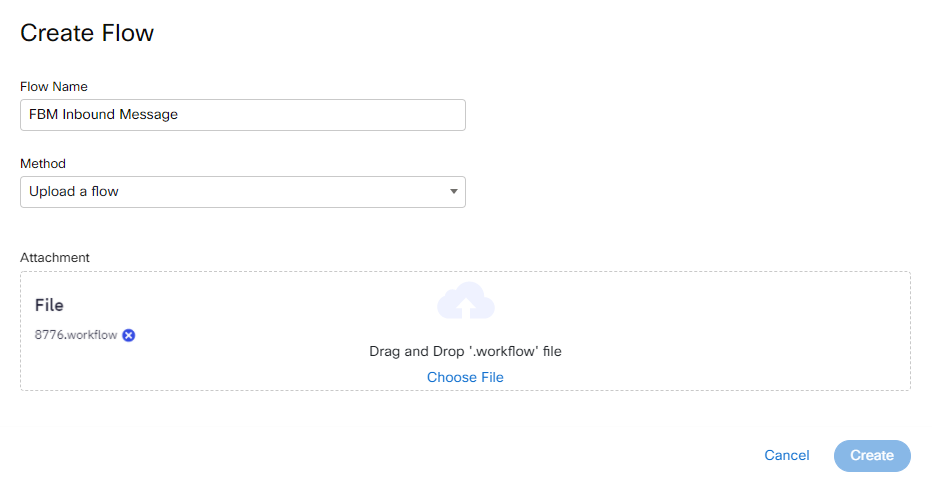
- Provide a name for the flow.
- Select Upload a flow in the Method drop-down.
- Click Choose File to upload the required file.

- Click Create.
Note
When a flow is created using an Upload Flow method, it is mandatory to Save the flow before proceeding further. This is required to ensure that configurations are saved correctly. As a known limitation missing this step can lead to Evaluate node script formatting getting lost.
Configure Flows
- Open the required flow in the flow editor.
- Double click the pre-built Cisco Webex Contact Center nodes one at a time and provide authorization for the concerned node.
- Keep the Method Name as is.
- Select Add New Authorization in the Node Runtime Authorization drop-down.
a. The Add new authorization pop-up window opens.
b. Provide a name for the authorization that appears in the Node Runtime Authorization drop-down. Click Authorize. The Cisco Webex Contact Center login page appears and you need to provide valid credentials to add the authorization. - Refer to the pre-built integration node documentation to configure other fields in the node.
- For SMS flow, click the Start Node and select incoming message as the flow trigger option. This step doesn't apply to other channels.
Repeat this process for all of the pre-built integration nodes within the flow.
Publish your flow once you've made all the changes.
Repeat the above steps for the remaining flows.
Understanding Representative Flows
Here's a high level overview of the logic configured in each of the representative flows:
FBM Inbound Message Flow
When an inbound message is received on Facebook Messenger, Webex Connect searches for the conversation. If the conversation already exists, the incoming message is appended to the existing conversation, else a new conversation is created or an existing conversation is reopened. Once a new conversation is created, a new task is created. This task needs to be queued. If it is successfully queued, the flow ends at that point. Incoming inbound event lands on the Routed flow. is also created and it is queued in Cisco Webex Contact Center for an agent allocation.
.png")
Search Conversation, Append Conversation and Create Conversation nodes are designed for conversation handling.
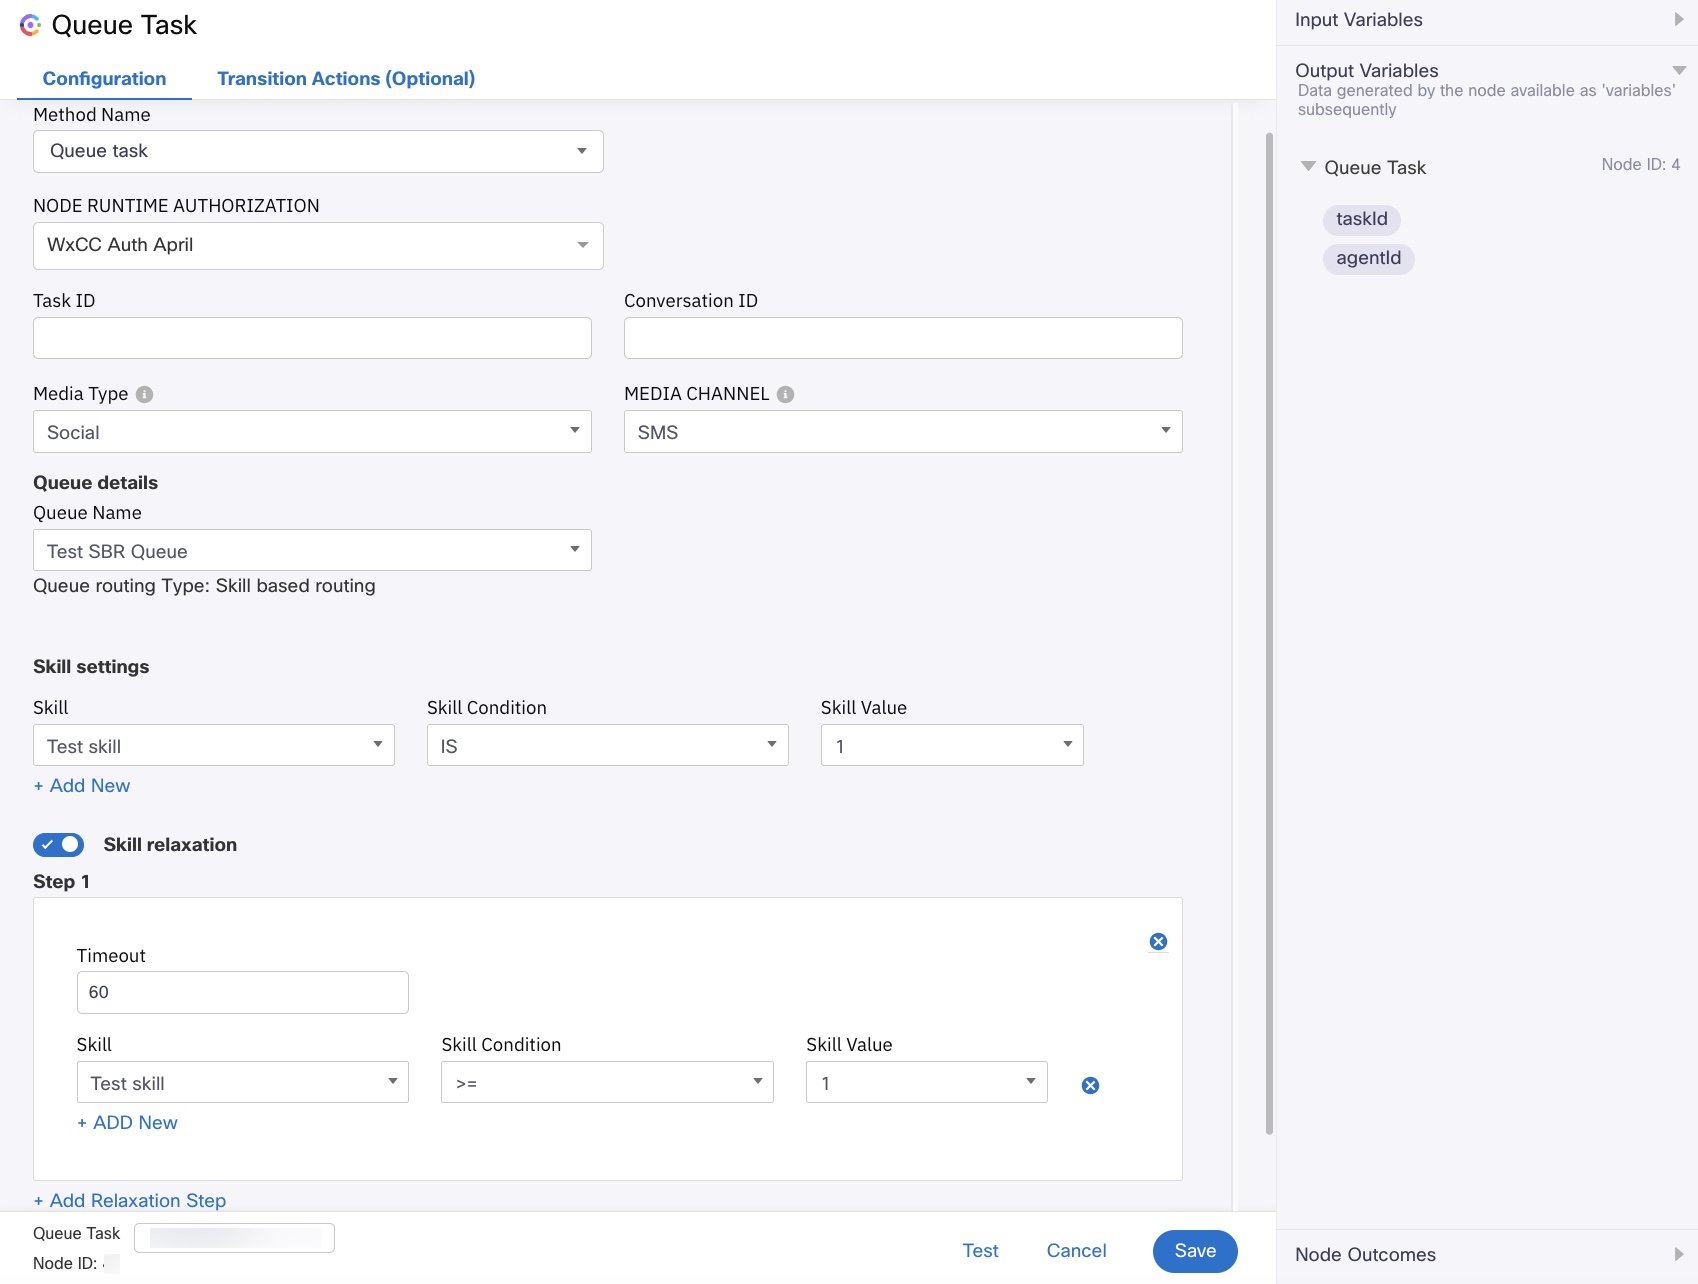
Queues are configured on the Cisco Webex Contact Center portal and then mapped to the Webex Connect tenant. You can see the list of configured queues in the Queue Task node for you to select the queue and assign an agent appropriately. Some queues have skill-based routing embedded into them. When you select a queue with skill-based routing capability, you can see on the UI that the queue routing type is skill-based routing.
You need to add/configure the skill settings:
- Select the required skill. The skills configured in the Webex Contact Center portal appear in this drop-down list. You (flow designer) can configure how a task is allocated to an agent based on the skills.
- Select the required condition and value for the skill.
- You can add multiple skills.
If required, you can also configure skill relaxation after a certain number of steps.
- Enable Skill relaxation.
- Configure the Timeout, skill, skill condition, and skill value.
You can add multiple skill relaxations.
The FBM Inbound Message flow ends when an asynchronous event is successfully received on the Queue Task node.
Please note that the following custom variables are being used in this flow:
- FBpageid
- conversationId
- messengerPayloadObject
- messagetext
- attachmentURL
- nonPCIComplianceReasonObject.
You can view these configurations by clicking on the setting icon on the top right side of the flow canvas.
Routed Flow
This flow is triggered when a queued task is routed to an agent. When the task routed event comes in, the Extract node is used to extract some variables to use subsequently in other nodes like Add Participant to Conversation node, Screen Pop node. The variables are part of the event payload.
The Add Participant to Conversation node adds the agent as a participant to the conversation, then the agent gets notified through the Agent Desktop and can accept the contact. After the agent has accepted the contact and the customer and the agent are interacting with each other.
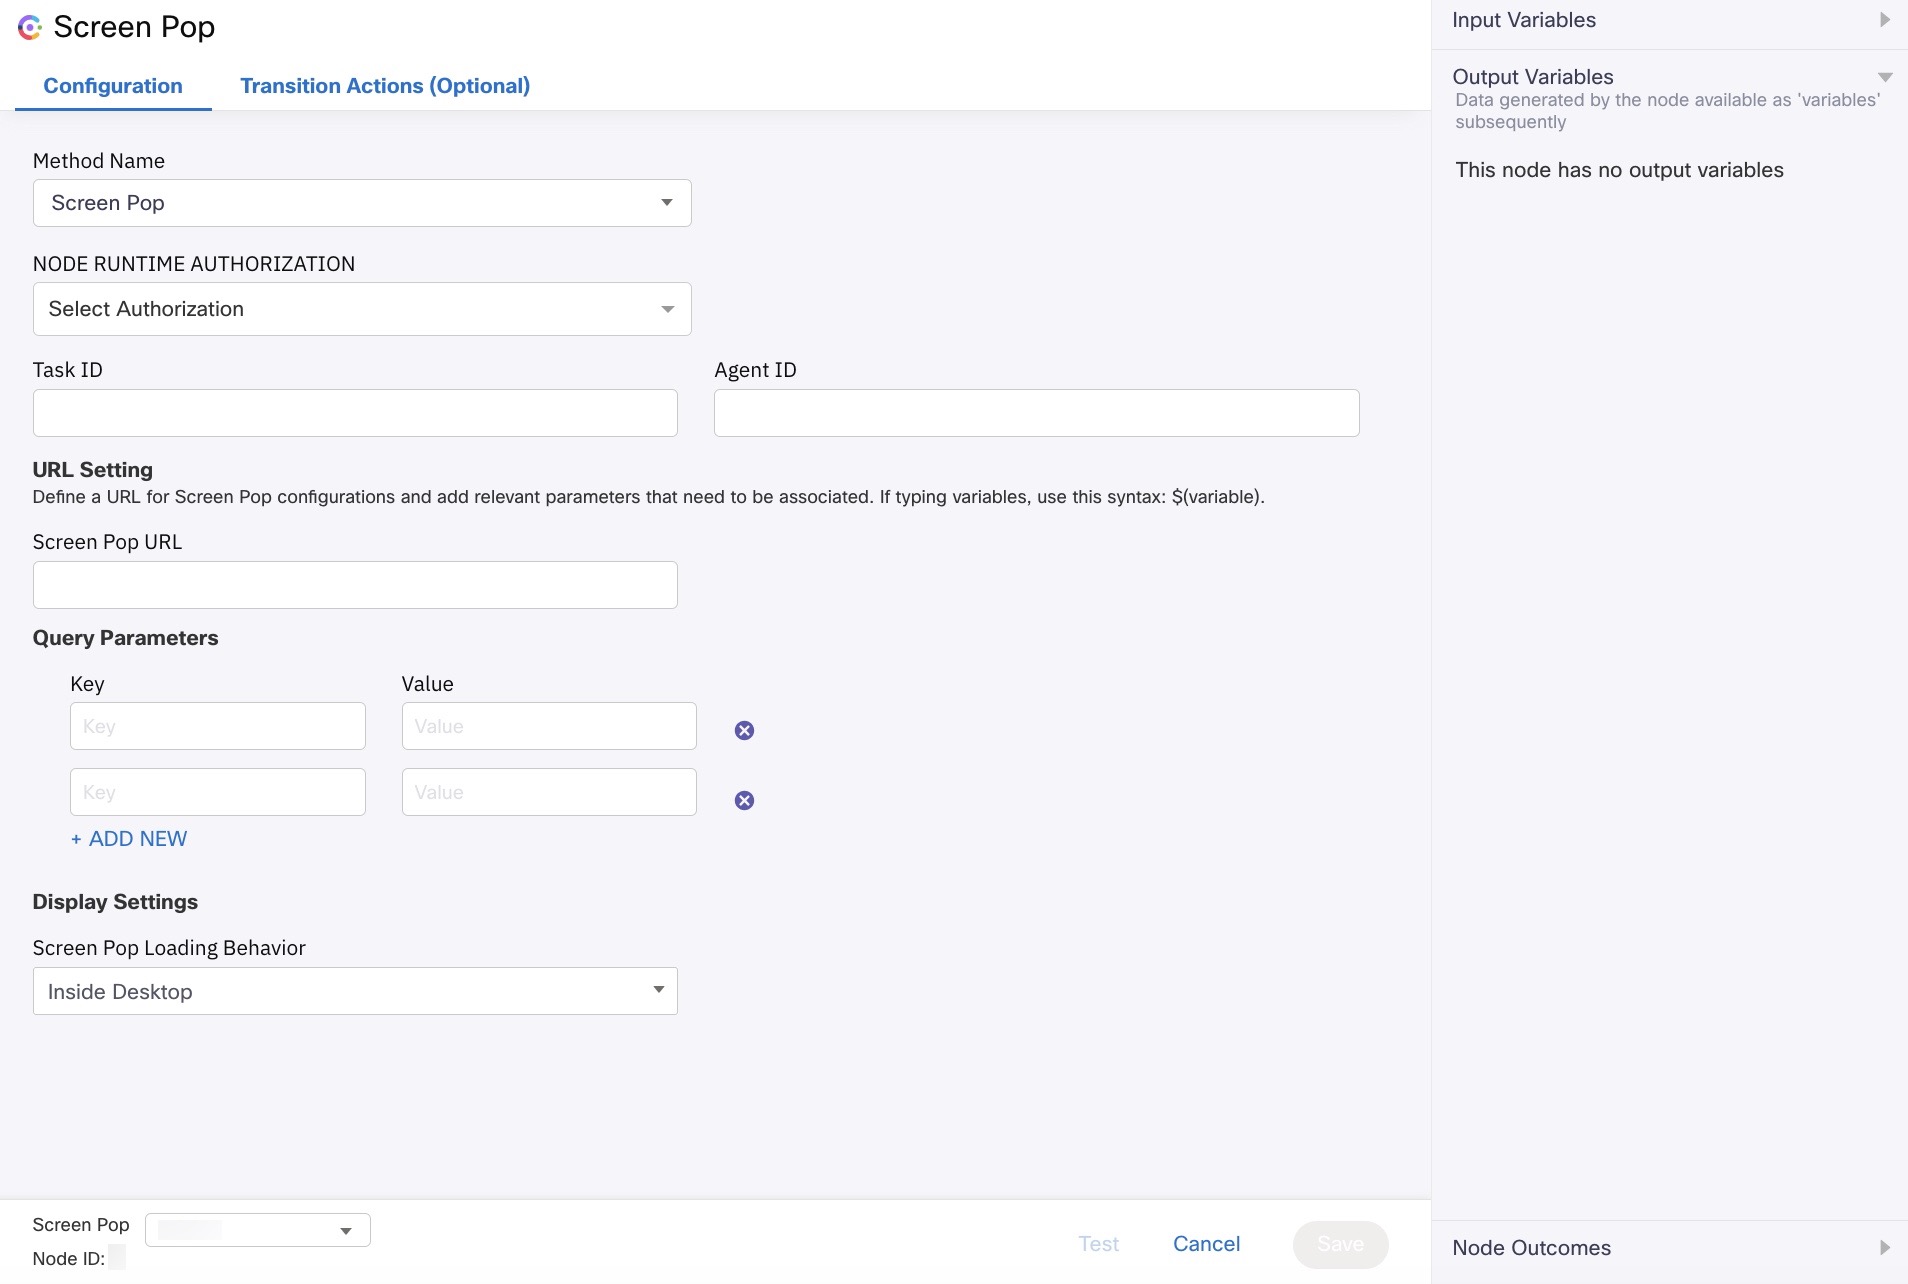
The Screen Pop node can be used to showcase either a URL or a pop-up screen on their agent desktop, during the interaction between the customer and agent.
While configuring the Screen Pop node, you can configure the Display Settings like the screen pop loading behavior. The screen pop can be inside the desktop, a new tab, or a new browser.
This flow is channel-agnostic but the flow designer can choose to make it channel-specific by applying conditions in the Start node.
Task Modified
When an agent is handling the contact, the agent has the option to Transfer and Conference. Transferring the conversation or conferencing other agents is handled by the Task Modified flow. When an agent ops to transfer or conference, a Task Modified event is received as an inbound event on Task Modieifed flow along with the context which specifies to add/remove the participant from the conversation.
This flow is channel-agnostic but the flow designer can choose to make it channel-specific by applying conditions in the Start node.
Close Task
When an agent clicks the End button on Agent Desktop, Webex Connect receives the Task Closed event which triggers the Close Task flow. On receiving a Task Closed event, the conversation is closed first and then Webex Connect notifies the Cisco Webex Contact Center about the task close.
This flow is channel-agnostic but the flow designer can choose to make it channel-specific by applying conditions in the Start node.
Livechat Inbound Message Flow
For the Livechat Inbound Message flow, sequence, and logic remain the same as other flows. Additionally, we use Pre-form chat which uses the form template, and the flow transitions into the next steps.
Updated 5 months ago