
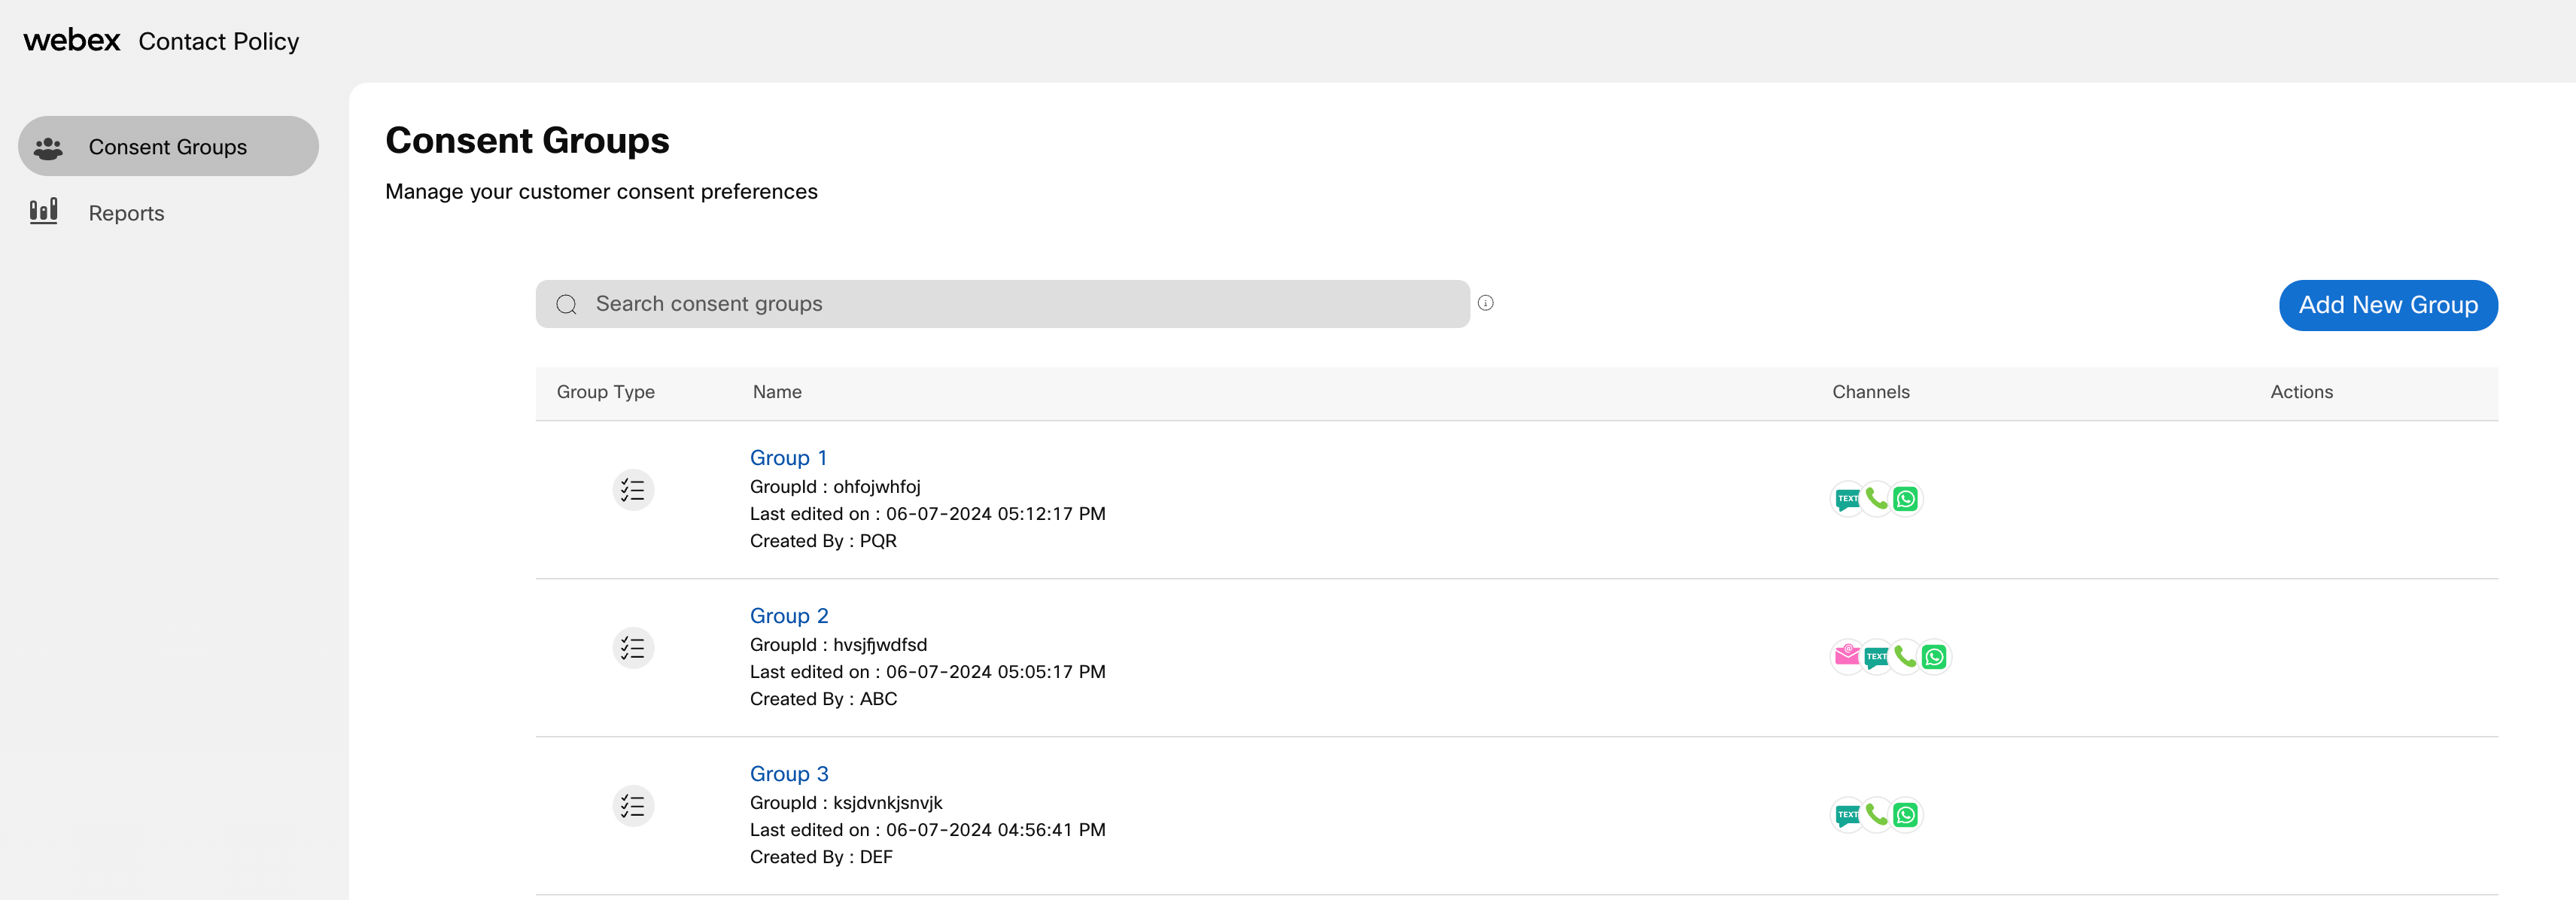
Consent Groups
Learn about Consent Group types and adding new groups.
You need to create groups to send specific types of messages. For example, you may have a group to whom you send messages showing all your sale items for the week and you may have another group who use the store pharmacy and you want to send messages about refilling their prescriptions.
The consent group type must be specified when creating a new group.
Consent Group Types
When you create a consent group, you must specify if it is a Allow List group or Deny List group. The group type defines rules for those consumers who are part of the group. If the Group Type is a Allow List, a consumer who is part of the group list, will receive messages. If the Group Type is a Deny List, a consumer who is part of the group list, will not be able to receive messages.
Add a New Group
To add a new group, use the directions below:
- On the Consent Group page, click the ADD NEW GROUP button . The Add New Consent Group page appears.
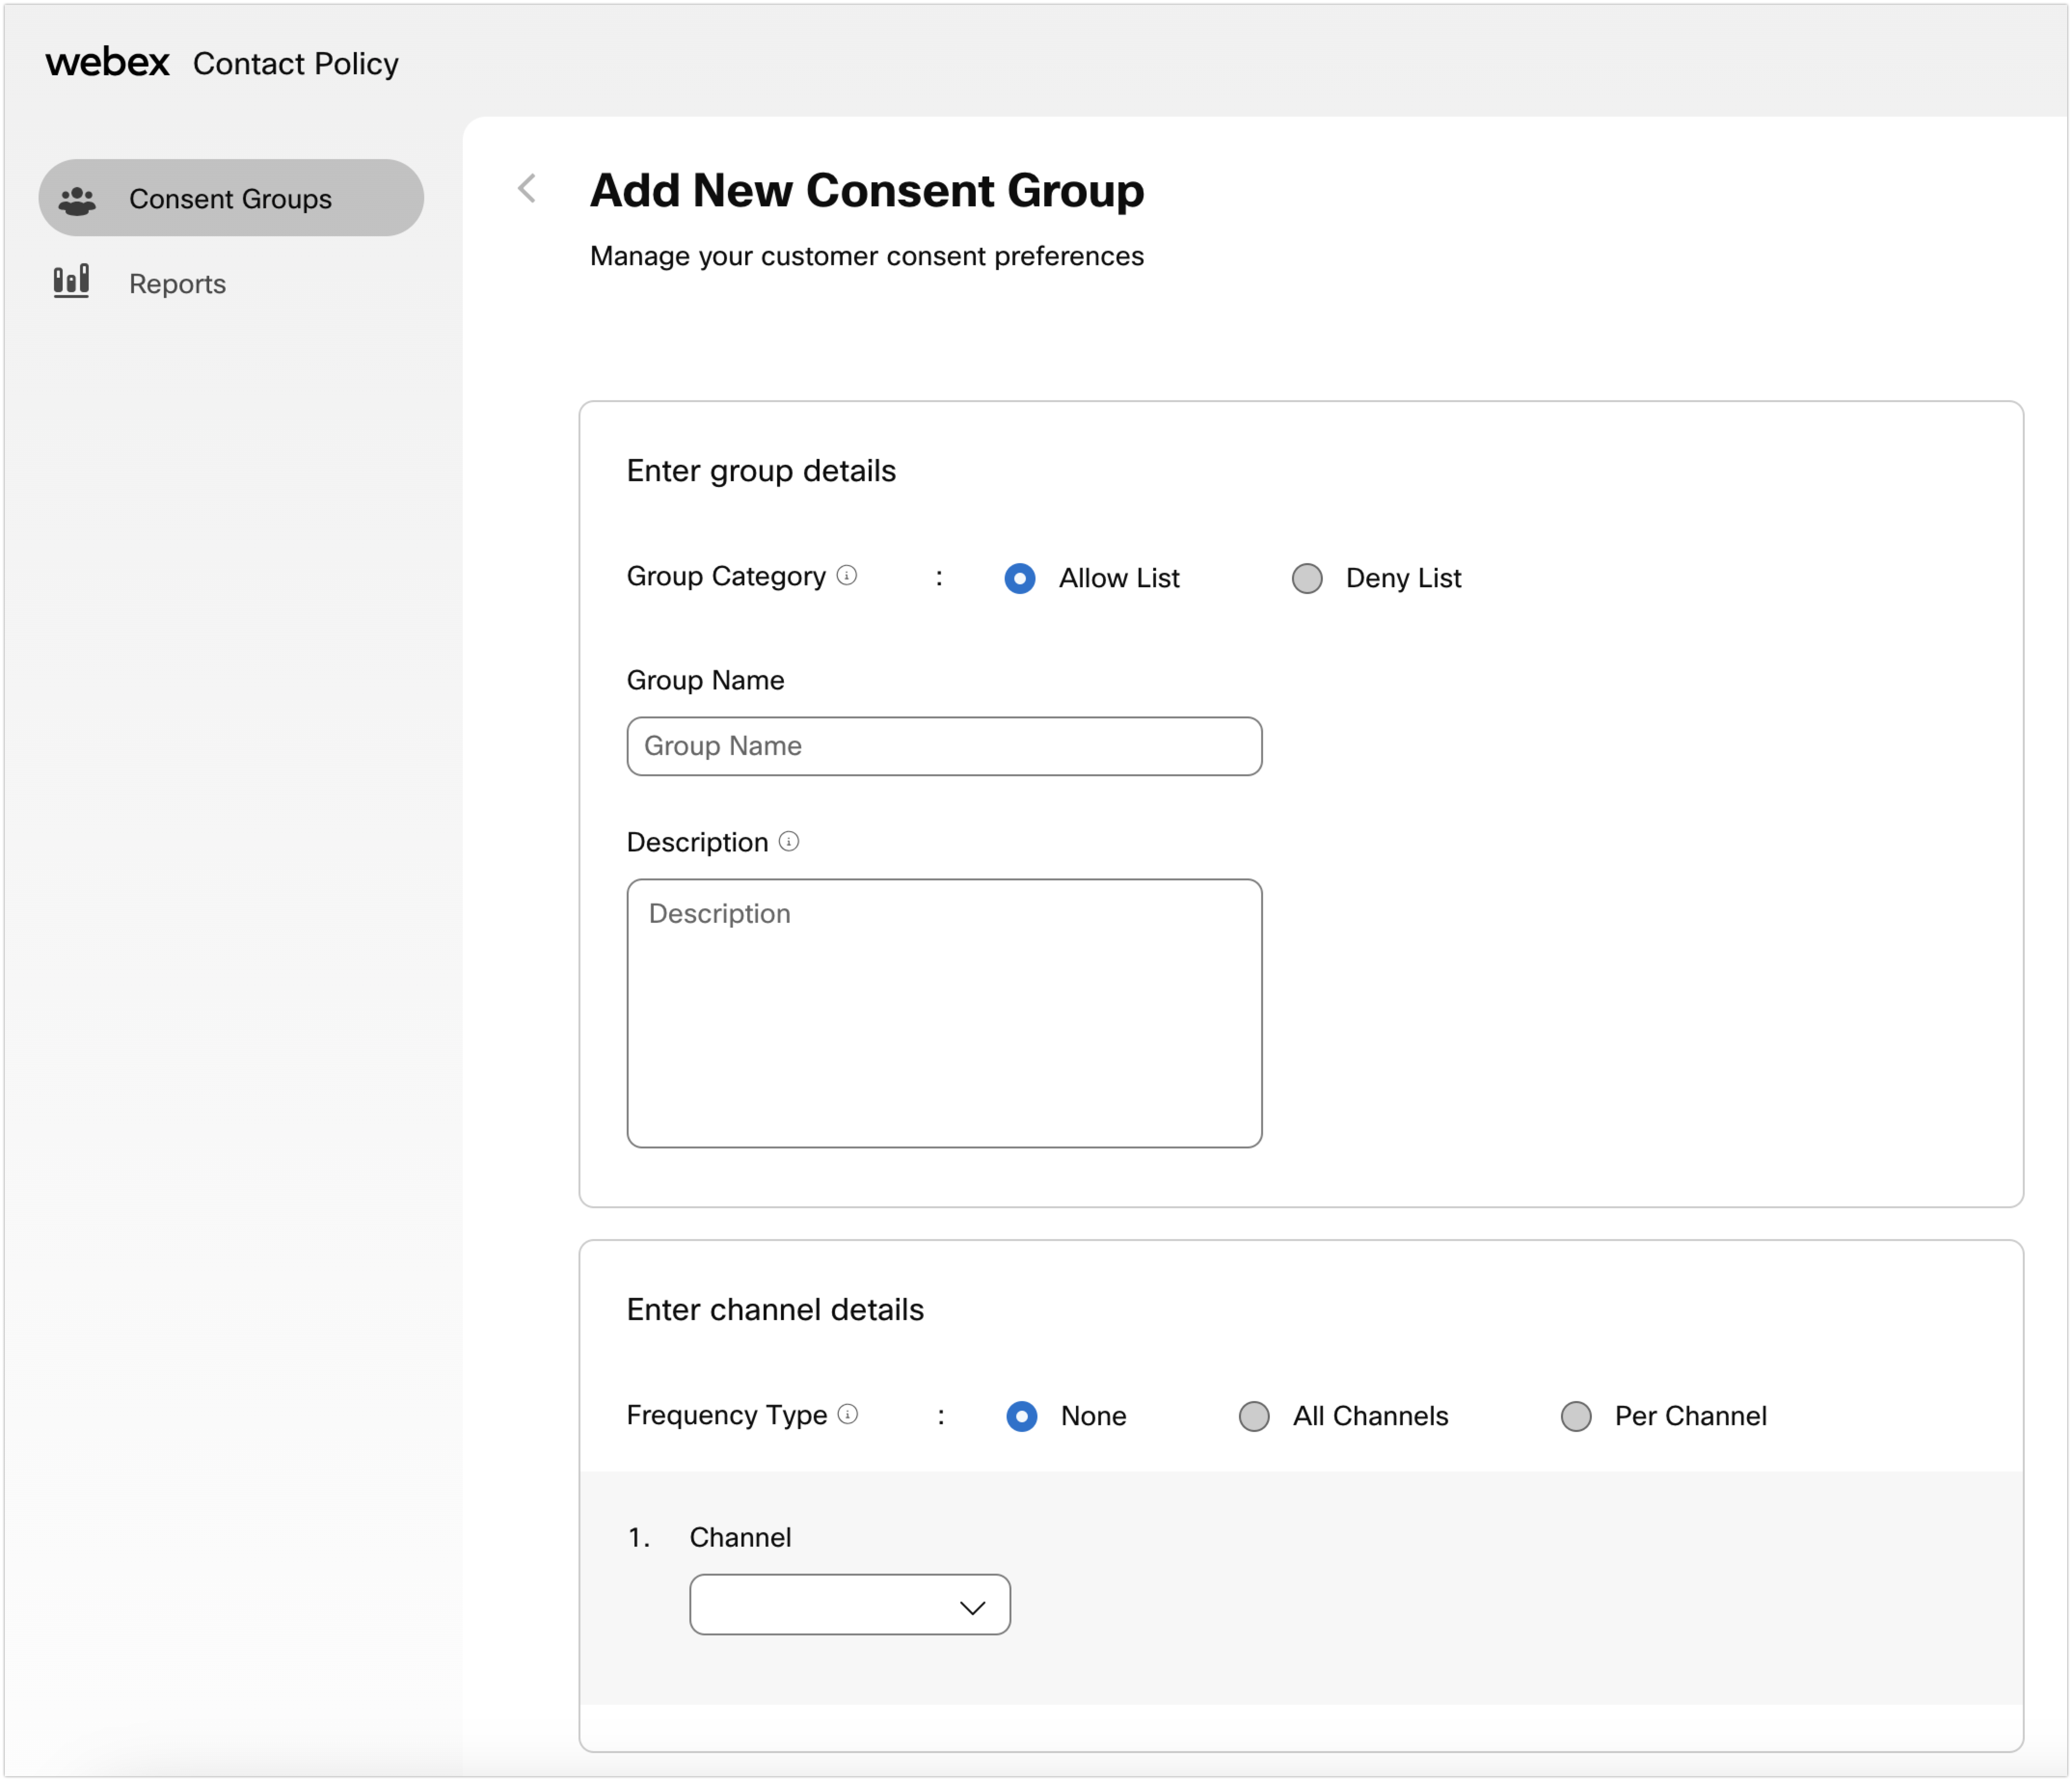
- Consent Group Type – select Allow List or Deny List.
- Allow List - Contains the list of users who don't receive messages unless they opt in.
- Deny List - Contains the list of the users who always receive messages unless they opt out.
- Provide the information listed below.
- Group Name – Type the name of the group.
- Description – Type a description for the group. This description may include such things as how customer consent, communication channel preferences, and marketing interests are captured for this group.
- Channels – Select the channel to receive the message. More than one channel can be selected.
- voice – Select this option to send messages to telephones. In the Sender ID field, type the identification associated with the sender.
- text – Select the text option to send messages in SMS, MMS, or RCS format (the three formats are clubbed into one - text). In the Sender ID field, type the identification associated with the sender.
- email – Select this option to send messages to email addresses. In the Sender ID field, type the identification associated with the sender.
- whatsapp – Select this option to send messages to whatsapp. In the Sender ID field, type the identification associated with the sender.
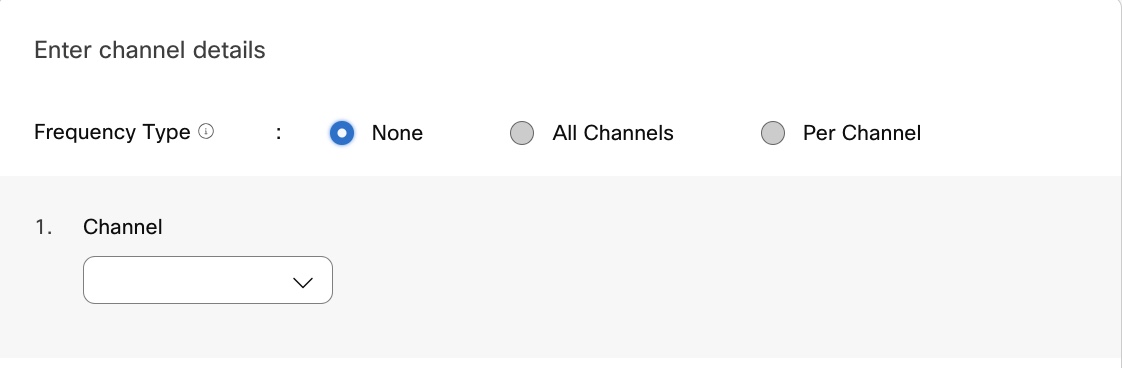
- Under Frequency Type, select None, All Channels or Per Channel.
- If you select None, there’s no need to select frequency for the channels. The frequency will be unlimited.
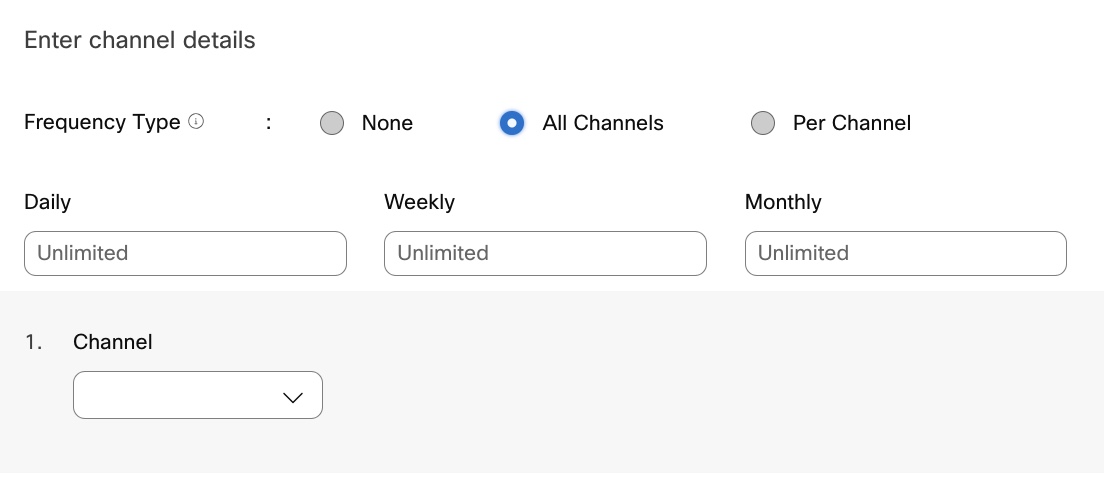
- If you select All Channels, the Daily, Weekly, and Monthly frequency will be applicable for all the channels selected. The number of messages sent cannot exceed 5000. The daily limit should always be lesser than the weekly limit and the weekly limit should always be lesser than the monthly limit.
- If you selected Per Channel, the Daily, Weekly, and Monthly frequency can be configured for each channel.The number of messages sent cannot exceed 5000. The daily limit should always be lesser than the weekly limit and the weekly limit should always be lesser than the monthly limit.
- If you select None, there’s no need to select frequency for the channels. The frequency will be unlimited.
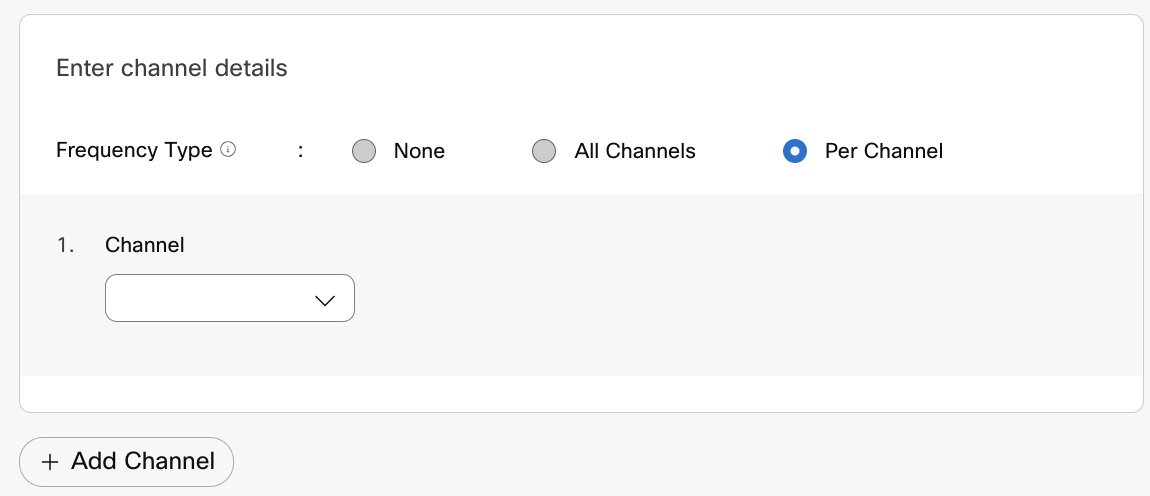
- Click + Add Channel to individually set the frequencies for the selected channels.
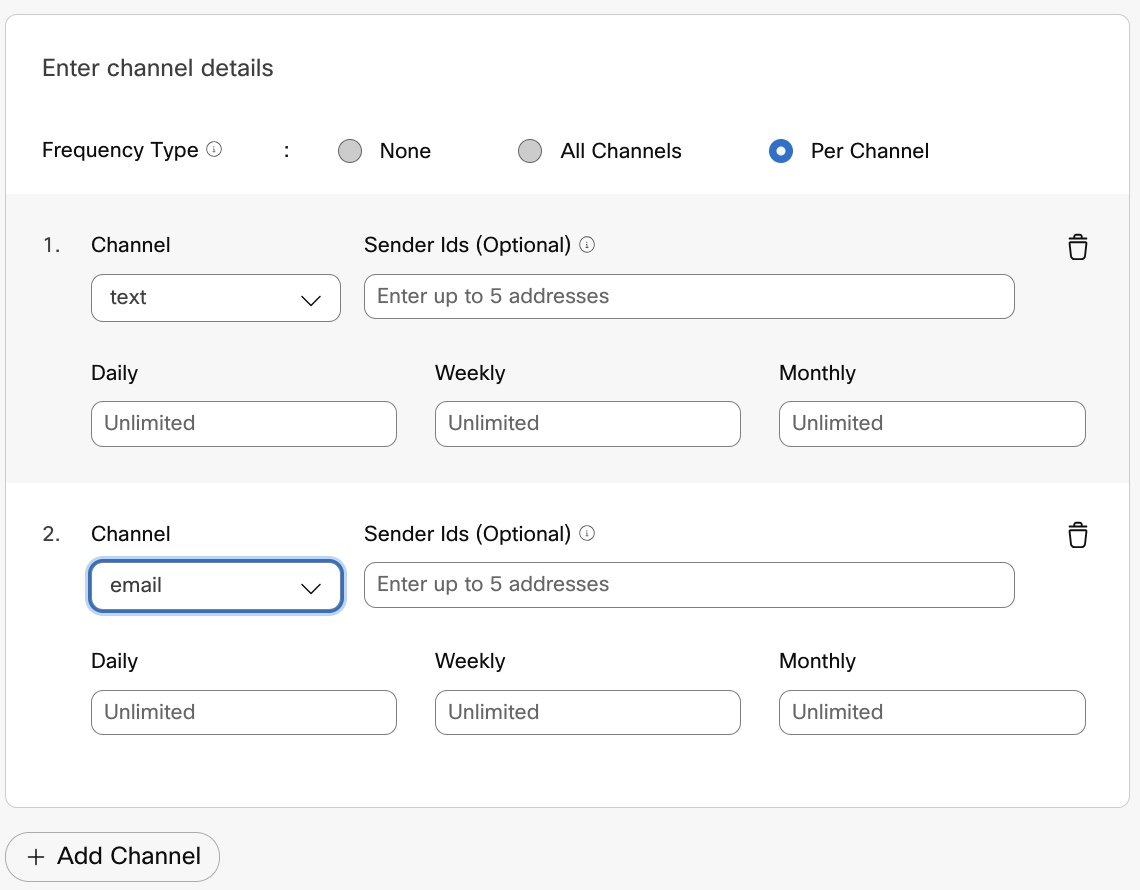
- Channel – Select the required channel from the list.
- Sender Ids – (This field is optional for all channels). Type the ID for the sender. This can be a short code, phone number, chatbot name, or email address based on the channel selected. You can enter up to 5 addresses.
- Enter the value for the messages to be sent on Daily, Weekly, and Monthly basis. The number of messages sent cannot exceed 5000.
The daily limit should always be lesser than the weekly limit and the weekly limit should always be lesser than the monthly limit.
The intervals and number of messages must be consistent. The daily, weekly, and monthly limit defined refers to the maximum limit of messages that can be sent for each frequency type. It is not mandatory to utilize the full capacity of the limit for each frequency type.
- For example, if you set a daily limit of 2 messages, a weekly limit of 5 messages, and a monthly limit of 15 messages, it means that a logical combination can be defined such that distribution of limit does not exceed the limit for each frequency type.
- In this case, 2 messages each can be sent on Monday and Tuesday, and one message can be sent on Friday, which matches the weekly limit of 5 messages. A contact frequency check will be performed, and if the frequency limit exceeds, the message is not sent.
The Frequency can only be set for channels selected in the displayed list.
- Click Save. The new group is listed on the Consent Group page.
After creating a group, consumer records can be added and updated using:
- API call through Webex Connect
- The Upload option
Updated 24 days ago