
Outbound Webhooks
Configure an Outbound Webhook URL to post events such as incoming messages from customers, incoming call events, and/or status receipts for your outbound messages
Outbound Webhooks can be used to forward the following events or messages to your applications or systems:
- Status receipts for the outbound messages sent using Webex Connect (E.g., Submitted, Failed, Delivered, etc. subject to channel specific capabilities.)
- Incoming calls and messages from customers across channels
- Incoming call events
URL Endpoint Notifications
- We only support HTTPs URLs. We make a test call to the configured URL and expect a standard 200 HTTP Response before you can save your configuration. All notifications will be delivered by making POST requests.
- In case Webex Connect is not able to send a notification because of an unreachable URL, it will retry sending notifications three times each, after 60 seconds. The maximum request timeout for each notification is 10 seconds. The HTTP Responses for which retries are not performed are - 202, 203, 204, 205, 206, 207, 208, 226, 300, 301, 302, 303, 304, 305, 306, 307, 308, 400, 402, 404, 405, 406, 407, 408, 409, 410, 411, 414, 415, 416, 418, 505.
SHA256 and SHA512 support
With the v5.6.0 release we have added support for SHA256 and SHA512 signatures while setting up outbound webhooks. SHA1 signature option that was earlier available is no longer supported and cannot be used for new outbound webhook configurations.
Note
The SHA-1 feature is no longer supported for new configurations. The feature will work as is for the existing configurations.
Configuring Outbound Webhooks at a Service Level
To configure an outbound webhook for a given service on Webex Connect platform, perform the following steps:
- Navigate to Assets > Integrations.

Integrations in Assets Menu
- Click Add Integration > Outbound Webhook.

Create Outbound Webhook
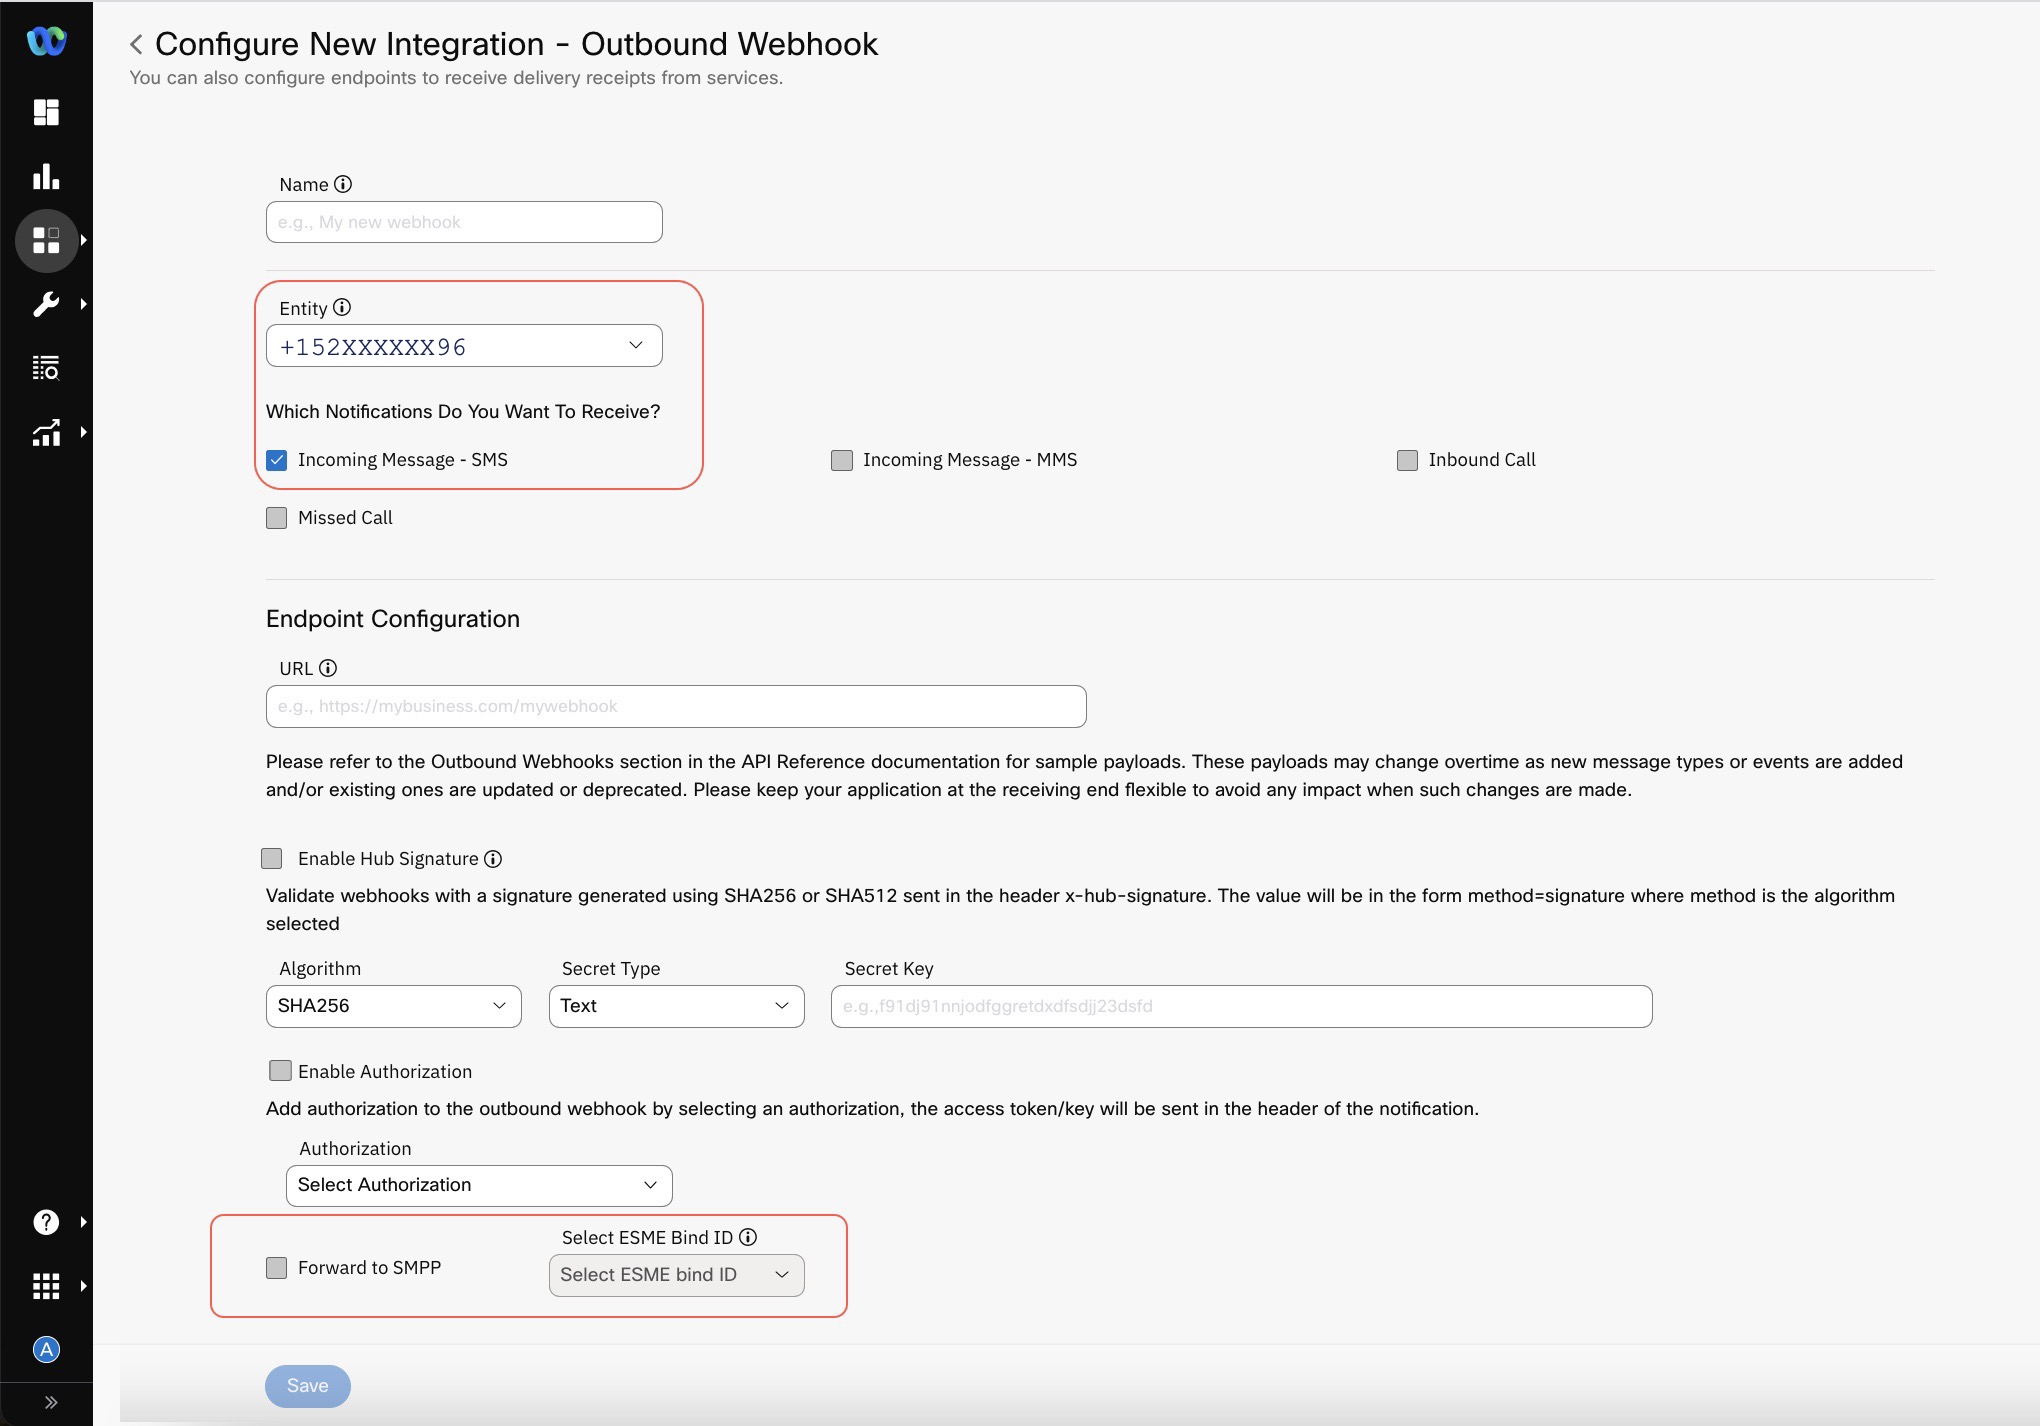
- Enter/select details like Name, Entity, Endpoint Configuration.
- Name - the name that you want to use for your outbound webhook configuration
- Entity - the Service to which you want to associate your outbound webhook
- URL - the URL at which the Webex Connect platform notifies your application of incoming events and messages.
- Which Notifications Do You Want To Receive - select the required notification you want to receive for the Outbound Webhook.

Outbound Webhook Configuration
Note
For Email Channel, the events marked with Asterisk are applicable only if 'Email via AWS SES' is the selected route.
- Enable Hub Signature (Optional Configuration) - The value of the hub secret is used as the key to creating a signature of the notification data and is sent along with the notification, which can then be verified by the receiving server. The signature is the hexadecimal (40-byte) representation of the signature computed using the HMAC algorithm selected during configuration (E.g., one of SHA256 or SHA 512) as defined in RFC2104. When enabled, you will receive an additional header called x-hub-signature.
- Select the Authorization that you would like to apply to this Outbound Webhook Configuration. Please refer to the section on Authorization Configuration below for more information.
- When you select a phone number from the Entity drop-down and select Incoming Message, the Forward to SMPP checkbox becomes visible if you don't select Enable Hub Signature. When you select the Forward to SMPP checkbox you also need to select a value from Select ESME Bind ID drop-down list.
- Click Save.
Configuring Outbound Webhook at Apps Level
To configure an outbound webhook for a given app on Webex Connect platform, perform the following steps:
- Click Add Integration > Outbound Webhook.
- Enter Name for your outbound webhook configuration.
- Select Entity to which you want to associate your outbound webhook at App level. It must be an In-App app asset.

- Select the checkboxes for the notifications you want to receive.

- Click Save.
How to use Outbound Webhooks to forward delivery receipts
To receive delivery receipts for your outbound messages:
- Select a service from the Entity dropdown
- Select the outbound channel for which you want to receive the delivery receipts
- Select the receipt types you want the notifications for. Please note that different channels offer different kinds of receipts.
The below table shows which notifications are available for each channel supported by Webex Connect. By default, none of the notifications are selected. You must explicitly select the required notifications channel-wise.
| Channel | Applicable Delivery Status |
|---|---|
| SMS | Submitted Delivered Undelivered Failed Clicked |
| Voice | Offered Accepted Answered Dropped Rejected Released Disconnected Trombone Connect Trombone Release |
| MMS | Submitted Delivered Failed |
| Messenger | Submitted Delivered Failed Read |
| In-App Messaging / Live Chat | Submitted Delivered Read Failed Clicked |
| Submitted Delivered Read Failed | |
| Push | Submitted Delivered Read Failed |
| Submitted Delivered Not verified Invalid Bounced Complaint Failed Read Clicked Note: Delivered, Not verified, Invalid, Bounced, Complaint, Read, and Clicked events are only available if Email via AWS SES is the selected route. | |
| Apple Messages for Business | Submitted |
| RCS | Submitted Delivered Read Failed |
| Read Submitted Failed | |
| Google Business Messages | Submitted Delivered Read Failed |
Sample Payloads for Outbound Message Status and Incoming Messages
Sample Payloads
For Information related to the sample payloads, refer to the section Outbound Webhooks in the API Reference documentation. Please note that the payloads vary for each message type, each event type, and each channel. Also, enhancements are made to these payloads overtime as new message types or events are added and/or existing ones are updated or deprecated. Please keep your application at the receiving end flexible to avoid any impact when such changes are made.
Error Codes
Error Codes
For Information related to the common and channel-specific error codes, refer to the section Channel Specific Status Codes in the API Reference documentation.
For more information on Authorization for Outbound Webhook, refer here.
Updated 18 days ago