Geofences
Create geofences on map and trigger events whenever a customer enters or leaves the location.
Webex Connect SDK can monitor the location of the user with their permission and can raise an event back to the platform that can trigger a rule or a workflow.
To create a new Geofence, click on the Add New Geofence button on the top right of the page.
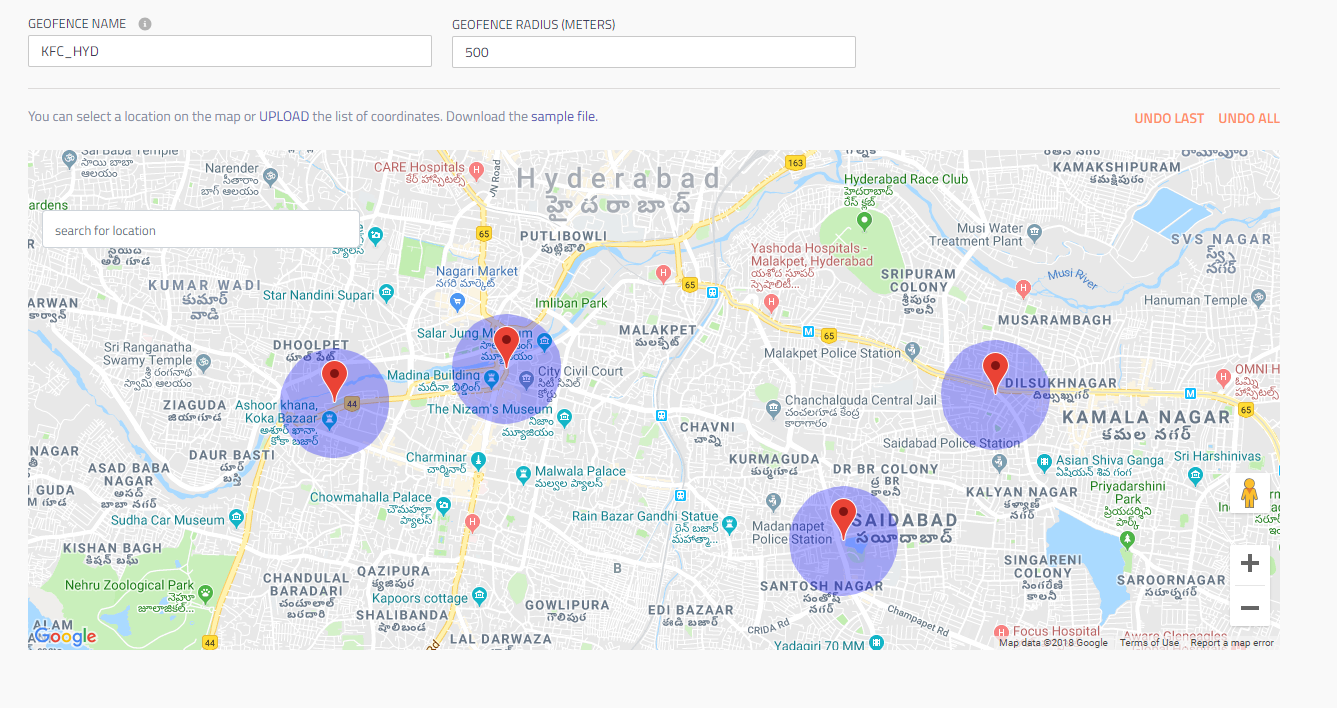
The Configure New Geofence page opens.
You can create multiple geofences together by either selecting the location of interest one by one or by uploading the list of locations in a .xls file.
- To manually set a geofence, search and mark the location.
- For marking multiple geolocations, upload the CSV file with coordinates.
Sample File
You can download the sample file from Tools > Geofence > Sample File.

Details to create a Geofence boundary:
- Geofence Name: Enter a name for the geofence to identify on the Geofence App.
- Geofence Radius (Meters): Specify the radius in meters for the geofence.
- Upload: Upload the CSV file that contains the Geofence location coordinates to mark multiple Geolocations.
(Click Sample to download a sample CSV file, you can use this file as a template to enter the coordinates of the geofence location.) - Undo All: Click to clear all marked geolocations on the map.
- Undo : Click to clear the last marked geolocations. This is applicable only when you have manually marked a Geolocation on the map.
Updated 8 months ago
