Entity Node
This node is currently in controlled beta. Please get in touch with your account manager if you would like to access this node.
Named-Entity Recognition (NER) (otherwise known as entity chunking, entity identification, and entity extraction) is a subset of information extraction mechanism to trace and classify the named entity from the unstructured entered text into different pre-defined categories like names, locations, organizations, quantities, medical codes, percentages, time expressions, monetary values, and so on.
The Entity node allows you (flow developers) to configure entities (information) that are required to be collected from a customer. Entities are of two types: System Entities and Custom Entities.
System Entities are standard entities (like date, time, currency, etc.) with a pre-defined dataset called Knowledge Base. For Custom Entities, you need to provide a dictionary of synonyms corresponding to an entity that forms its knowledge base. During the flow execution, the customer's message is passed to the Entity node to extract all the required entities available in the message. If the message passed to the entity node doesn't have all the mandatory entities then for the remaining entities, the node sends a prompt message, one at a time for each entity, and runs in a loop until all the entities are collected from the customer. Customer inputs for the collected entities are stored and are available as flow variables for further use.
Entity Node
Node Configuration
Use this tab to configure the Entity node. You can define the Entity in two steps: Configuring Entity Settings and Transition Actions.
Entity Node Configuration
Perform the following steps to Configure Entity:
- Double-click the Entity node.
The Entity screen appears. - On the Entity screen, click the Configuration tab if it is already not opened by default.
The configuration fields appear. - In the Input Message field, enter the message string for which entities are to be extracted.
- In the Input field, enter the message string to capture entities after the
onpartialcompletenode outcome. - In the Entity Configuration section, enter the Prompt Repetition to determine the number of times each entity message will be prompted before the
onmaxcountnode outcome.
1. Enter a Name for the Entity (from the default name is Entity1).
2. (Optional) Enter a Description for the entity.
3. Select a Data Type of the entity to be extracted.
4. Enter the Prompt Message word for the entity. It’s the message that appears as a prompt to the end-user for entity collection if entity value is missing.
Note: You can add multiple Entities by clicking the Add New Entity button. - Click the Train button to set the entity. You need to click the Train button before saving your intents in order to update the configuration into the platform. In case you click the Save button without, clicking Train, the platform will display a warning message and prompt you to Train first to proceed further.

Untrained Entity
6.1 Clicking the Save button on the Warning screen will save the configuration. However, untrained Entity configurations will not be used for entity extraction during flow execution.
7. Click the Save button at the bottom.
The Entity node is configured.
Input Variables
You can see a list of all the flow variables available for use within this node under the Input Variables pane. You can also search for a variable using the Search field.
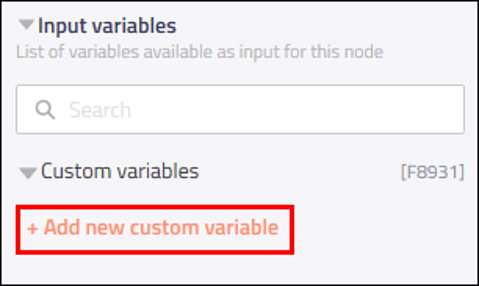
You can see the list of variables that you explicitly create and configure for this node under the Custom Variables pane. You can also add a custom variable to the flow using the Add New Custom Variable button. For more information, see Custom Variables.

Input and Custom Variables
Output Variables
Click this collapsible panel to view the output variables.
You can see the data that this node generates as output variables. The data generated by the node is displayed as variables here. These variables are available for use in subsequent nodes. The standard output variables for this node are:
- Entity
- entity.promptMessage: One output variable is generated for each configured entity. The prompt message variable holds the value of the entity provided by the user.
Output Variables
Node Outcomes
You can see the list of possible node outcomes for this node under this pane. You can customize the node labels using the Edit (pencil) icon. The node exits through one of the node edges corresponding to the outcome of the node. Each branch corresponds to a node outcome.
| Node Edge | Node Event/Outcome |
|---|---|
| Success (green) | * onSuccess - the flow exits through this node when it is a success. |
| Timeout (orange) | onmaxcount - the flow exits through this node when it reaches max count. onpartialcomplete - the flow exits through this node when it is partially complete. |
| Error (red) | * onError - the flow exits through this node outcome when there is an error. |
Transition Actions
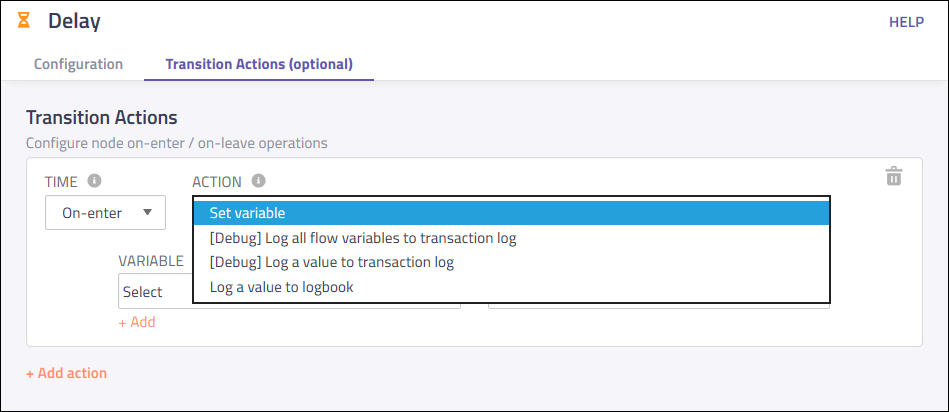
Use this tab to configure the transition actions for On-enter/On-leave events. However, configuring transition actions is optional. For detailed instructions about configuring the transition actions, see Node Transition Actions.

Transition Actions
Testing the Data
Both the Configuration tab and the Transition Actions tab contain a Test button.
Here is what you can do using the Test button:
- Click the Test button on the Configuration tab to test the sample input.
- Click the Test button on the Transition Actions tab to test the configured on-enter / on-leave operations.
- Click the Test button.
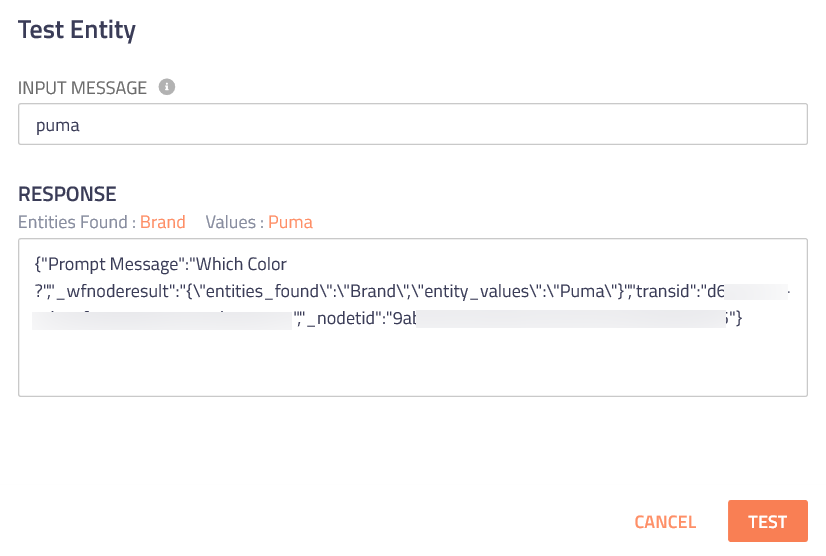
The Test Entity window appears. - On the Test Entity window, enter Input Message like ‘clothing type, brand, color’ in the text box, and then click the Test button.
- Click the Test button.
Test Entity
The system will run the input entity and return the result in the Response text box.

Note
Copy and Paste functionality is not supported for this node
Updated 7 months ago
