Flow Settings
Manage the flow configuration settings and set default values
To access settings, click the gear icon in the upper-right corner. Settings are categorized into four tabs namely:
- General: contains settings (basic and advanced) related to the flow behavior
- Custom Logs: allows mapping of the logbook(s) for capturing custom log data. If a Logbook that is in use is disabled in the admin console, the Logbook is disabled for the tenant. Flow runtime data will not be logged into the mapped logbook. warning message is displayed.
- Flow Outcomes: allows managing flow end results and set (optional) outcome-based notifications to be notified on a URL. If an invalid URL is passed in API request or via a variable, then such request will not be considered eligible for retries.
- Custom Variables: lists the custom variables used in a flow so that you can view and manage them.
General Settings
Lists the common flow settings required for running the flow.
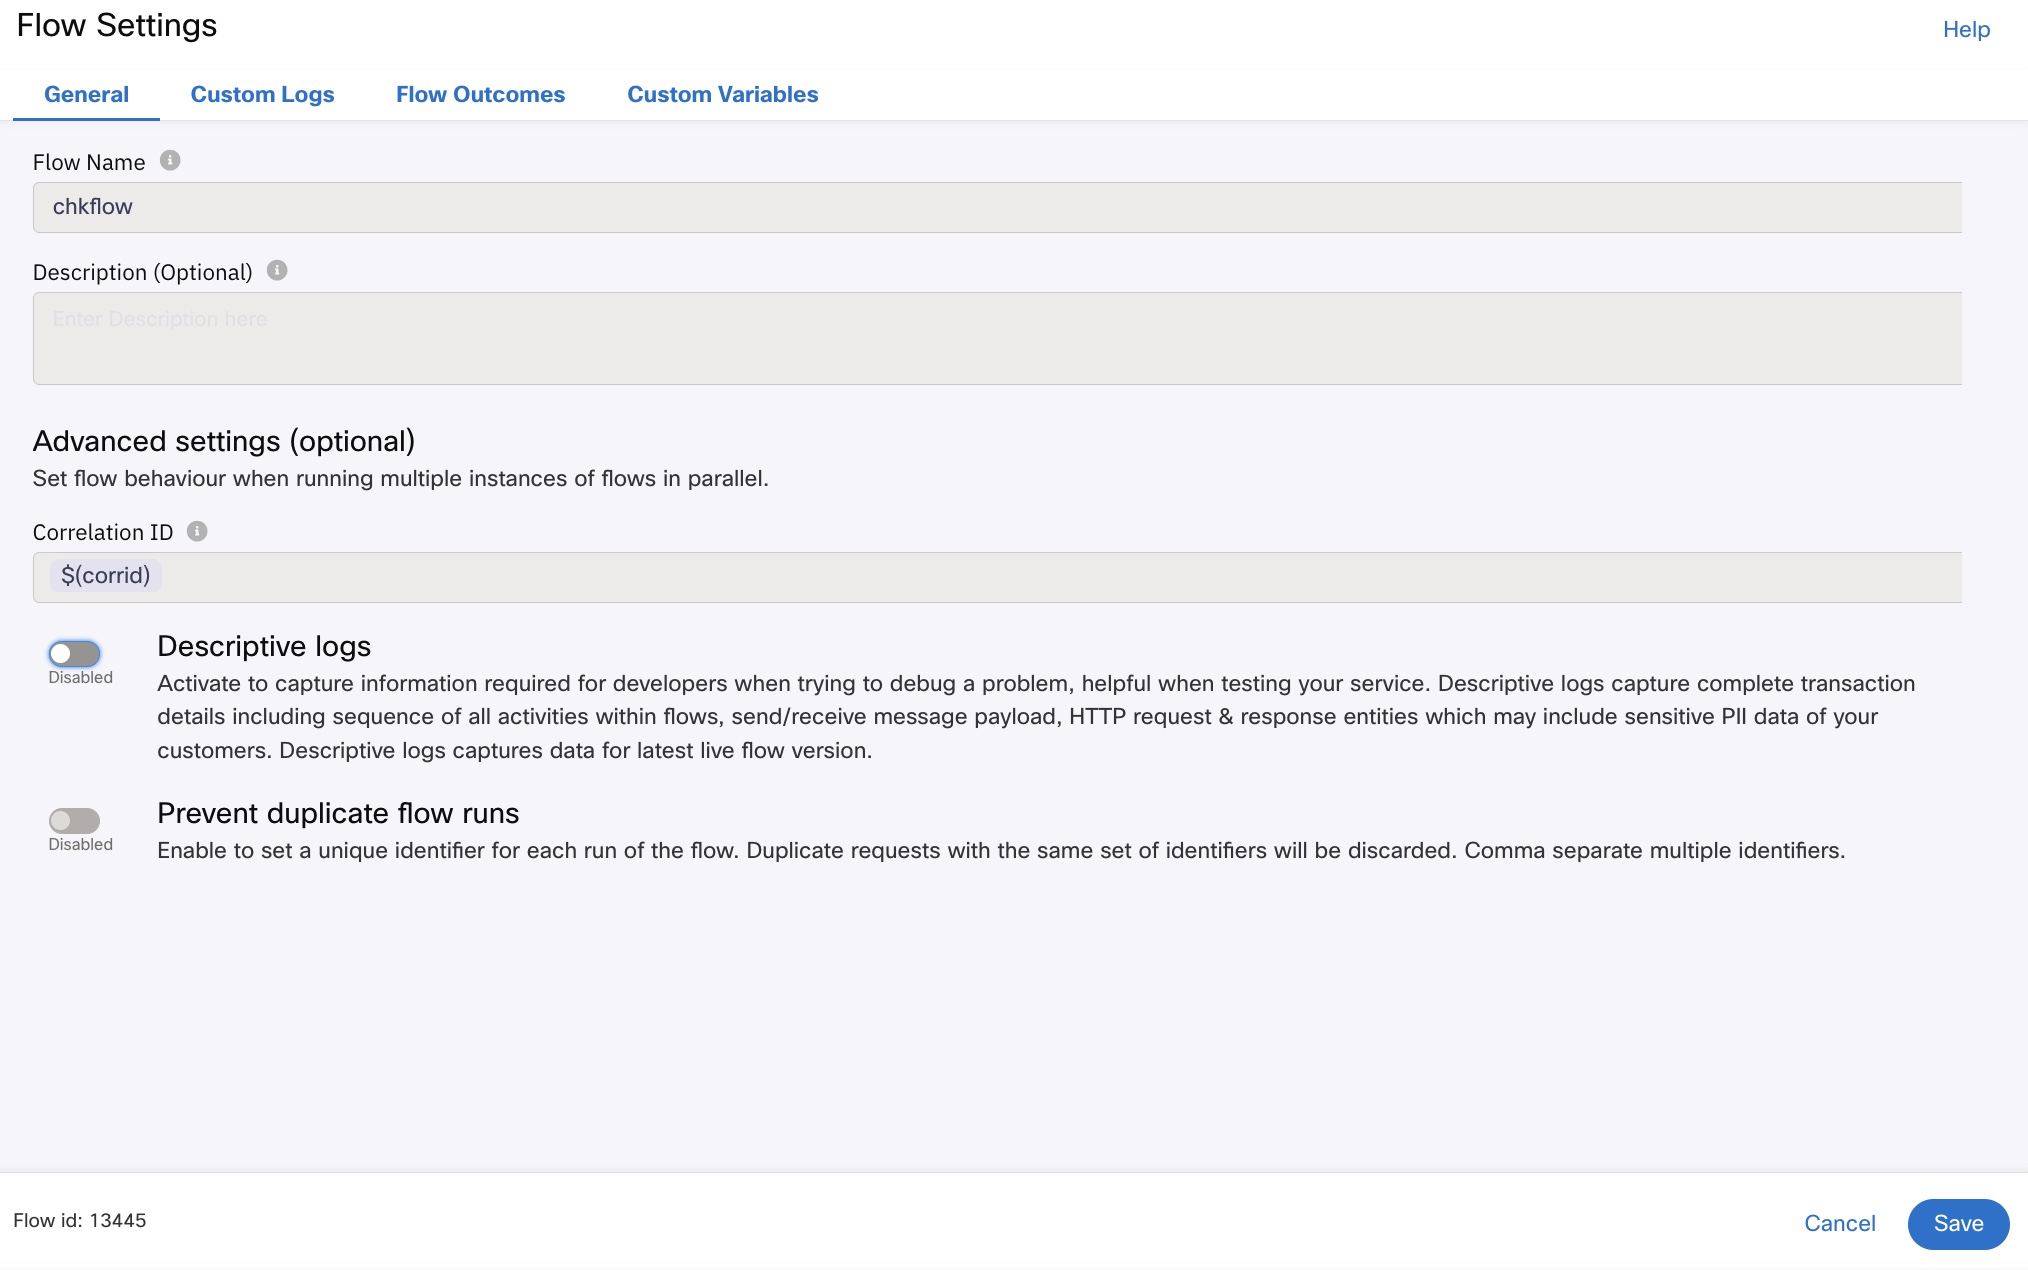
Flow Settings
| Setting | Description |
|---|---|
| Flow Name | The flow name used while creating the flow. |
| Description | A meaningful description of the flow. This is an optional field. |
| Correlation ID | A unique value that is attached to each running flow. This value allows you to trace a given flow run to your original request. For example, you can attach the OrderID created on your system as a CorrelationID to trace the flow run against the request. The field length limit is 250 characters. This is an optional field. |
| Descriptive logs | A toggle button that is disabled by default. - Disabled - captures flow execution summary in the transaction logs. - Enabled - captures full node execution details in the transaction logs for debugging.Note: It may take up to 2 mins for the descriptive logs to start logging.This is an optional setting. Descriptive logs can be enabled or disabled irrespective of the status of the flow. However, they will log only the version of the flow that is in live state. |
| Prevent duplicate flow runs | A toggle button that is disabled by default. - Disabled - creates a new flow identifier for each run of the flow. - Enabled - sets a unique identifier for each run of the flow. Duplicate requests with the same set of identifiers are discarded. Earlier, this setting was referred to as Session Key.This is an optional setting. |
Descriptive logs
The node transition actions that start with
[DEBUG]are applicable only when the Descriptive logs option is turned ON. Please note that this feature is suggested to be used only during initial flow set-up and troubleshooting. Enabling this feature in production mode can impact your tenant performance.
Descriptive Logs
The Descriptive Logs can be enabled for an existing tenant without any time or transaction limit. For tenants with the auto-disable descriptive log feature, on enabling descriptive log you must add add a time limit to automatically disable the logs or it will be automatically disabled after 1000 transactions. The minimum and maximum time limits are 1 minute and 1440 minutes (24 hours) respectively.
Any transaction that is initiated while the descriptive logs are enabled will be logged in, even when the time limit for automatic disable is reached.
If you are not asked for a time limit to automatically disable descriptive logs or you are asked to publish a flow version to be able to enable descriptive logs. Please reach out to operations manager for enabling auto-disable feature in descriptive logs.
Starting from the 6.3.0 release, the descriptive logs are independent of the flow version.
Descriptive logs can be enabled or disabled irrespective of the status of the 'Auto-disable descriptive logs’ toggle button. This is applicable for all existing and new tenants.
Custom Logs
The Custom Logs allow mapping of one or more logbook(s) to the flow for capturing custom log data. For more information about setting up and managing a logbook, see Tools - Logbook.
You can configure the values to be captured in the logs during a flow run using the 'Node Transition Actions - Log a Value to Logbook' option, once a logbook is mapped. The platform has the capability to capture:
- Information into a logbook at any node while entering/exiting the node.
- One or more values at each stage in a node.
- Values of a custom variable or any node variable available in the node.
The data captured into the logbook follows the Rotation Policy set against the logbook.
Note
Local File Transfer is disabled for this tenant in the admin console, you will see the following warning message:
"Local as a file transfer option in logbooks is disabled for the tenant. Flow runtime data will not be logged into the mapped logbook. Please reach out to your account manager if you would like to enable Local file transfer option for logbooks.
Setting up a Custom Log
Apart from mapping to the existing logbooks, you can also add a logbook.
- Select the logbook that suits your requirement from the Logbook drop-down list box and then click Load.
- Click the Add Another Logbook button and repeat the previous step.
The Logbook details are displayed along with the attributes.
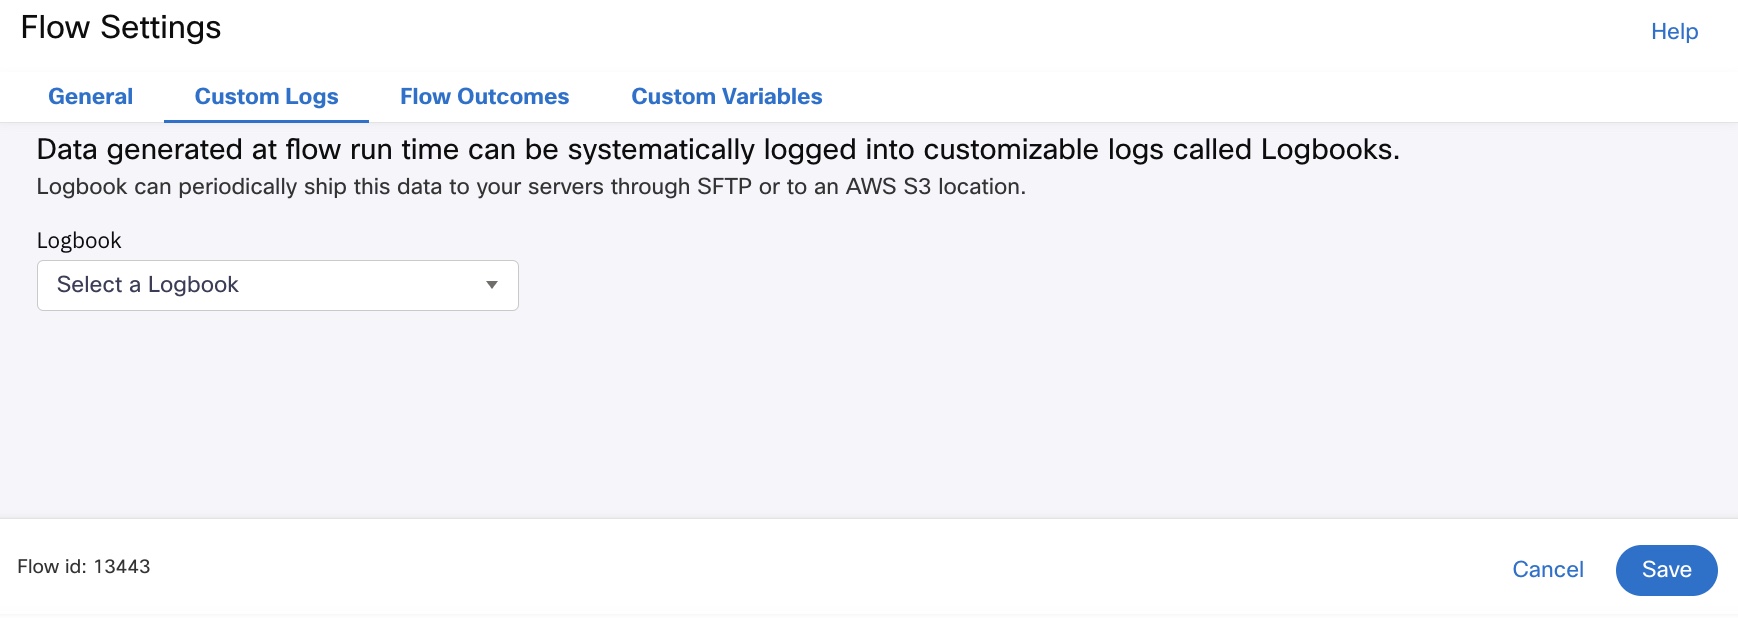
Mapping a Logbook to a Flow
Note
You can see only the enabled logbooks for selection in the drop-down list box. Manage your logbook availability from the Tools - Logbooks listing page.
Flow Outcomes
Flow Outcomes allow you to classify the outcome of a flow run. Webex Connect provides three standard outcomes by default - Success, Error, and Incomplete. There is a status code and an optional description associated with each outcome. If needed, you can add custom outcomes by configuring the status code and description of the status code as shown below.
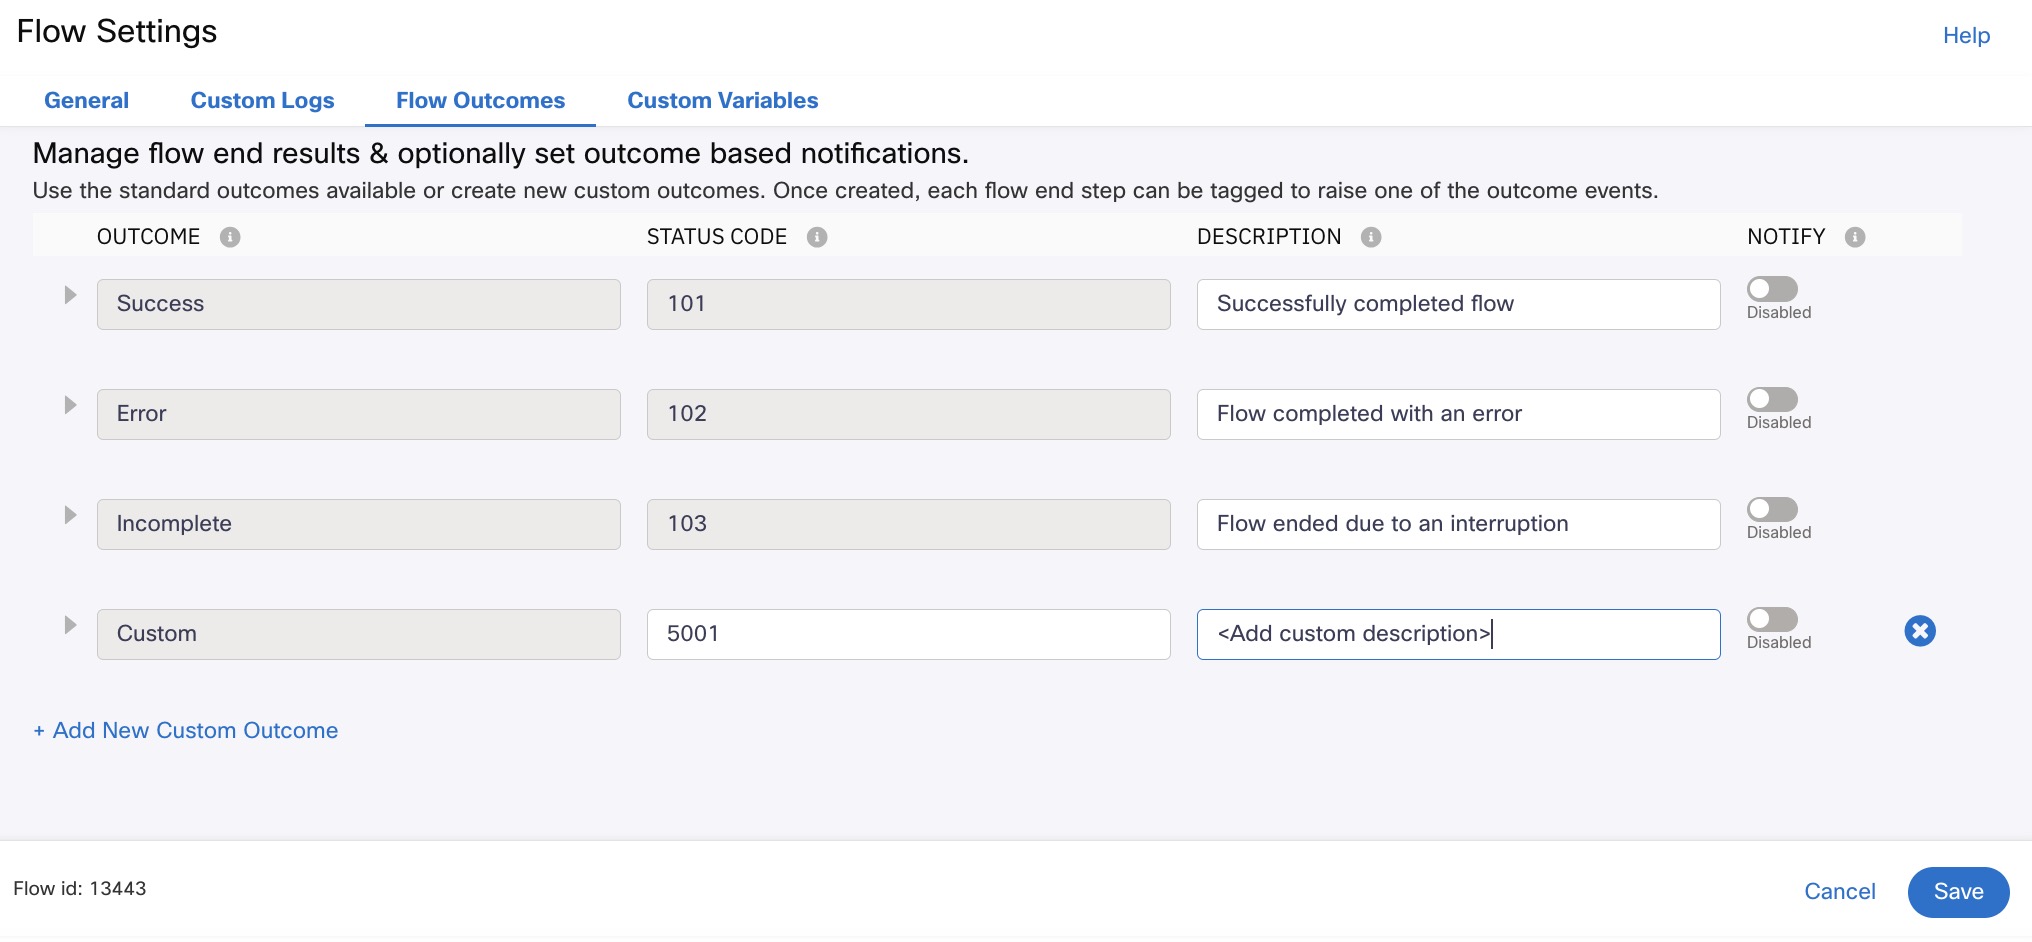
Configuring Flow Outcomes
Once configured, the custom Flow Outcomes are available for use when configuring the node end error configs.
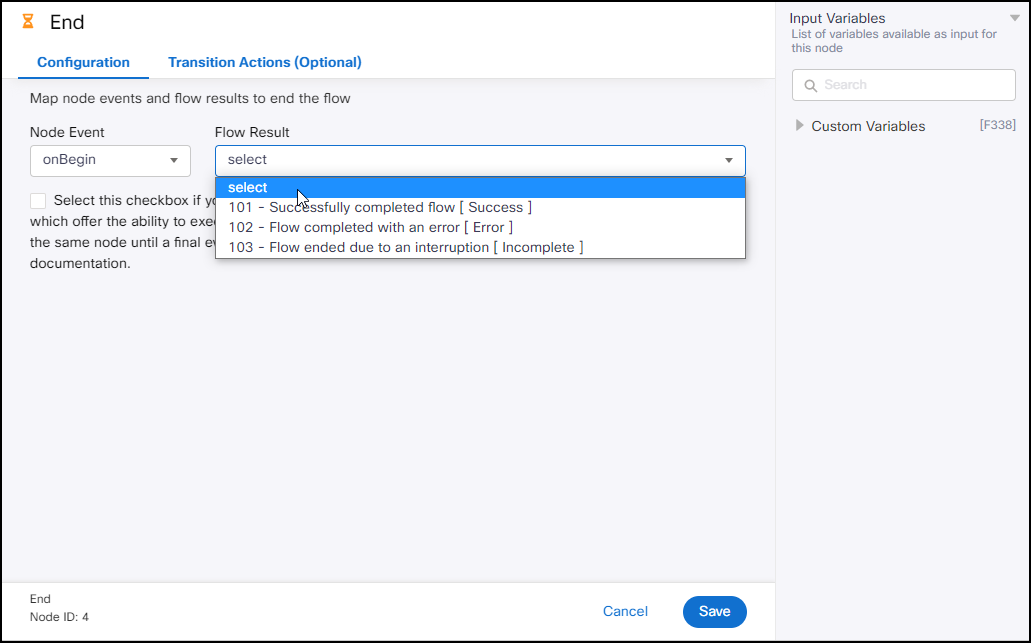
Custom Outcome in End Edge Configuration
Note
If you drag the event and try to end it, it doesn’t wait for the allocated agent event to end.
Selecting this checkbox to make the flow wait for the other event, even if the branch ends. You can enable this checkbox only for pre-built nodes, which are expecting a response from the events and do not have immediate response.
Outcome-based Notifications
For each of the outcomes set, you can notify your application using the standard HTTP methods. The platform supports four HTTP methods namely: GET, POST, PUT, and DELETE. You can customize the data payload with custom variables or any of the node variables.
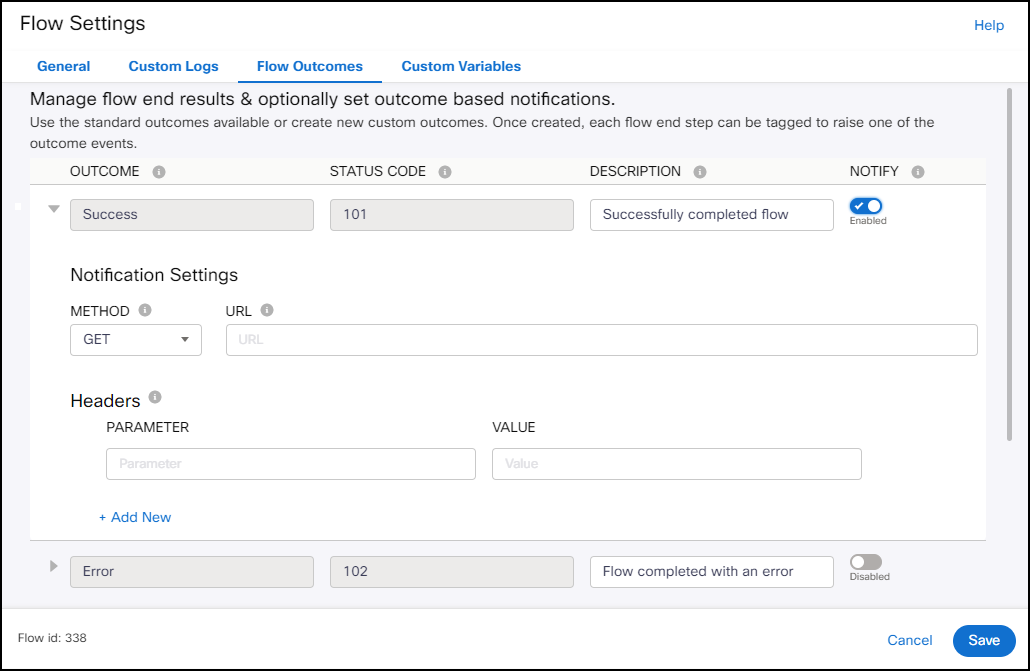
Setting up outcome-based notifications
The outcome-based reports are available under the Reports section in your account.
Enable descriptive logging and check the transaction logs in debug mode to verify if the notification URL is accessible. Please note that this feature is suggested to be used only during initial flow set-up and troubleshooting. Enabling this feature in production mode can impact your tenant performance.
Custom Variables
You can add custom variables to a flow. This is optional. While adding a variable, you must provide a Variable Name and a Default Value if required. You can access the custom variables during node configuration from the Contextual Information Sidebar.
You can mark variables for externalizing. Such variables are presented each time a flow is made live. This process allows variables to be set centrally across multiple nodes at once.
Please note that all flow variables are case-sensitive.
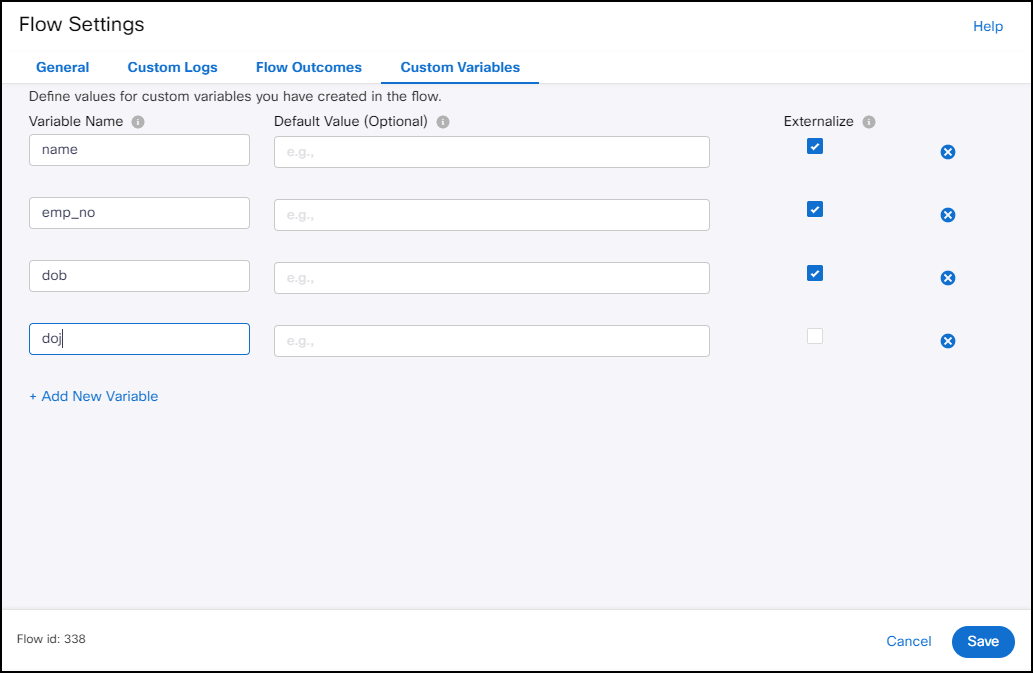
Managing custom variables
Updated 24 days ago
