
Send high-value transactional emails with high throughput and deliverability using dedicated IPs
Email as a channel enables users to send plain text or rich HTML email messages with tables, embedded links, and attachments via the Webex Connect platform.
Note
The following Email App Configuration instructions are not applicable for Webex CC and Webex Connect integration. If you looking for Email app configuration instructions for Webex CC integration please refer to this page.
This document describes the following topics:
Prerequisites
To set up an Email app in Webex Connect, you need to have a domain to send or receive emails. The same email domain should be registered with Webex Connect under the Apps section.
Note
Webex Connect offers the ability to send Emails via two routes - Amazon Simple Email Service (Amazon SES) or Simple Mail Transfer Protocol (SMTP). One of these two routes will be available in your tenant depending on the tenant configuration at the time of onboarding. This is configured in the Admin console while setting up your tenant.
If you have chosen to use AWS SES route, you can reach out to the Webex Connect support team (refer to the details available within Contact Us page in your Webex Connect account) to get AWS SES credentials that are needed for completing Email channel set-up. Please make sure to convey the region you would like your AWS SES account to be set-up in from the AWS Region dropdown available in the email app asset configuration page.
We recommend using the AWS SES credentials provided by Webex Connect team. However, if you want to use your own AWS SES account, you're required to follow the below mentioned configurations within AWS before you get started with email channel configuration within Webex Connect. Please note that the Webex Connect standard email pricing applies even when you choose to bring your own AWS SES account.
The following are the two routes through which you can configure your email asset.
Email channel set-up in Webex Connect via AWS SES
- Create IAM Policies in AWS
- Configuring your email domain and AWS SES account details
- Configuration for DKIM Settings
- Configuration for Inbound Email
- Configuration for Email Unsubscribe Links
Email channel set-up in Webex Connect via SMTP
Email App Asset configuration using AWS SES
Create IAM Policies in AWS
Note
This is an optional step that's needed only to clients who want to use their own AWS SES account instead of the one provided by Webex Connect team.
As the first step, you need to make relevant AWS configurations to provide programmatic access to Webex Connect for your AWS SES and SNS service.
AWS Identity and Access Management (IAM) is a web service that helps you securely control access to AWS resources for your users. You use IAM to authenticate (control who can use your AWS resources) and authorize (what resources they can use and in what ways).
Steps for providing programmatic access to Webex Connect (admin level access):
- In the navigation pane, choose Users and click Add Users.
- Enter a User name, for example: sestest.
- Under Select AWS access type, select the Programmatic access check box in the Access type. This enables the access key ID and secret access key for the AWS API, SDK, and other development tools.

Add User
- Click Next: Permissions.
- In the policy list, select AmazonSESFullAccess, AmazonSNSFullAccess, and AmazonS3FullAccess check box.

-
Choose Next: Review to see the list of group memberships to be added to the new user. When you are ready to proceed, click Create user. This completes user creation and configuration of relevant access levels for the concerned user.
-
As you see in the below screenshot, you get an Access key ID and a Secret access key at this stage. These are required to be entered during email app creation in Webex Connect.

Success Message
Using Sandbox SES Account
If you want to use your own Sandbox SES account, please allow list your destination email IDs on the AWS SES dashboard as emails for sandbox accounts are only delivered to allowed list IDs. If this step is missed, attempts to send emails may result in error code 7522 i.e., 'Email address is not verified'.
Configuring your email domain and AWS SES credentials
- Login to your Webex Connect account and navigate to Assets > Apps section.
- Click Configure New App and select Email.
- Enter your domain or sub-domain details without HTTP or https in the Domain field. E.g., ..
- Enter the 'Access Key ID' and 'Access Key Secret' that were provided by Webex Connect support team, or generated by you in case you are using your own AWS SES account and followed the optional first step.
Please note that only lower case must be used while configuring the Email app asset 'Domain' details.
In case a user enters a domain/subdomain that already exists in AWS SES, the asset creation will fail.
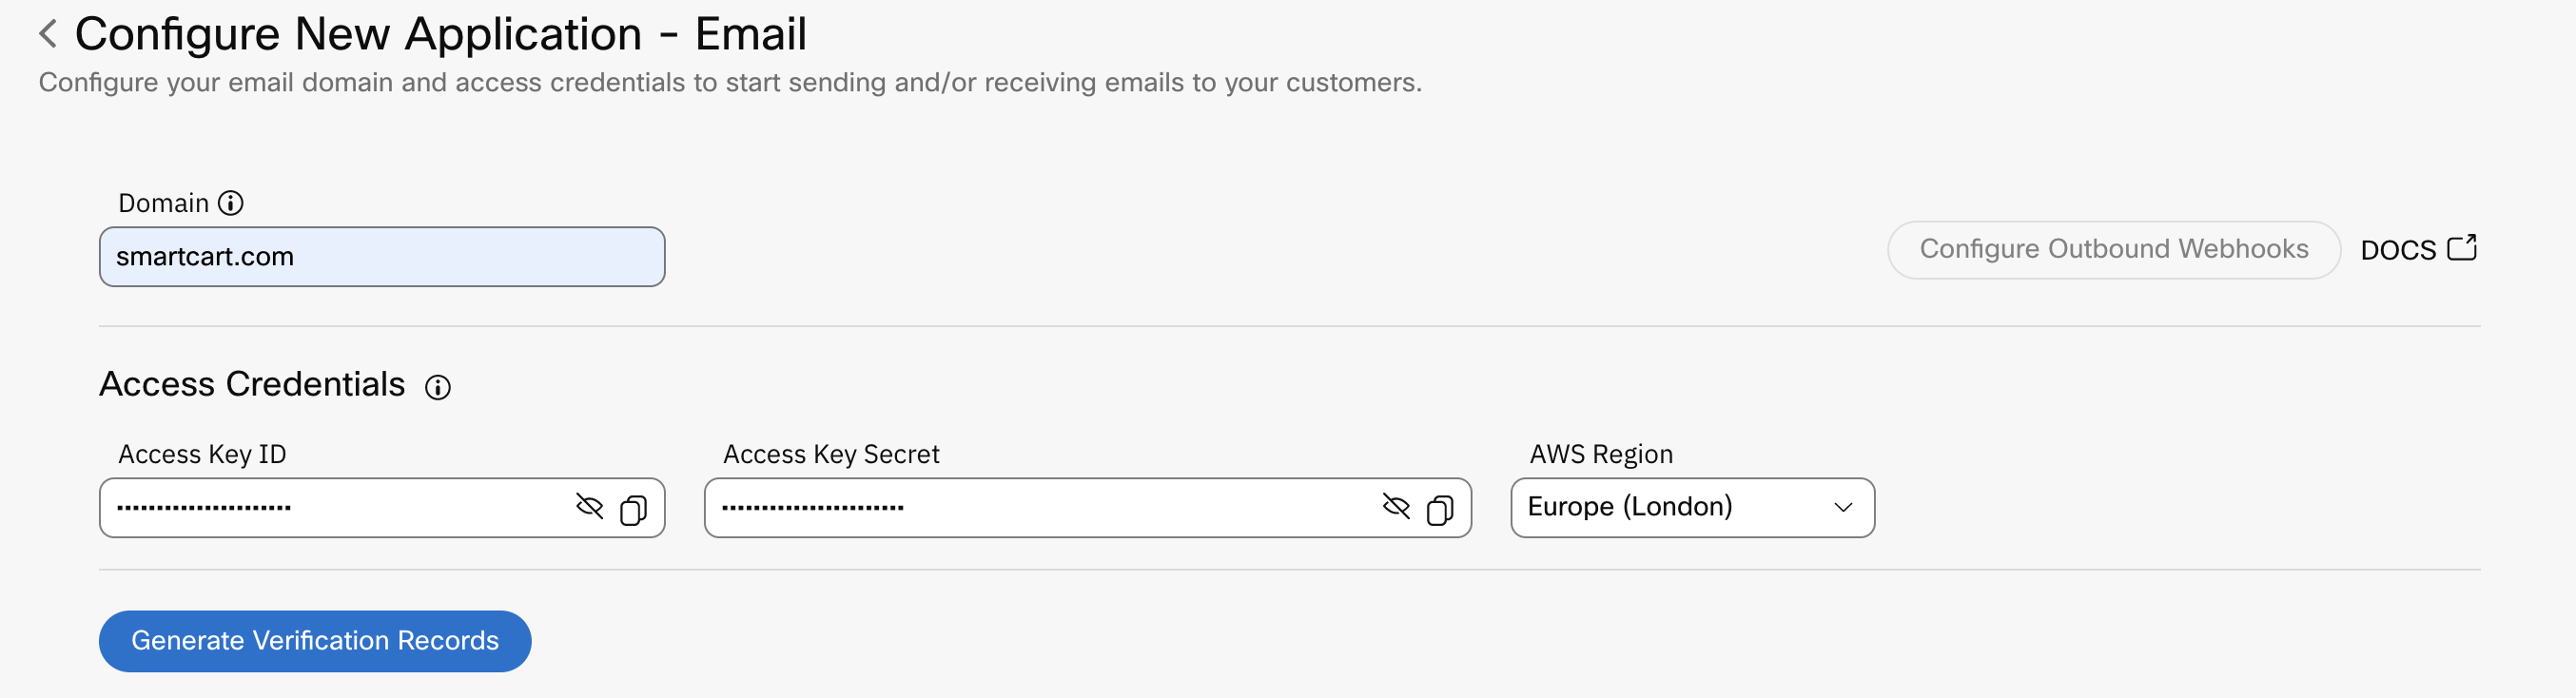
- Enter the 'Access Key ID' and 'Access Key Secret' that were provided by Webex Connect support team, or generated by you in case you are using your own AWS SES account and followed the optional first step.
- Select the region where this AWS SES account is hosted.
- Click Generate Verification Records. This will generate a TXT record that will need to be added to your Domain Name System (DNS) server within 24 hours to verify with Amazon SES that you own the concerned domain. This is also referred to as Domain Verification Record.

Configuration for DKIM Settings
DKIM (Domain Keys Identified Mail) is an email security standard designed to make sure messages aren't altered in transit between the sending and recipient servers. We highly recommend you to complete DKIM set-up. Here are the steps for configuring:
- Click the toggle button to enable DKIM Settings configuration. Once done, you will see three CNAME records that need to be added to your DNS servers.
- Update your DNS records as per the showcased CNAME information.

DKIM Settings
Once the DNS records are updated, it may take up to 72 hours to take effect.
Configuration for Inbound Email
Note
Please note that AWS SES supports inbound email option only in a few regions and it may not be able in the region your Webex Connect account is hosted. Refer AWS SES documentation to know more about this limitation.
Note
We introduced the ability to support inbound email sizes up to 40 MB starting from Webex Connect v5.6.3 onwards in April, 2022. If you've an existing email app asset that was configured before this release, it will continue to work with previously supported limit of 150 KB however please do not make any changes to the set-up of such assets (including addition of an email id) as that can disrupt existing set-up. Please get in touch with support team if you would like to enable inbound email for email app assets configured before v5.6.3.
The steps until this stage were all related to configurations required for sending outbound emails using AWS SES. If you want to use Webex Connect for receiving emails, you need to add the MX records shown in the UI to your domain's DNS settings to allow Webex Connect to receive emails on the registered domain.

Inbound Email
Managing Email Unsubscribes
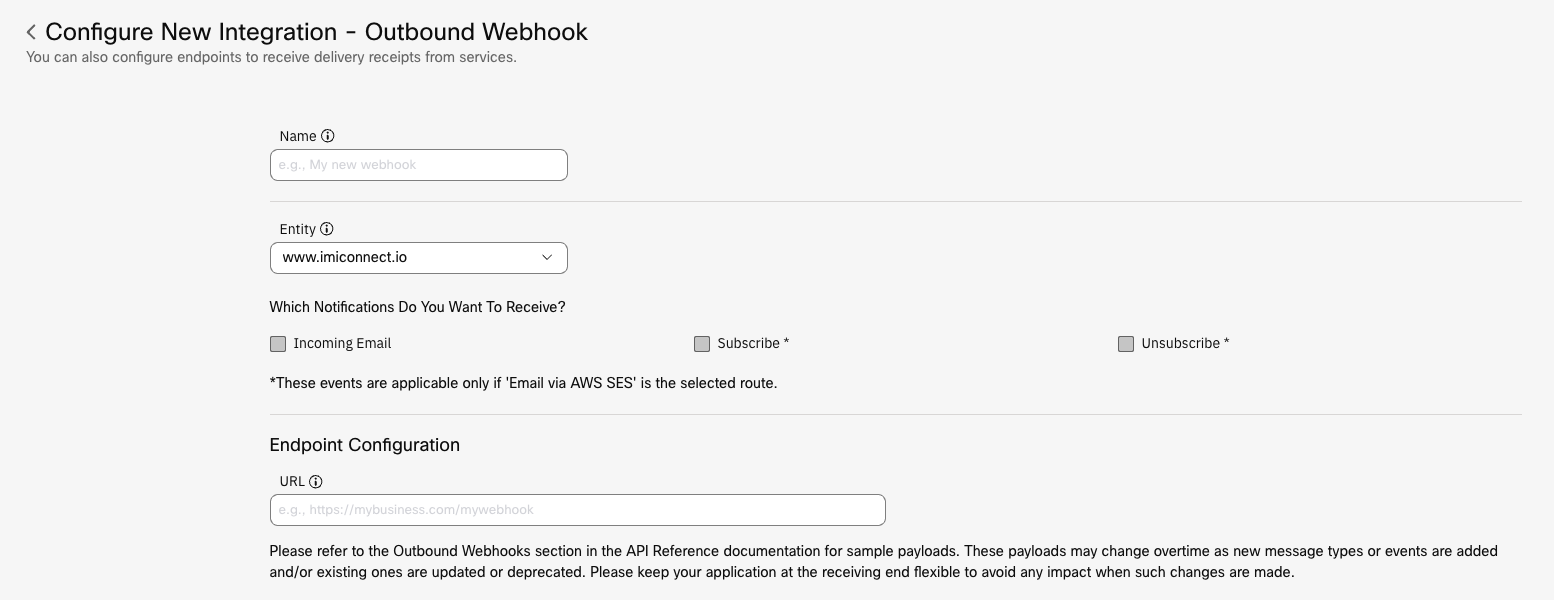
Webex Connect platform offers the ability to add an unsubscribe URL to the emails sent via Webex Connect. You will need to enable the 'Unsubscribe' option during email app asset configuration as shown below.

Once the Unsubscribe toggle has been enabled you are required to include the unsubscribe tag in the Email HTML content as mentioned in the Send Message v2 API documentation page for Email Channel. Refer the API sample for Email Channel.
Webex Connect also offers the ability to pass the 'List-Unsubscribe' and 'List-Unsubscribe-Post: List-Unsubscribe=One-Click' headers as part of the outbound emails. Select 'Enable Unsubscribe Header' checkbox as shown in the above image to enable this option. Once selected, Webex Connect adds this headers to the outbound emails sent using the configured email domain. For one-click unsubscribe postbacks, Webex Connect adds a default URL and notifies you about these unsubscribes on the Outbound Webhook URL configured under Integrations -> Outbound Webhook section (refer below screenshot).
Since, the List Unsubscribe headers are typically required to be passed as part of subscription based emails, if you would like to exclude this header from mandatory emails such as one time password or emergency notifications, you can do so by using a different email Sender ID for each of the communication purposes (e.g., info@., news@., etc.) and adding the list of Sender IDs you wish to skip adding these headers for in the 'Skip Unsubscribe Headers For These Email IDs (Optional)' field.
Please note even though you have the ability to skip List Unsubscribe headers from the outbound emails sent via specific sender ids by using 'Skip Unsubscribe Headers For These Email IDs (Optional)' configuration option, unsubscribe management in Webex Connect works at the email app asset level at the moment. You will not be able to handle unsubscribes at a email Sender ID level as a limitation at the moment.
If you want to configure an email id to enable users to send their unsubscribe requests by sending you an email on clicking the List Unsubscribe link, you can configure that in the 'Unsubscribe Mail To Address (Optional)' field. The configured email address should have inbound emails enabled. When an email recipient clicks 'Unsubscribe' in this case, the Compose new email pop-up will open-up with the configured email address auto-populated in the 'To' field and the subject as “List-Unsubscribe.” You would need to set-up a Rule or a Flow in Webex Connect to process such email requests if you want to handle them programmatically.
Enter the list of sender IDs separated by commas in the Skip Unsubscribe Headers For These Emails IDs field for emails that don’t require unsubscribe header when sent from these specific sender IDs.
Once the above settings are enabled, you will need to add an unsubscribe link to the footer of your email templates using the Webex Connect email composer accessible in the Templates section.
Note
Please note that Webex Connect supports unsubscribe handling for email transactions with recipient in the 'To' email address field, and not email addresses mentioned in 'CC' or 'BCC'. We don't recommend using this feature in email transactions that have more than one recipients.
Also, the validation whether a recipient has unsubscribed from receiving any further emails is supported only for 'To' email addresses in your request. At the moment, Webex Connect does not check subscription status for email addresses mentioned in 'CC' and 'BBC' fields.
Webex Connect maintains a list of unsubscribed email ids at the email app asset level. While sending emails, Webex Connect identifies and filters the unsubscribed emails from the send list i.e., Webex Connect validates the targeted users against the unsubscribed list before delivery of emails.
Sending Limits

Once you've completed email app asset configuration onWebex Connectand you click on Manage option for the concerned app, you will be able to see the Sending Limits applicable for your email app at the end of the email app management screen. In addition to the email size limits for sending and receiving emails, you will also be able to see the number of emails that you are allowed to send within 24 hour period. If your use case requires this limit to be higher, please share the details with the support team so that we can get these changed as per the requirement. Note that there may be some lead time for getting these limits changed.
Email App Asset configuration using SMTP for Outbound and Email forwarding for inbound
Follow the below steps to map your support email addresses with Webex Connect:
- Log in to Webex Connect platform.
- Go to Assets → Apps.
- Click Configure New App and then select Email.
Configure New Application - Email page displays.
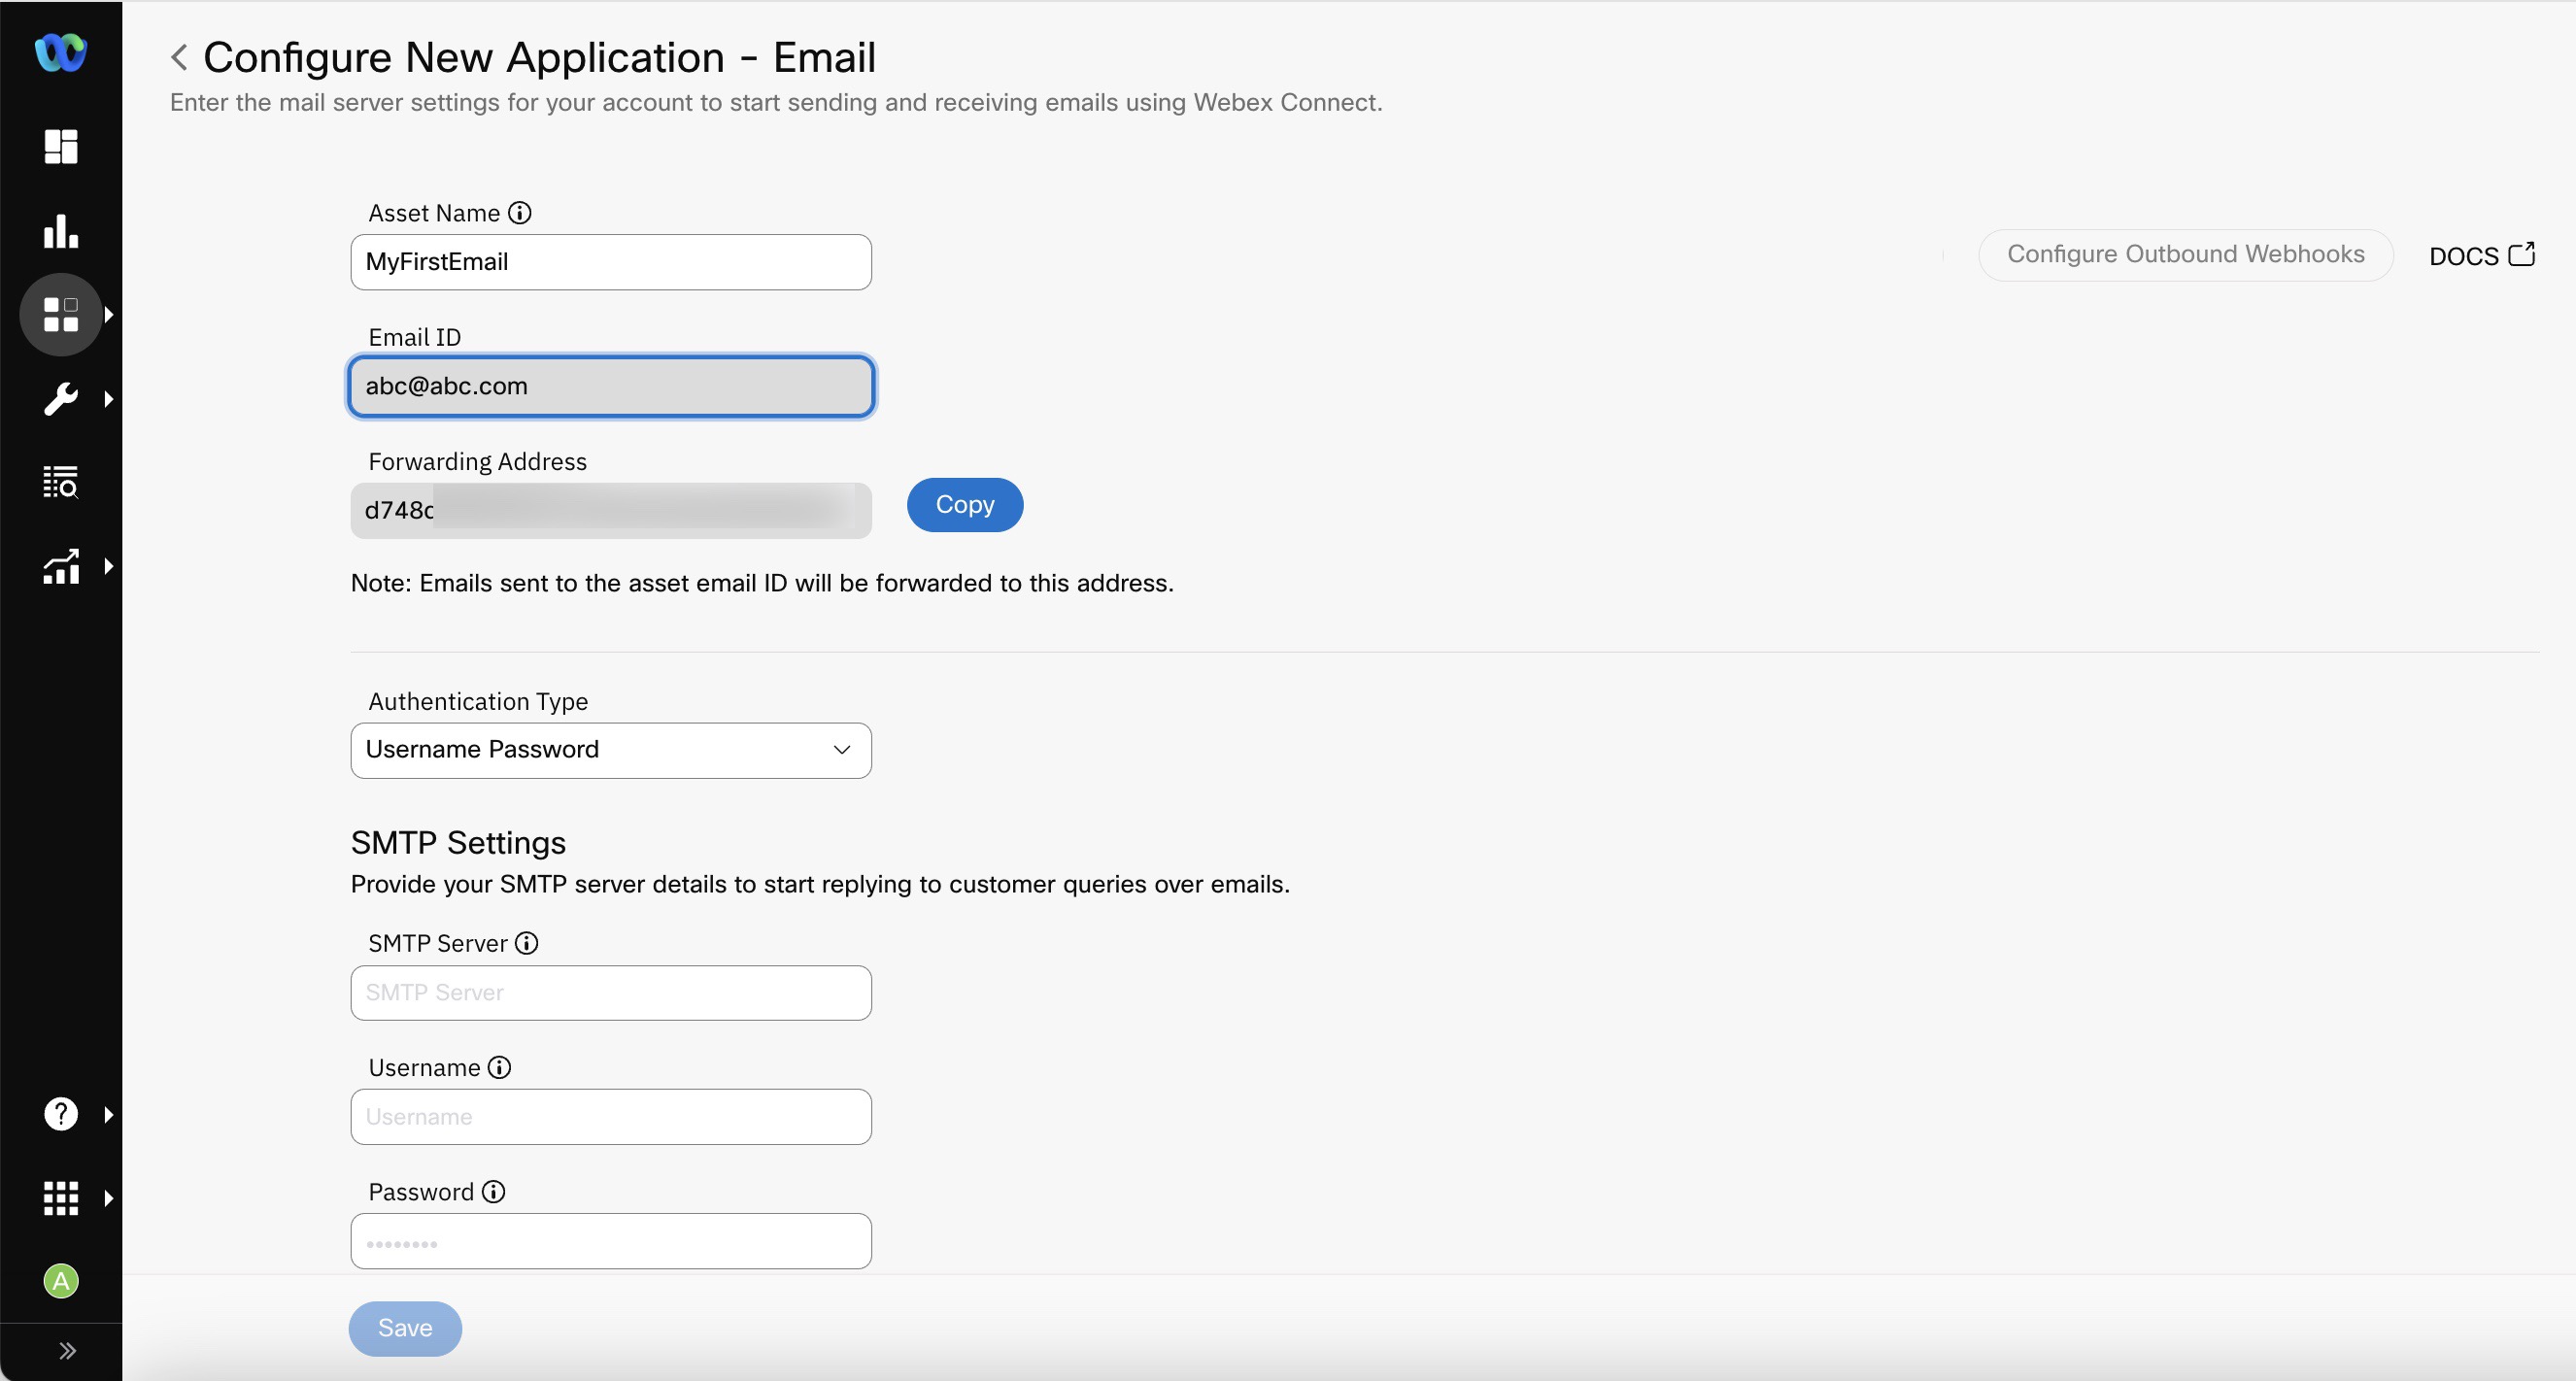
- Enter a user-friendly name for the Asset.
- Enter a valid Email address (such as support@CLIENT-DOMAIN).
- Copy the forwarding email address and configure an email forwarding rule in your email client to forward emails sent to your support email id (i.e., same as the email id mentioned in step 5) to this email address.
Note
Please note that you’d need to mandatorily configure an auto-forwarding rule to forward the emails received on the email address configured in ‘EMAIL ID' field to the email address available in the ‘FORWARDING ADDRESS’ field. Webex Connect won’t receive the inbound emails unless this step is completed. In the case of Gmail, you must verify the email forwarding address by entering the OTP sent to the provided address. You can retrieve the OTP by decrypting the Debug Logs for the Email asset. It is found in the full email body of the logs. Earlier, the OTP was found in the subject of the email in the downloaded Export Logs.
- Enter the domain name for the SMTP Server.
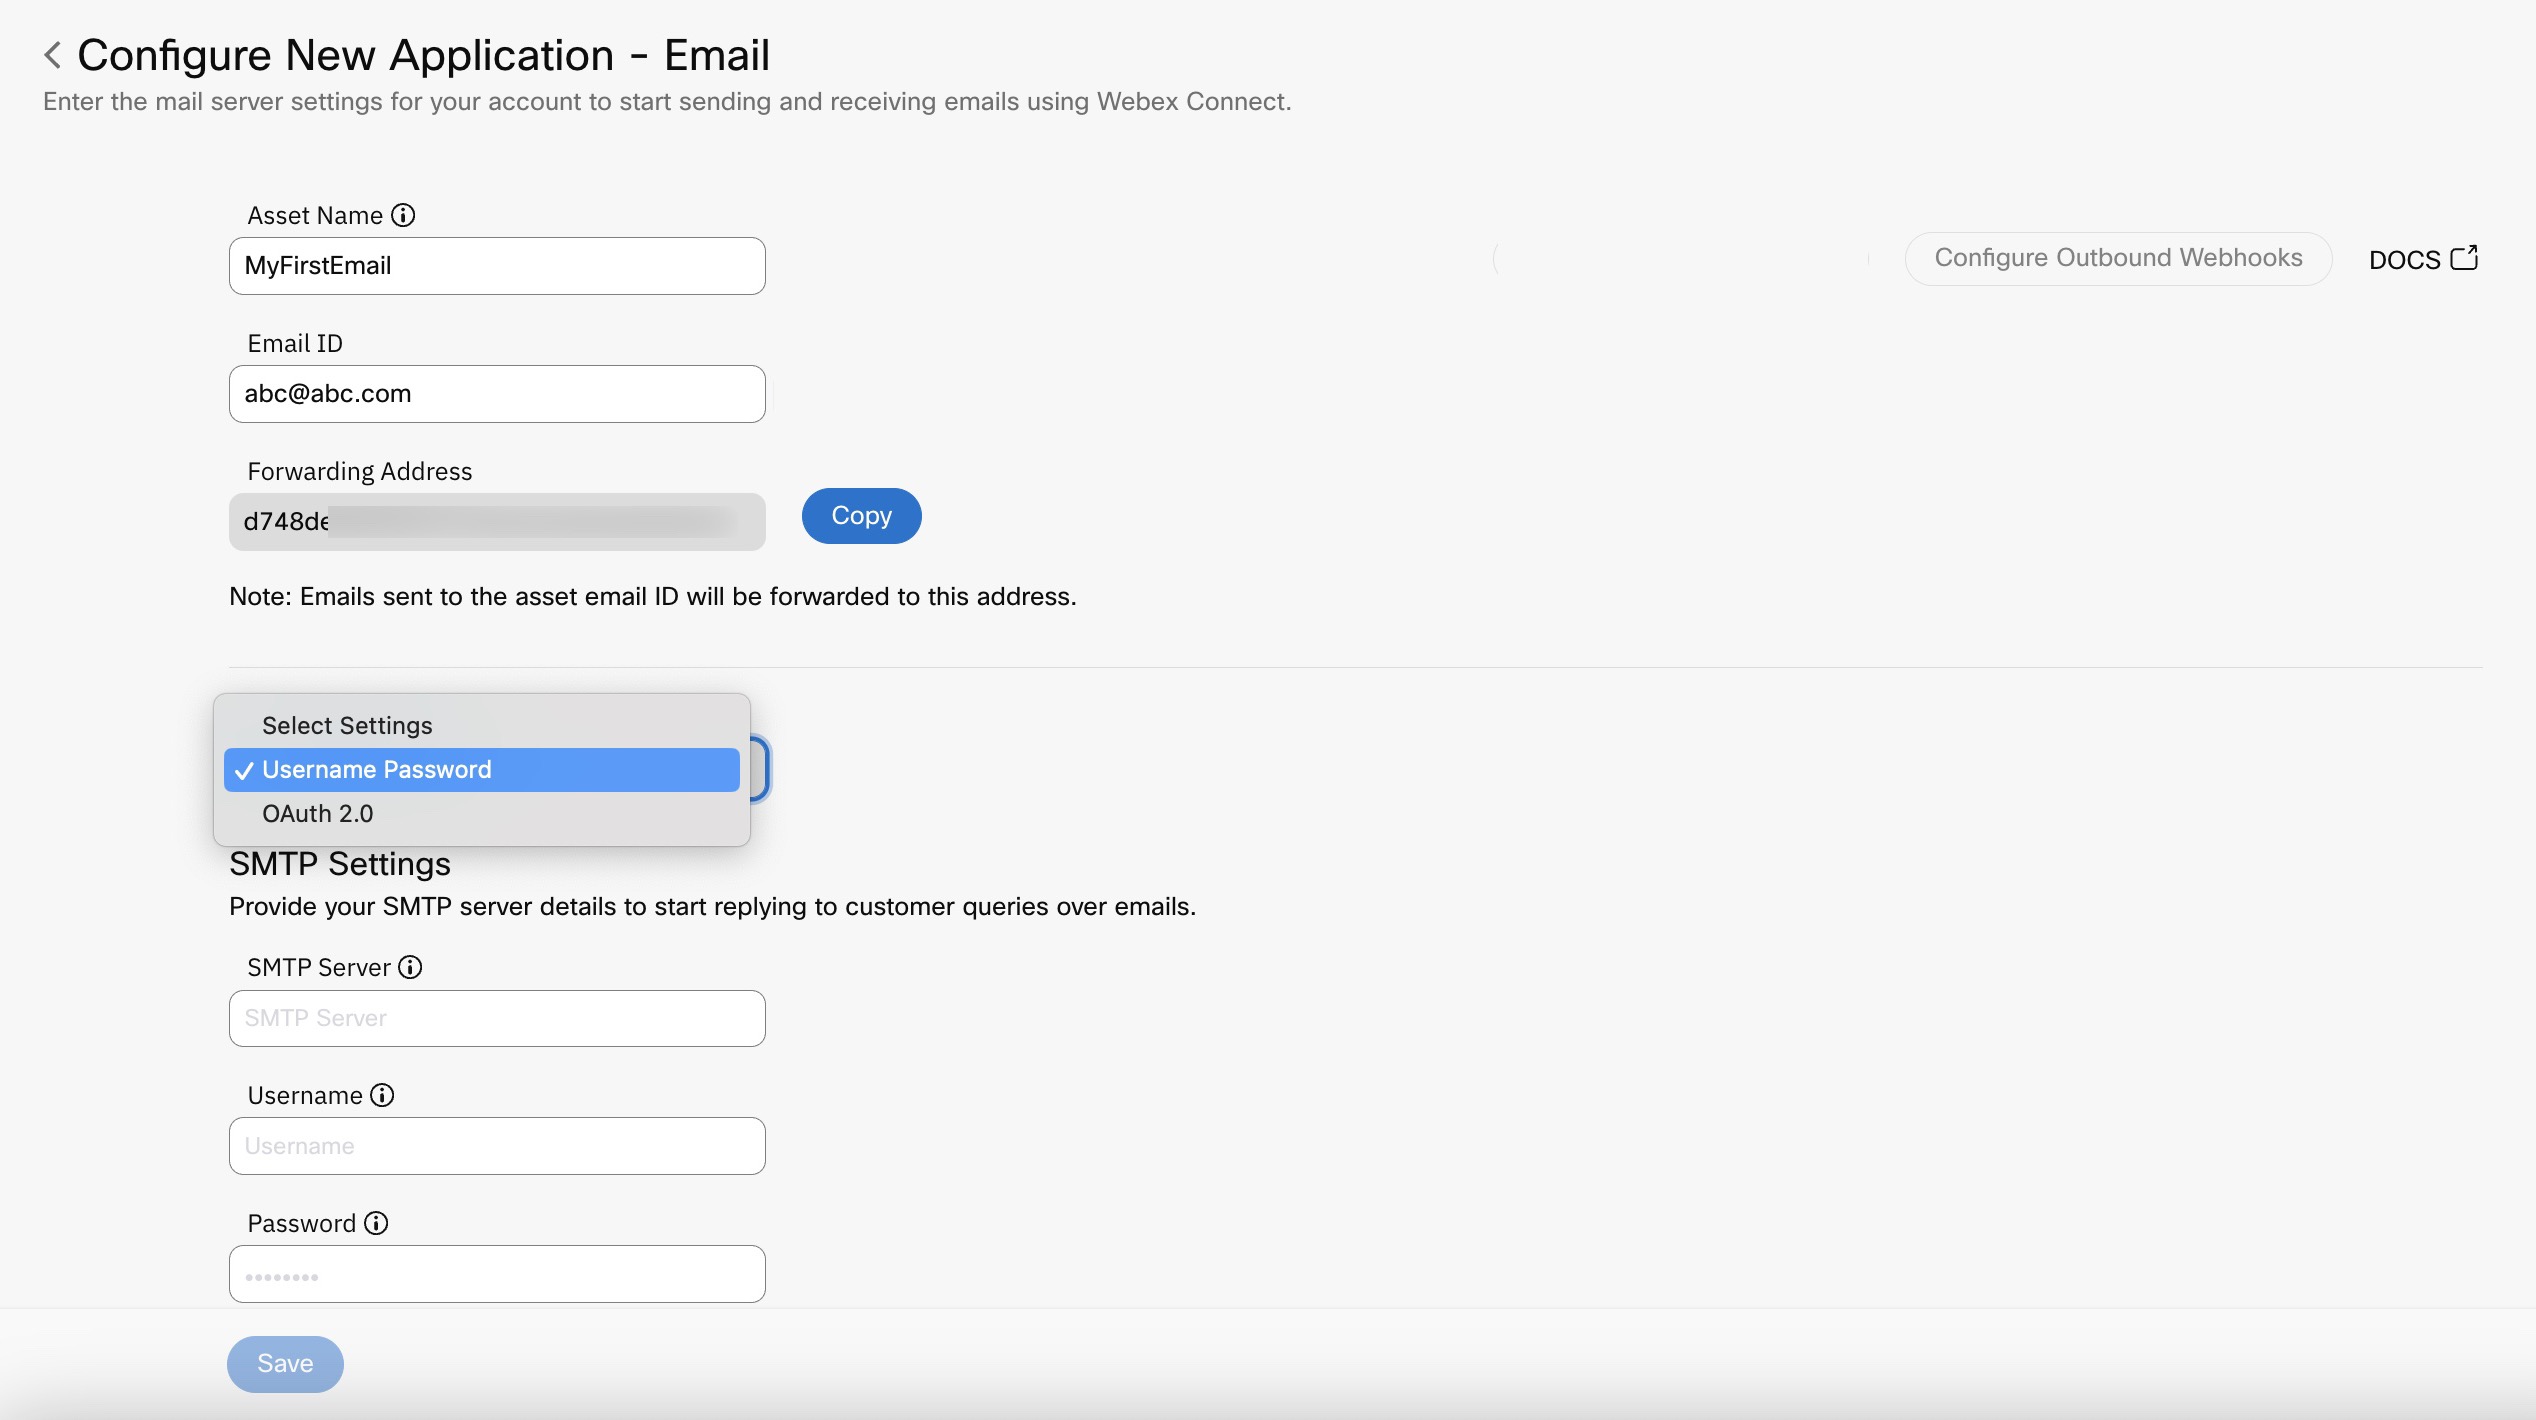
- Follow one of the two authentication protocol below based on your use case:
- Username Password
- OAuth 2.0 (Recommended)
Note
Based on your selection in step 8 in the procedure above, follow one of the two procedures below for authentication.
Authentication using Username and Password
- Enter a valid Username and Password to be used to authenticate the SMTP server connection.
- Enter the Port number to which you want to configure your email asset.
- Select the Security type as SSL or STARTTLS if required, otherwise leave it as None.
- Click Test Connection.
If the connection is successful, you will receive a confirmation message.

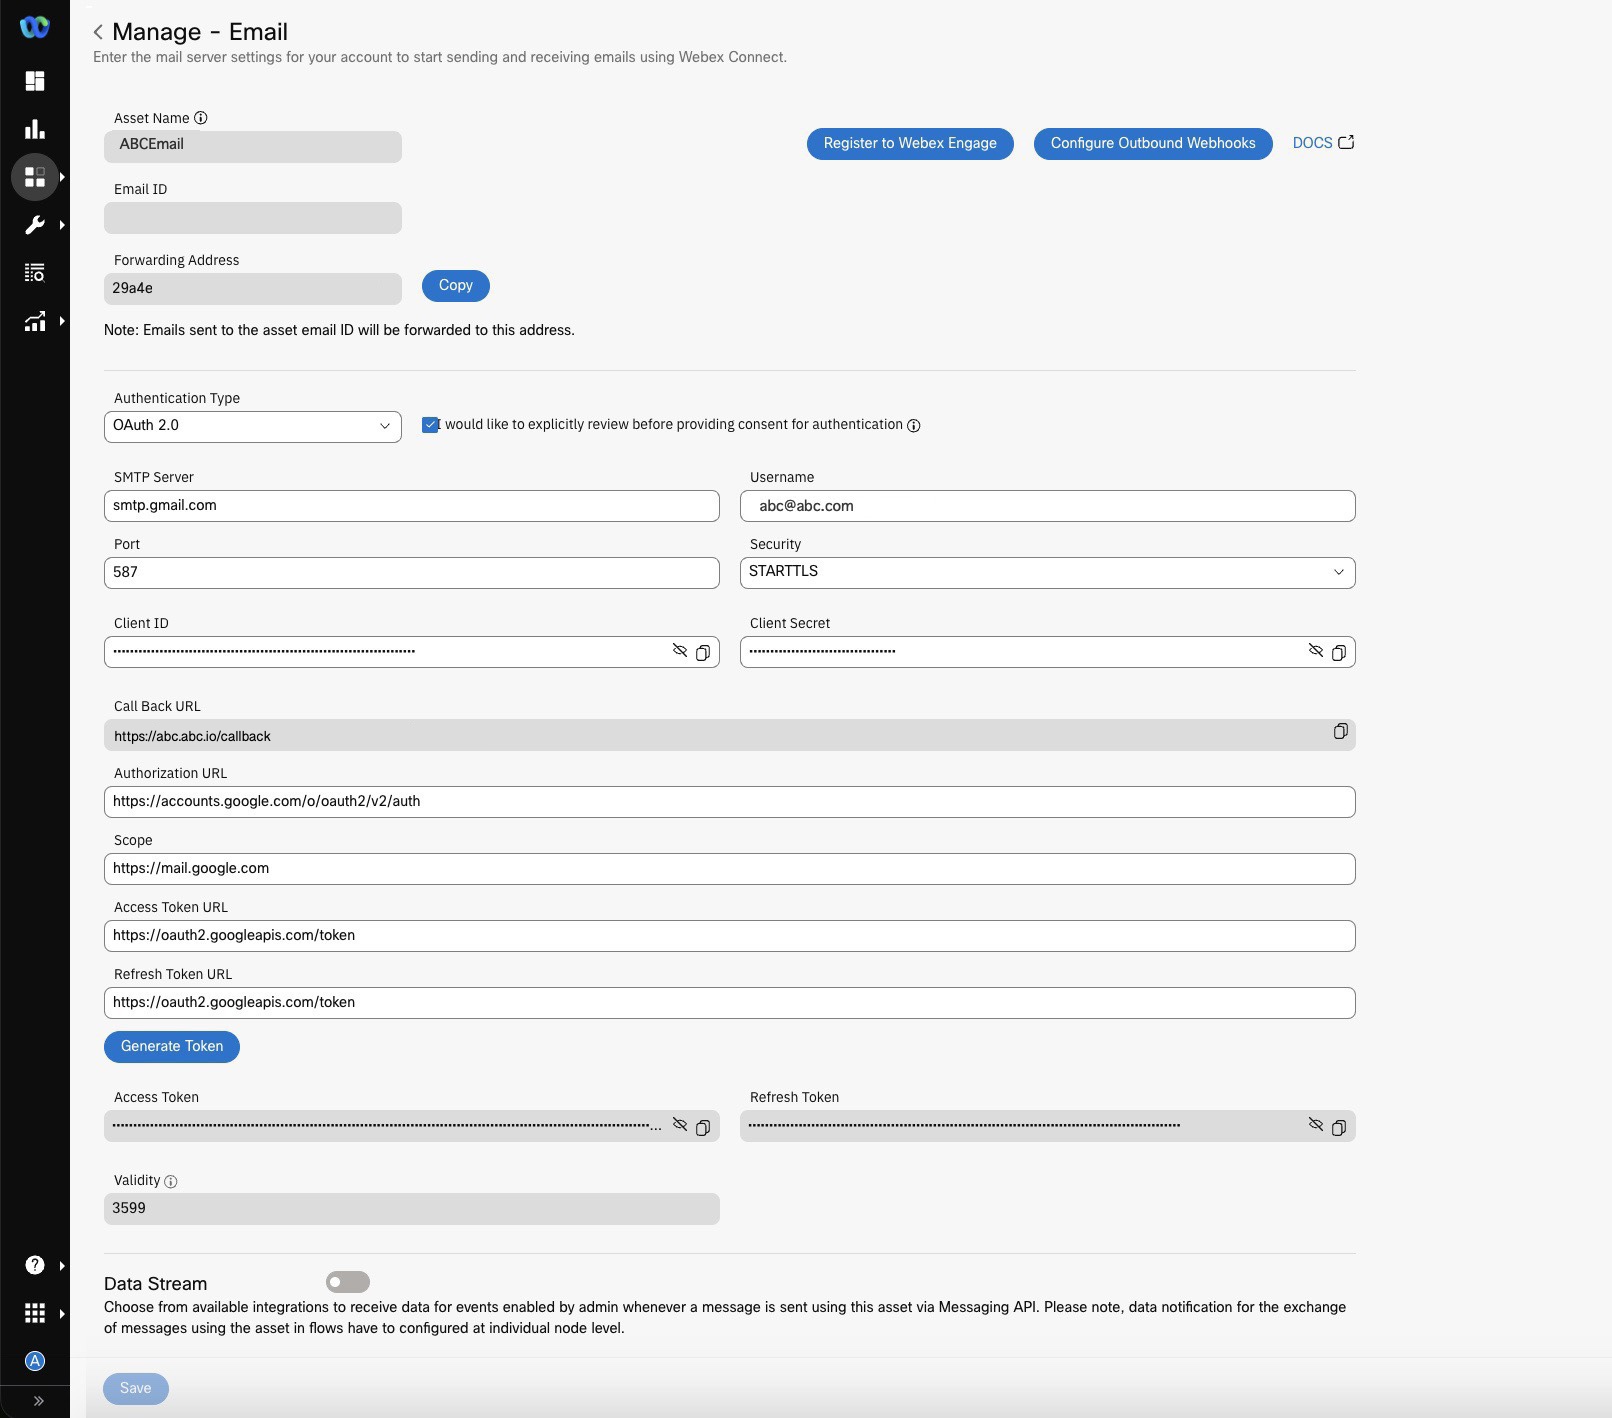
Authentication using OAuth 2.0
Follow the below steps to configure OAuth 2.0:
- Enter the SMTP Server, Username, Port, Client ID, Client Secret, Authorization URL, Scope, Access Token URL, Validity, and Refresh Token URL.
- Click Generate Token.
- Click Save to complete email channel asset creation.
Note
To get details such as Client ID, Client Secret, Authorization URL, Scope, Access Token URL, Validity, and Refresh Token URL based on your email provider, follow one of the following procedures.
Please use the same email account as mentioned in the emailID, to generate access token.
If your administrator restricts the users from providing consent for applications by choosing the option “Do not allow user consent“ or a similar option in the user consent settings of the email service provider, please make sure that you clear the option “I would like to explicitly review before providing consent for authentication“, when you are trying to create an email asset. Selecting the option may result in authentication failure as you might not have permission to provide consent for application, but the authentication request expects you to provide consent.
Note
User Consent Settings
In case of Office 365, if the user consent settings on Azure Active Directory are recently changed, please make sure that the new settings have taken effect, before adding an email asset on Webex Connect platform.
Note
Access Token
The Access Token, Refresh Token, and Validity are auto populated after a token is generated.
In some cases, Refresh Token needs to be generated manually. Email is sent by connect to the tenant owners email ID. Clients will receive an automated email. They must navigate to the Email asset page and must re-generate the token.
Token has a fixed expiry time and the backend application automatically calls the API to regenerate token before that.
Registering on Google Cloud
For information on how to register using Google cloud, please refer here
Registering on Office 365
For information on how to register using Office 365, please refer here
API
Here is a Postman collection to test our APIs. Make sure you change the key in the header to your service key.
Latest Collection: 
Archived Collection: Refer Postman Collection
FAQs
You can refer to the Email channel FAQs for contextual information.
Updated 17 days ago